On my quest to find the perfect self-hosted dashboard, I came across an amazing dashboard called Homer. According to the developer, Homer is a “dead simple static HOMepage for your servER to keep your services on hand, from a simple yaml configuration file.”
If you’ve read any of my previous posts, you’ll know that really enjoy testing and tweaking dashboards. In the past, I’ve configured Organizr, Dashmachine, and Heimdall. After spending some time in Homer, I can confidently say that Homer is now my primary dashboard.
If you are looking for a tutorial or guide to setup Homer, this step-by-step setup guide is perfect for you.
Why Homer over other dashboards?
There’s quite a few reasons I prefer the Homer vs some of the others. Here’s just a few reasons:
- Homer is blazing fast. Since it’s static webpage, everything loads instantly.
- There is only 1 yaml config file to edit.
- Very customizable – you can change number of columns, add sections, upload custom icons, add background images, toggle dark/light theme and much more.
- Mobile responsive; it looks and scales perfectly on your phone. Imo it’s a very clean layout.
- Actively developed. He’s personally responded to me on his Gitter.im chat, and I see him push out updates on Github regularly.
Granted, there are still some things missing. For example, I’d like to see API data from Radarr, Sonarr, Tautulli, etc display in the services. Maybe include a small circle icon in the service card that is green if pingable, but turns red if down. According to the dev, those things are coming.
Getting Started: Choose Your Install Method
There are three ways to set up a Homer dashboard: using Python or a Docker image. In this step-by-step guide, I’m going to show you how to setup Homer using Docker Desktop on a Windows Server 2019 machine. At the end of the guide is a basic Python setup. I’ve also recently added the Docker-Compose file I now use.
The reason I’m setting Homer up in Docker Desktop for Windows (instead of a Linux VM) is because we’ll be using Visual Studio Code to edit the configuration file. WIth Docker Docker, this makes it super easy because we can just point to the mounted folder path.
Method 1: Step 1 – Install Docker Desktop for Windows
If you don’t already have Docker Desktop for Windows installed, you can download it from here: https://www.docker.com/products/docker-desktop.
Follow the steps in this post to get it installed: https://docs.docker.com/docker-for-windows/install/
Step 2: Deploy Homer Docker image
If you want more info, check out the Homer Github page: https://github.com/bastienwirtz/homer
For purposes of this guide, I want Homer to run out of a folder on my Windows Server 2019 computer, so I’m specifying my volume path to be C:\homertest\ I also want the container to automatically restart if my server restarts, so I’m adding a –restart:always command.
Open Command Prompt and copy & paste this:
docker run --restart=always -p 8090:8080 -v C:\homertest\:/www/assets b4bz/homer:latestThis will pull down the latest Homer image, and save the Homer config files to C:\homertest.
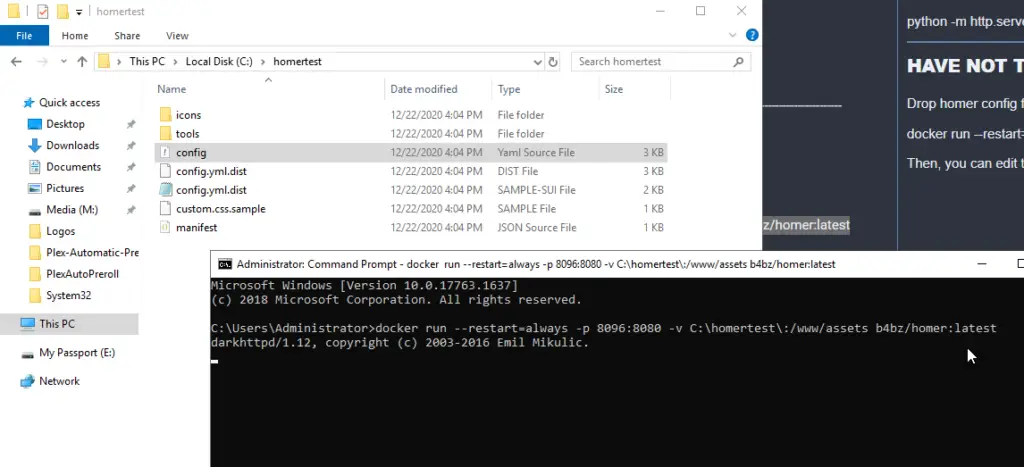
Step 3: Open URL in Web Browser
Homer should now load in your web browser at port 8090! If port 8090 is already used by another container, choose a different port. (For example, if you want to use 9000, then change the config above to 9000:8080)
You can either use http://localhost:8090 to load Homer, or http://YourIPAddress:8090 (to find your server’s IP, open CMD and type ipconfig. Look for the IP address on the IPv4 line).
If everything went well, you should see the Homer demo page like this:
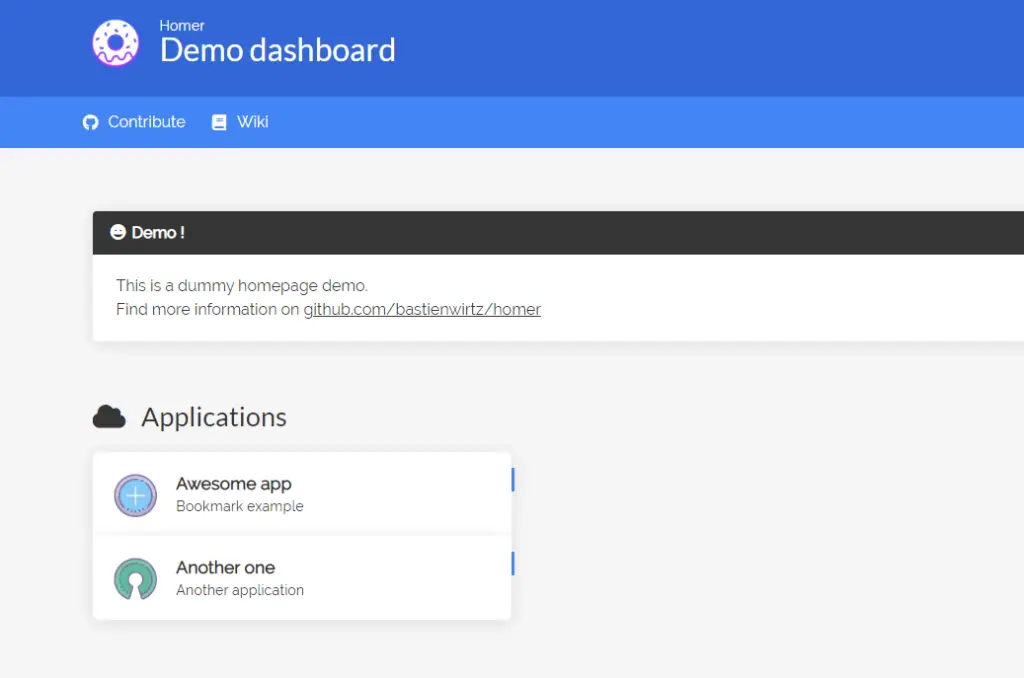
Step 4: Edit config file using VS Code Editor
Now that you’ve confirmed it’s working, it’s time to edit the configuration file so you can customize it.
The config file is located at C:\homertest\config.yml (or whatever path you’ve mounted)

From here, you can either edit the configuration file with Notepad, or use VS Code Editor (recommended!).
VS Code is simple to install – just download it from here: https://code.visualstudio.com/download Once installed, Open Visual Studio Code from Start and browse to the config.yml file:

From here, let’s start making edits!
I would start by changing the Title, Subtitle, and some of the colors. If you want 4 horizontal groups like I have, add the line columns: "4". Otherwise, 3 columns is the default.

After a few edits, your dashboard can now look like this! The half moon is where you’d toggle between light and dark theme.
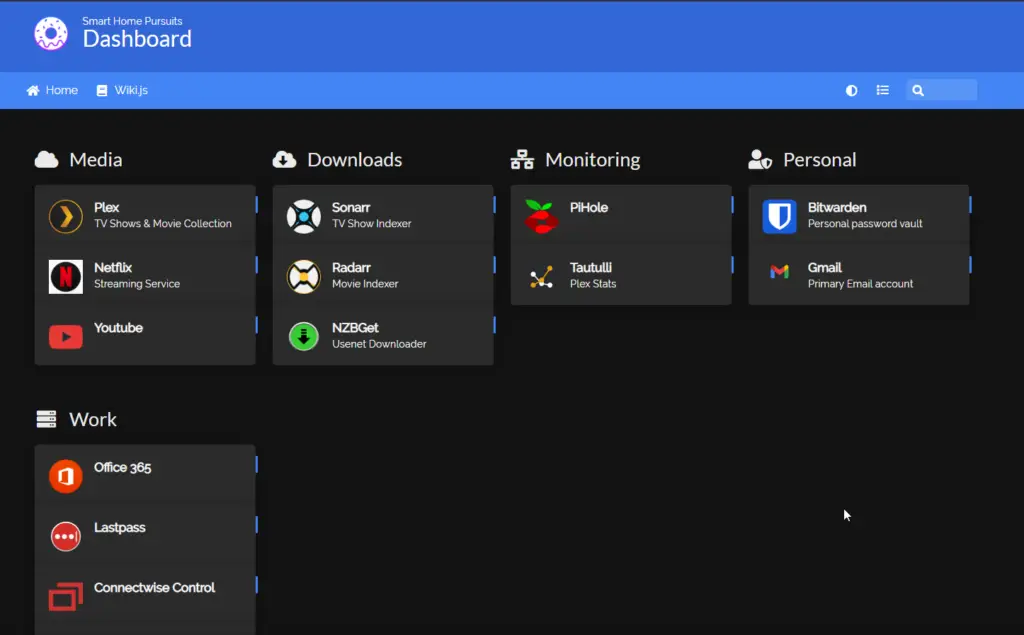
Step 5: Example Services
If you’d like to create a “Media” block like I did, your configuration would look like this. The only things you’d need to change are the IP addresses of your services and upload logos to C:\homertest\tools. To change the icons, just search FontAwesome.com.
To find icons for the various services, I typically type “round transparent Sonarr PNG” into Google. You can also check SuperTinyIcons or this https://github.com/NX211/homer-icons.
services:
  - name: "Media"
    icon: "fas fa-cloud"
    items:
      - name: "Plex"
        logo: "assets/tools/plex.png"
        subtitle: "TV Shows & Movie Collection"
        tag: "app"
        url: "http://192.168.68.137:32400/web/index.html"
        target: "_blank" # optional html a tag target attribute
      - name: "Netflix"
        logo: "assets/tools/netflix.png"
        subtitle: "Streaming Service"
        tag: "app"
        url: "https://netflix.com"
      - name: "Youtube"
        logo: "assets/tools/youtube.png"
        tag: "app"
        url: "https://youtube.com"
  - name: "Downloads"
    icon: "fas fa-cloud-download-alt"
    items:
      - name: "Sonarr"
        logo: "assets/tools/sonarr.png"
        subtitle: "TV Show Indexer"
        tag: "app"
        url: "http://192.168.68.137:8989/"
        target: "_blank" # optional html a tag target attribute
      - name: "Radarr"
        logo: "assets/tools/radarr.png"
        subtitle: "Movie Indexer"
        tag: "app"
        url: "http://192.168.68.137:7878/"
      - name: "NZBGet"
        logo: "assets/tools/nzbget.png"
        subtitle: "Usenet Downloader"
        tag: "app"
        url: "http://192.168.68.137:6789/"
Method 2: Homer Python Install Instructions
If you choose to run Homer in Python instead of Docker, I’ve set that up as well. This method is equally as easy to setup, and you can also edit the config file from VS Code.
- Download and install Python will all defaults.
- Download Homer.zip from Github.
- Extract files to a local on your computer (For example, C:\homer).
- Open CMD and change directories to the folder you just created. Type command
cd C:\homer - To run this on port 8090, you’d then type
python -m http.server 8090 --bind 192.168.68.137(Changing out the port number and IP address, of course) - Open Visual Studio Code and browse to the path of the config.yml.
Have Homer Start Automatically After Reboot
To make your Homer dashboard startup automatically with Python, you can create a batch file and place it into you Startup folder.
Open Notepad. Paste these two lines:
cd C:\homer
python -m http.server 7077 --bind 192.168.68.137
Note: Homer will now open in 192.168.68.7077, but not localhost:7077
When saving, change Save as Type to All Files and add a .bat to the end of the file name. Save it to your Startup folder located here: C:\ProgramData\Microsoft\Windows\Start Menu\Programs\StartUp
To ensure it works, simply restart your server. If it opens correctly, you are good to go!

Method 3: Docker-Compose
When I initially wrote this guide, I was using Docker Desktop for Windows. I’ve since moved all of my Docker containers to a Ubuntu VM, installed Docker, and Docker-Compose.
If you’d like to do the same, log into your docker host and run these 2 commands:
sudo curl -L https://github.com/docker/compose/releases/download/1.21.2/docker-compose-`uname -s`-`uname -m` -o /usr/local/bin/docker-composeThen, set the permissions:
sudo chmod +x /usr/local/bin/docker-composeInstall Docker-Compose
To install via Docker Compose, first SSH into your Ubuntu server using Putty.
Once logged into, navigate to your parent folder where other Docker containers live and create a new directory. I keep all of containers in one folder /srv/config, so I’m going to navigate there.
cd /srv/configThen, create a new folder called Homer
mkdir homerThen, navigate to the Homer folder
cd homerNext, you need to create the Docker-Compose.yml file. This is where you will add of the configuration info to create the container.
touch docker-compose.ymlThe file is now completed, but is empty. To edit it, we use a tool called nano.
nano docker-compose.ymlIt will then open a blank file. Paste in the docker-compose below, changing out the path in red if yours is different. I used port 8092, but you can choose any port you’d like to as long as it isn’t in use by anything yet.
---
version: "2"
services:
homer:
image: b4bz/homer
#To build from source, comment previous line and uncomment below
#build: .
container_name: homer
volumes:
- /srv/config/Homer:/www/assets
ports:
- 8092:8080
#environment:
# - UID=1000
# - GID=1000
restart: unless-stopped
And finally, you need to save the file and run the containers. CTRL+X > Y to save.
Then, type:
docker-compose up -dYour Homer instance should now be running at the IP address of your Docker host at port 9092 (http://192.168.68.141:8092)!
To edit the configuration.yml file to add services like we did above, you need to SSH into your Homer container. You may need to add a sudo before typing the code below.
cd /srv/config/homerThen, edit the config.yml
nano config.ymlYou should now see and be able to add all of your services like I did the in the Docker Desktop example above.
Again, editing the config is easier using VS Code with the SSH addon, so I recommend installing that.
Wrapping Up
Hopefully this guide was simple enough to follow – even if you reading it with little to no Docker experience. If you have any questions, feel free to post them below and I can help out.
Another quick tip – you will likely be editing and checking the changes frequently, and browsers often cache old data. If you notice changes not being applied to the frontend, open your dashboard URL and press CTRL+F5 to clear cache and reload a new page.
My Homelab Equipment
Here is some of the gear I use in my Homelab. I highly recommend each of them.
- Server 2019 w/ Hyper-V
- Case: Fractal Design Node 804
- Graphics Card: NVIDEA Quadro K600
- CPU: AMD Ryzen 7 2700
The full list of server components I use can be found on my Equipment List page.


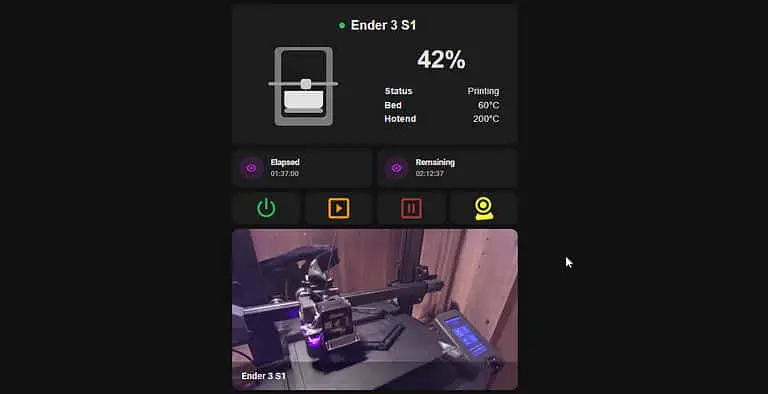


Dumb question – can you point Homer to an actual application (ie an .exe)
Nope you can’t. Web apps or URL’s only.
Is there any of the methods below can be applied to install Homer on Synology Docker ? I’ve tried it so many times the result is a disaster . do you have any docs for it ? Thanks
Unfortunately not, I don’t use Synology. You could probably create a Linux VM in Synology, then install Docker/Docker-Compose, and then follow my guide to set it up.
I’m using the docker compose option and really this dashboard.
The only thing that I cannot find is how to change the favicon for homer. Would you know the solution for this? I already tried to copy a “favicon.png” in the assets directory.
use an online converter to create an *.ico from your *.png and replace it