Setting up Dashmachine v0.7 Without Code Editor Integration
For those of you not in the selfhosted/Dashmachine subreddits, Dashmachine v0.7 was released about a week ago. Dashmachine is a dashboard for all of your selfhosted apps, media applications, browser shortcuts, and much more. You can think of it as an application bookmark.
Once installed, set it as your browser's default opening URL so everytime you open your browser - you are met with a beautiful Dashmachine dashboard!
As someone who loved the previous versions, I jumped on the chance to install this as soon as it was released.
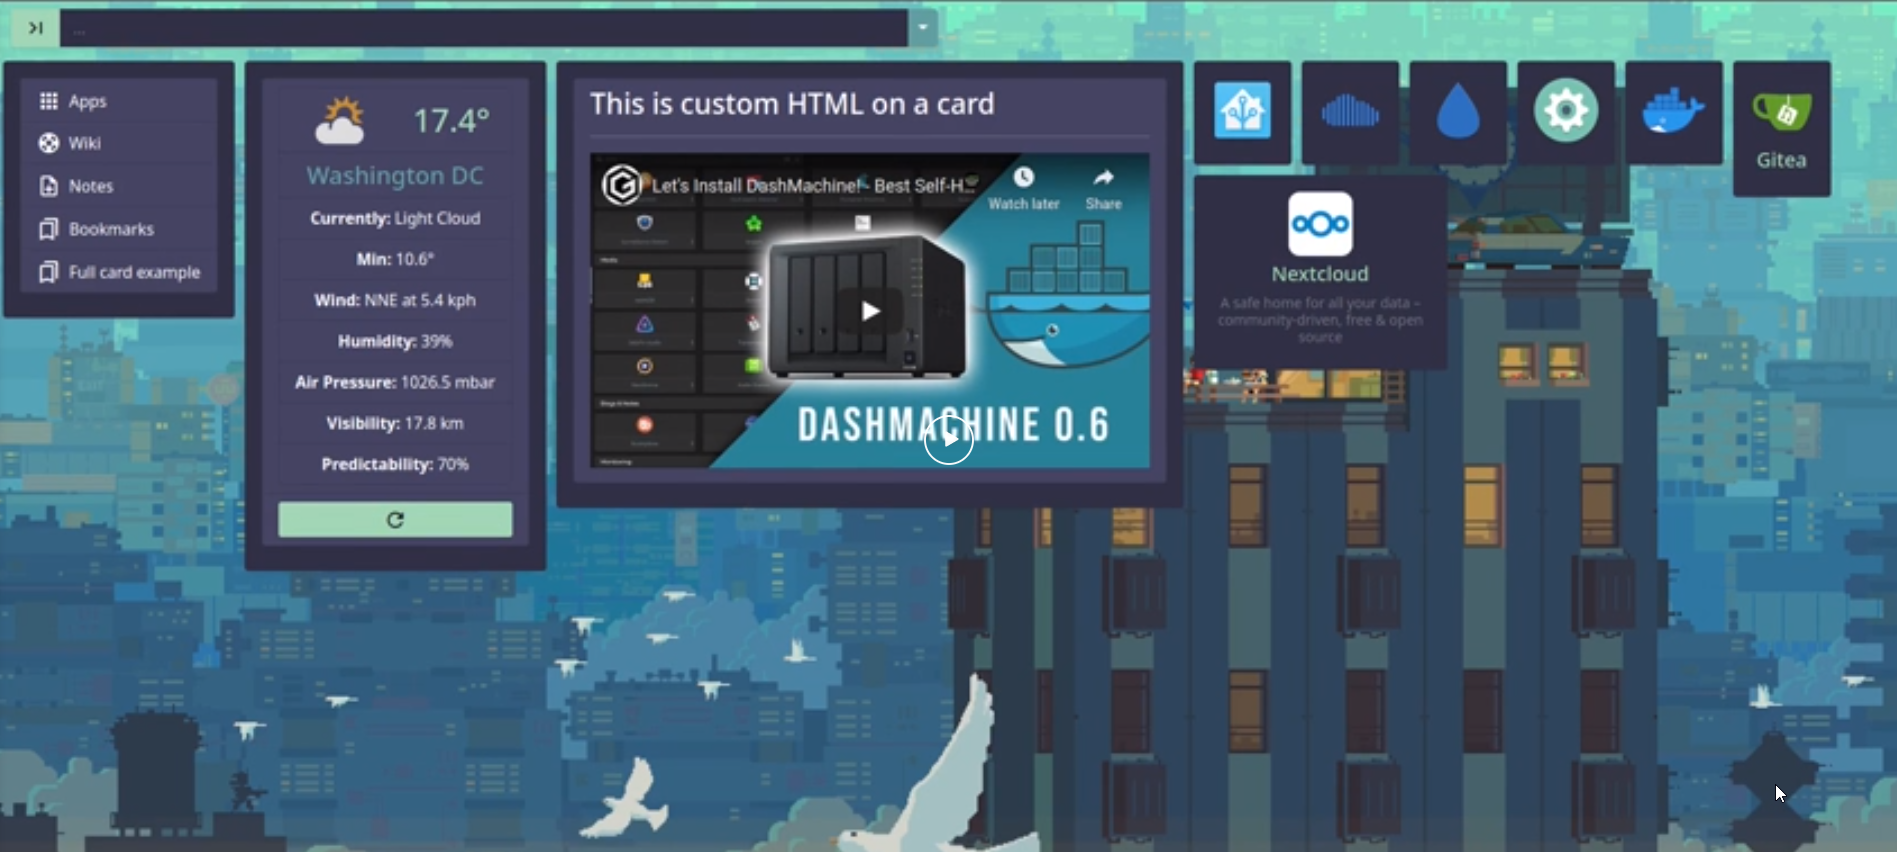
For a list of all updates and changes, check out this video from the developer: https://www.reddit.com/r/DashMachine/comments/ivyrnc/dashmachine_version_07_complete_rewrite_coming/
Among many other awesome updates, one of the biggest changes is the ability integrate your VS Code Editor into Dashmachine.
What is a Code Editor?
Why do you need a code editor? And what does it mean to "integrate" it within Dashmachine?
A code editor is basically a program that lets you open and edit the source code of Dashmachine. In this version, there's no longer just 1 config file to edit - there's several. And there's no built-in way to edit the Dashmachine config within the URL like previous versions.
Having multiple config files allows for much more flexibility and customization of your dashboards.
Because of this, using a code editor to edit the files is much easier than editing from a text editor like Notepad.
However, getting the Code Editor integrated into Dashmachine so you can edit the configuration from within your browser requires a few extra steps (such as having a reverse proxy). Many of you may just want to test it out without going through those extra hoops!
In this guide, I'm going to show you how to edit the Dashmachine v0.7 config files from VS Code editor without integrating the two.
This basically means instead of editing the config from within your Dashmachine URL, you will open VS Code, browse to the Dashmachine folder, and then edit the configuration files there.
Setup Notes: I've installed Docker Desktop for Windows with WSL2 components, and am using Yacht for container management.
Installing Dashmachine v0.7
Link to Github Project: https://github.com/rmountjoy92/DashMachine-0.7
docker create \ --name=dashmachine \ -p 5000:5000 \ -v path/to/data:/DashMachine/config \ --restart unless-stopped \ rmountjoy/dashmachine0.7:latestInstalling Dashmachine v0.7 with Yacht
I've recently switched from Portainer to Yacht as my primary container manager. To install Dashmachine on Yacht, follow the steps below. If you use Portainer, the steps should be very similar.
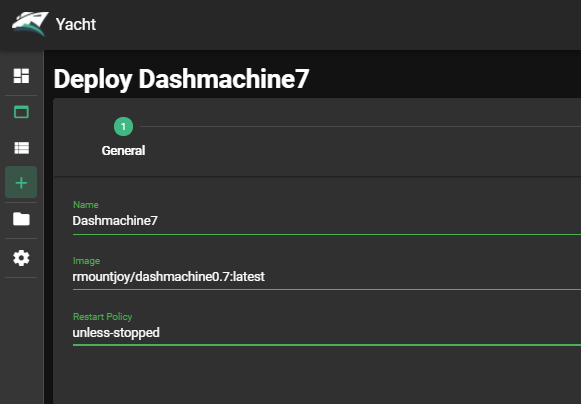
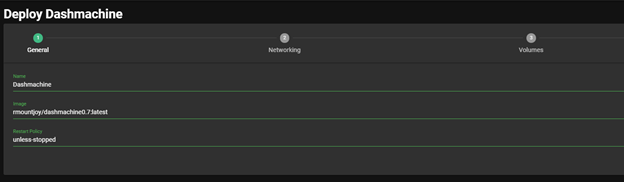
On the left sidebar, go to New Application.
General
- Name: Dashmachine
- Image: rmountjoy/dashmachine0.7:latest
- Restart Policy: Unless-stopped
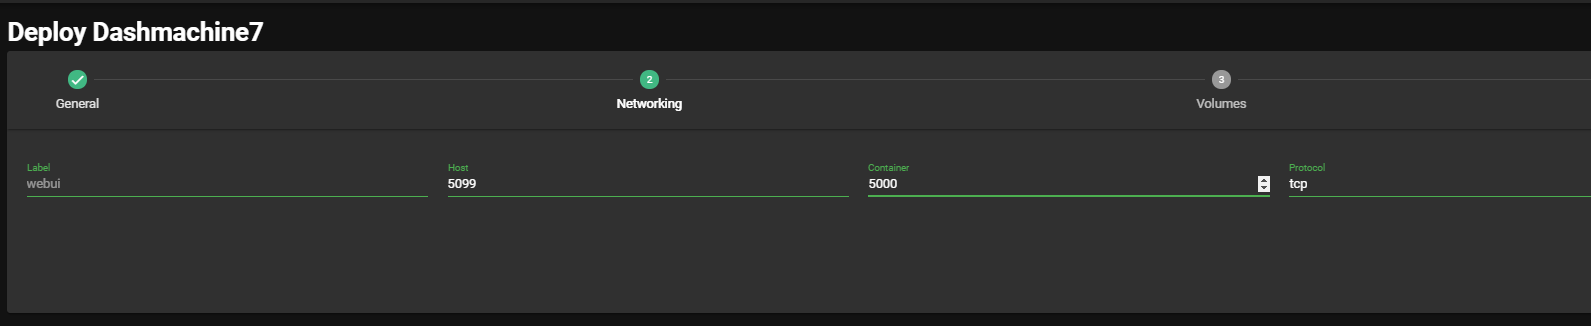
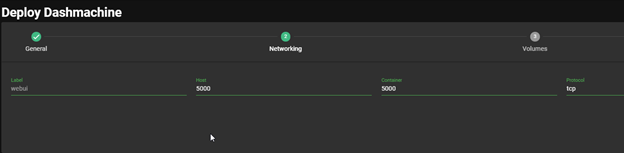
Networking
- Label: webui
- Host: 5000 (Default is 5000. If you have an older version/different application already on port 5000, choose a different port. 5050 would be fine.)
- Container: 5000
- Protocol: tcp
Volumes
- Host: /volumes/dashmachine
- Container: /dashmachine/config
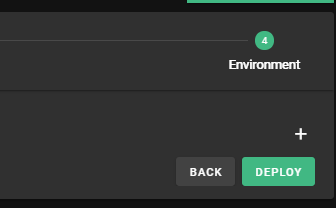
Environment
Nothing to edit here. Just click Deploy.
Dashmachine 7 should now be accessible from localhost:5000
Install VS Code
As I mentioned earlier, there is no config editor built into Dashmachine v0.7. Instead, you'll need to install VS Code to edit the various configuration files.
Step 1: Download and Install VS Code
Download Visual Studio Code from here: https://code.visualstudio.com/download
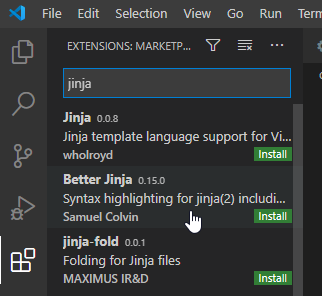
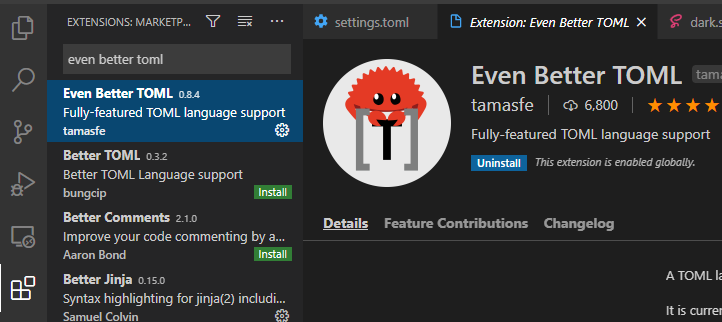
Step 2: Install Recommended Extensions
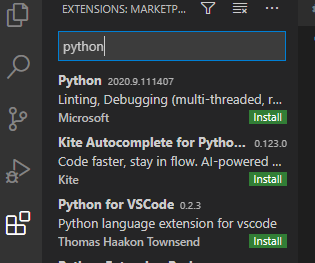
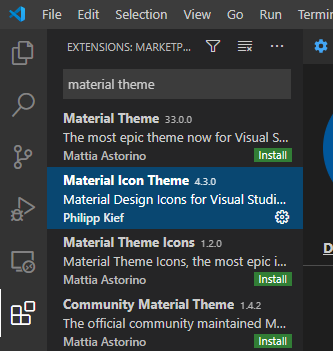
After VS Code is installed, click Extensions on the left pane of VS Code.
Search for and add the following 5 extensions:
- Better Jinga
2. Python
3. Material Icon Theme
4. Event Better Toml
5. Dashmachine
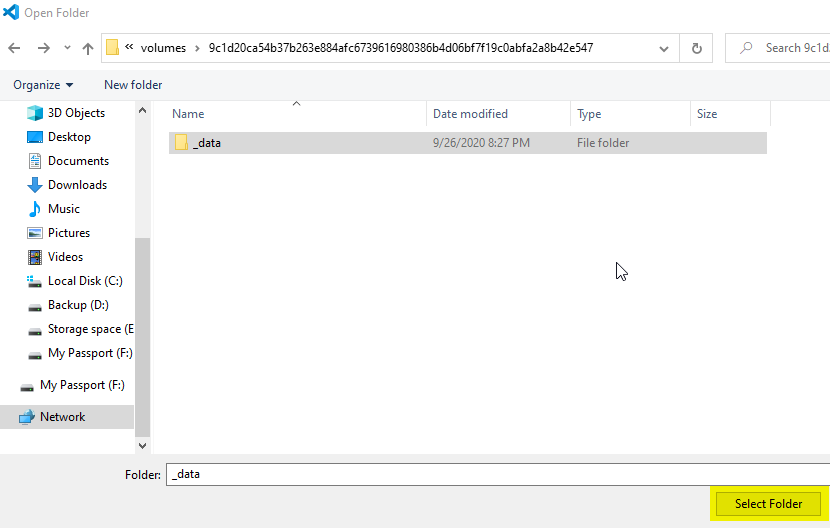
Step 3: Browse to Dashmachine Folder
Go to File > Open Folder to browse to the Dashmachine folder. If you've installed Docker for Windows as well, you can browse here:
\\wsl$\docker-desktop-data\mnt\wsl\docker-desktop-data\data\docker\volumesSelect your Dashmachine volume. If you have several volumes listed, select the one with the latest timestamp. Click Select Folder to open it inside VS Code.
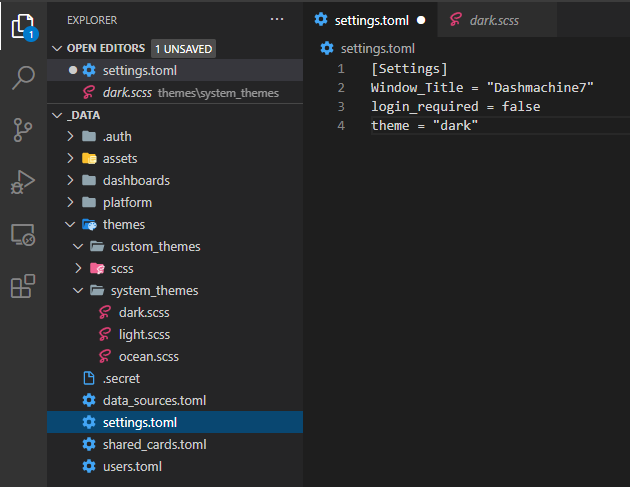
You should now see the contents of your Dashmachine files:
If you aren't using Docker Desktop for Windows, just browse to the appropriate path where your Docker images are stored.
Step 4: Configure Dashmachine Settings
Now that Dashmachine is installed and your VS Code editor is installed, it's time for the fun part: customizing and adding cards!
Important: Dashmachine has built-in "listeners" that look for config changes and refresh them in the background. If you make a change and don't see it reflect, simply restart your application via Docker Desktop or Yacht.
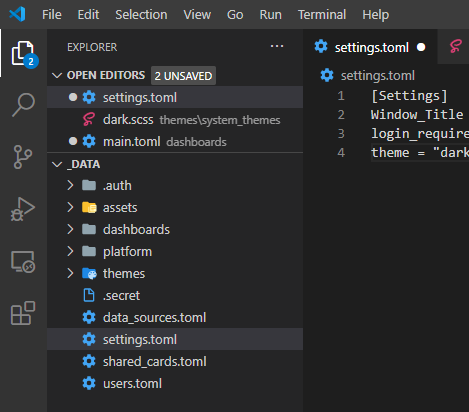
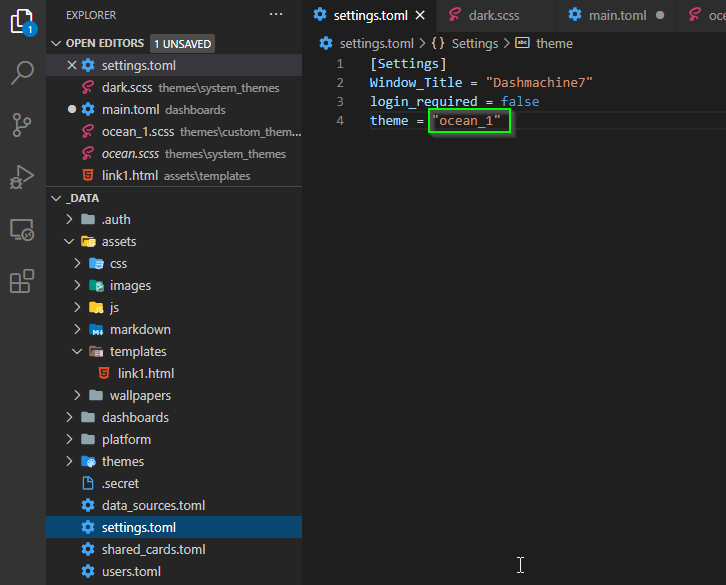
Edit Settings.toml
This is where you'll edit the basic settings of your dashboard, such as changing the theme, whether or not your dashboard requires a password, or setting a background image.
Theme options:
- light
- dark
- ocean (new!)
Note: You can't customize system themes (well, you can...but it will revert the next time you restart your app) You can create your own themeand edit that.
but you can create your own theme to edit.
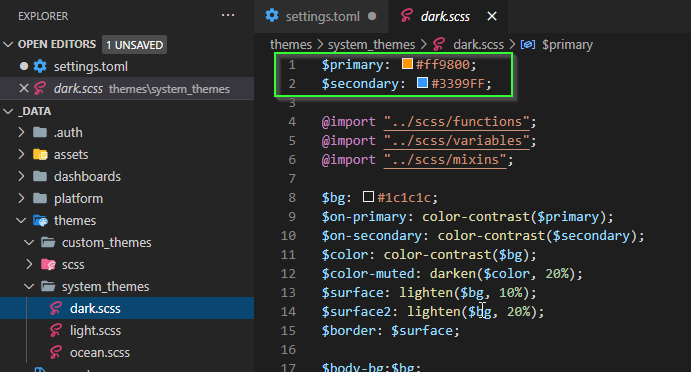
Creating Custom Themes & Customizing Theme Colors
To customize a theme, copy & paste one of the system_themes into themes > custom_themes and give it a unique name (not dark, light, or ocean)
Hover over the hex color code (#ff9800) to change the color. Click File > Save afterwards.
The last thing you'll need to do is edit your Settings.toml file to reflect the new theme.
After changing theme colors, here's what it looks like:
Creating Your First Card on Main Dashboard
Now that your main settings are set, it's time to create your first card!
Dashmachine version v0.7 now supports multiple dashboards. If you'll only be using 1 main dashboard, just add "cards" to the existing main.toml file (dashboards>main.toml).
Let's get started by creating two basic cards.
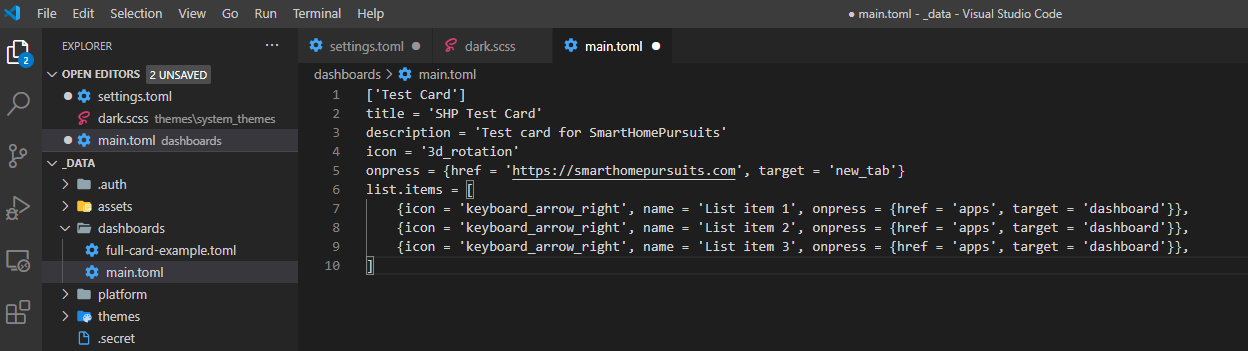
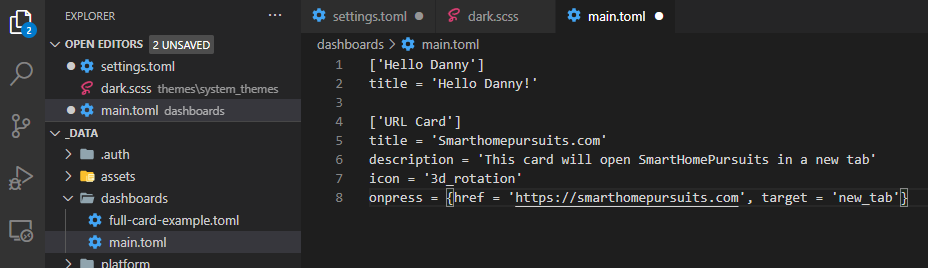
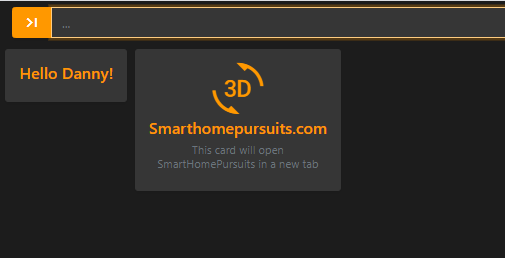
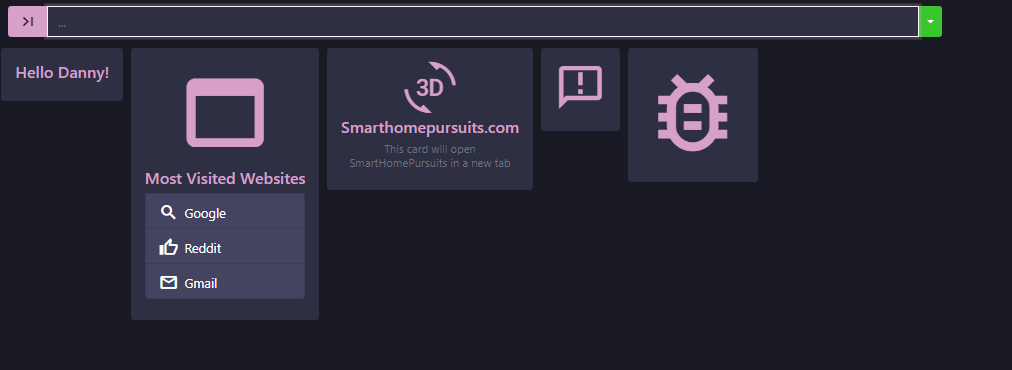
First Card: Text Only
title = 'Hello Danny!'
Second Card: Open URL Card
title = 'Smarthomepursuits.com' description = 'This card will open SmartHomePursuits in a new tab' icon = '3d_rotation' onpress = {href = 'https://smarthomepursuits.com', target = 'new_tab'}Change Icons
To change your icons, just replace 3d_rotation with the name of a different icon from this site: https://material.io/resources/icons/?style=baseline
Change Link Behavior
The image above will open the URL in a new tab. Replace target = 'new_tab' with one of the options below to change the link opening behavior:
- iframe
- new_window
- new_tab
Here's what those two cards look like on the frontend:
Pretty cool, right? Now, I know these cards aren't super impressive just yet but this should give you a good idea of what to expect.
Let's keep customizing.
Creating More Advanced Cards
While there are a TON of configurable options, I'm just going to create a few basic cards to get you started. As I learn more and more, I'll update this guide and include more card ideas.
The developer is also working on a community repository of user-created cards. That will be love at https://dashmachine.io in the future. This will let you pull down cards or themes from a URL, which will make creating your dashboards even easier.
The only thing I changed here is the size of the icons and the icon image. If you want to change the order of your cards, simply copy & paste the "card block" above or below the others.
Small Image-Only Card
icon.image = 'announcement' icon.height = '64px' onpress = {href = 'https://google.com', target = 'new_tab'}Large Image Card
icon.image = 'bug_report' icon.height = '128px' icon.width = '128px' onpress = {href = 'https://google.com', target = 'new_tab'}Large Image Card #2
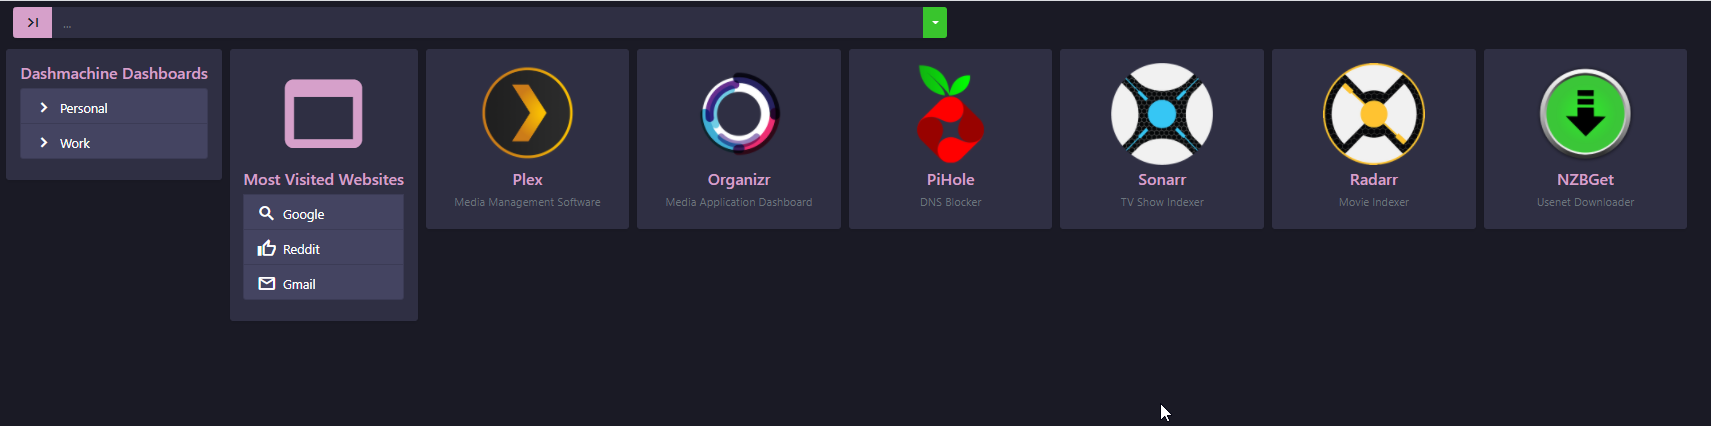
title = 'Most Visited Websites' icon.image = 'web_asset' icon.height = '128px' icon.width = '128px' onpress = {href = 'https://localhost:32400', target = 'new_tab'} list.items = [ {icon = 'search', name = 'Google', onpress = {href = 'https://google.com', target = 'https://google.com'}}, {icon = 'thumb_up_alt', name = 'Reddit', onpress = {href = 'https://reddit.com', target = 'https://reddit.com'}}, {icon = 'email', name = 'Gmail', onpress = {href = 'https://gmail.com', target = 'https://gmail.com'}} ]Here's what we have so far:

The big advantage here is that you'll only need to edit the one shared card for it to update on all other dashboards.
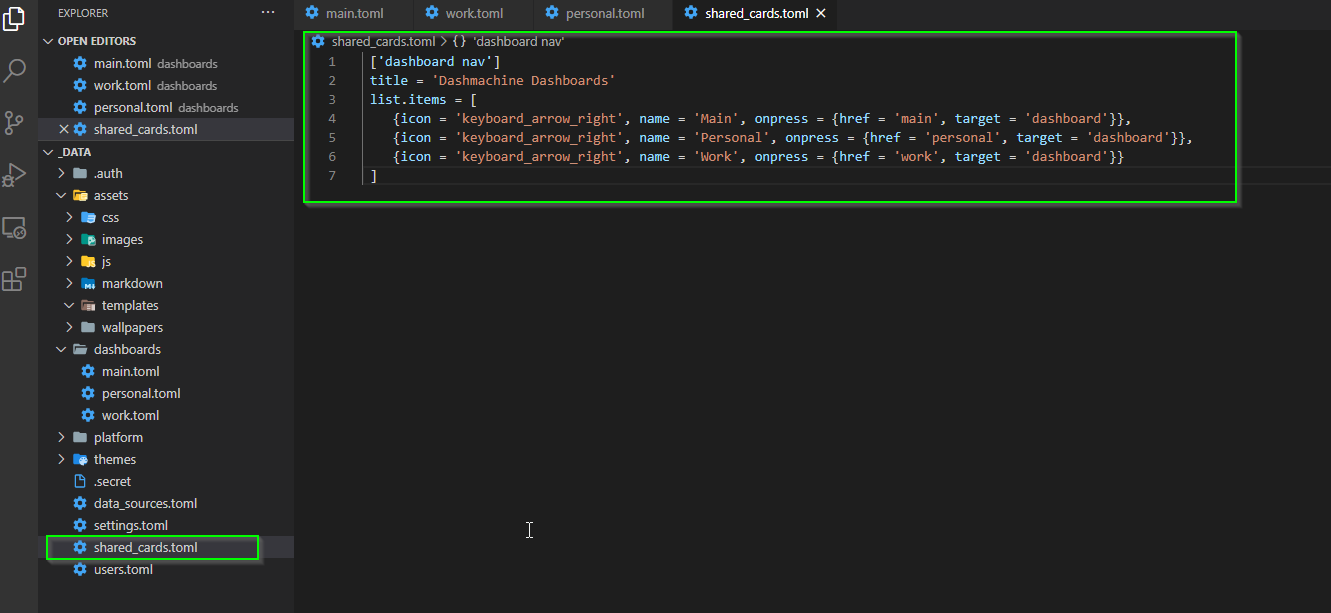
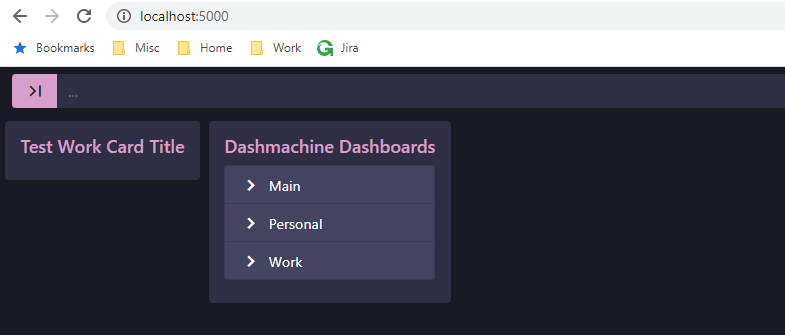
In this example, I created a shared navigation card called 'dashboard nav'. Under shared_cards.toml, add this and save:
title = 'Dashmachine Dashboards' list.items = [ {icon = 'keyboard_arrow_right', name = 'Main', onpress = {href = 'main', target = 'dashboard'}}, {icon = 'keyboard_arrow_right', name = 'Personal', onpress = {href = 'personal', target = 'dashboard'}}, {icon = 'keyboard_arrow_right', name = 'Work', onpress = {href = 'work', target = 'dashboard'}} ] Then, create a new dashboard. Right-click dashboards > New File. The name of this file will also be the name of your dashboard. For our second dashboard, we're calling it work.toml. For our 3rd dashboard, we're calling it personal.toml.
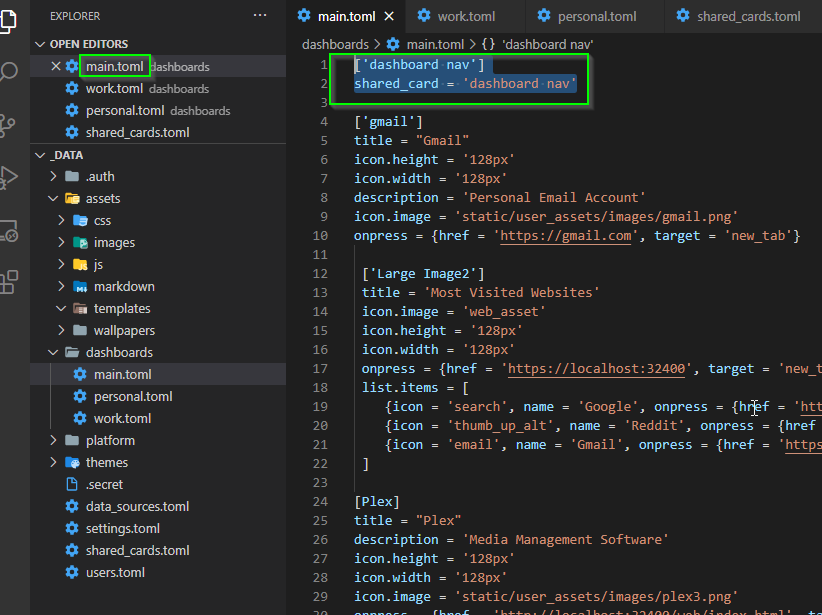
Then, paste this into each new dashboard you create:
shared_card = 'dashboard nav'And here's our Work.toml dashboard. You'll notice it automatically pulls in the shared card data, which I'm using for site navigation.
Next Steps / Wrapping Up
Here's my very basic Dashmachine v0.7 dashboard!
I had a blast creating my previous Dashmachine dashboards, so I'm really looking forward to diving into this version some more. Especially looking forward to using data sources to pull in API data from Donate, Radar, Nzbget, Tautulli, etc.
Like I said at the beginning of this post, this was only released about a week ago, and there isn't a whole lot of documentation to reference yet. I plan on updating this post or creating a new post I've learned how to add a few more items.
Hopefully this guide helps you get up running quickly without needing to integrate the code editor!