How to Install Docker on Ubuntu 20.04
If you're looking for a simple step-by-step guide to install Docker on Ubuntu 20.04 in 2021, look no further than this guide.
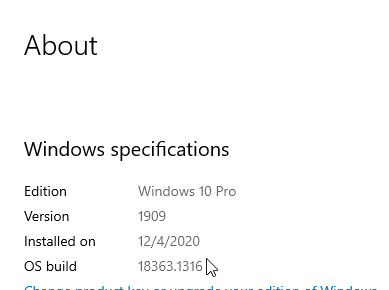
**You must be running either Windows 10 Pro or Windows Server 2019 and have the Hyper-V role enabled. Windows 10 Home doesn't have the option to run Hyper-V virtual machines.**
Prerequisites
For this guide, I'm installing a Ubuntu virtual machine on my Hyper-V host server.
If you aren't sure if you have Windows 10 Pro or Home, press Windows key+ X > System. Scroll to the about section:
If you have Windows 10 Home, you can upgrade to Pro for $99 from the Windows Store. Once you've verified that you are on Windows 10 Pro or Server 2019, you can continue below.
Step 1: Enable Hyper-V
- Search for "Turn Windows Features On or Off" from Start.
- Scroll to the Hyper-V section.
- Check all the boxes for Hyper-V.
- Click OK to begin the installation process. It'll prompt you to reboot once complete.
Step 2: Create Ubuntu VM
After rebooting, log back into your host server or computer and download the latest version of Ubuntu from here: https://ubuntu.com/download/ You can download this .iso to your Downloads folder for now.
Open Hyper-V Manager and create a new virtual machine. If you need help creating a Hyper-V VM, follow this guide.
Right-click the VM > Settings. Under the Security section, uncheck the "Use Secure Boot" option.
Then, right-click the VM to start the Ubuntu installation process.
Follow all default prompts to install Ubuntu:
Once it completes, it will ask you to restart it. After restarting, you may see a "Please remove the installation medium" popup. If you do, just power the VM off and relaunch it.
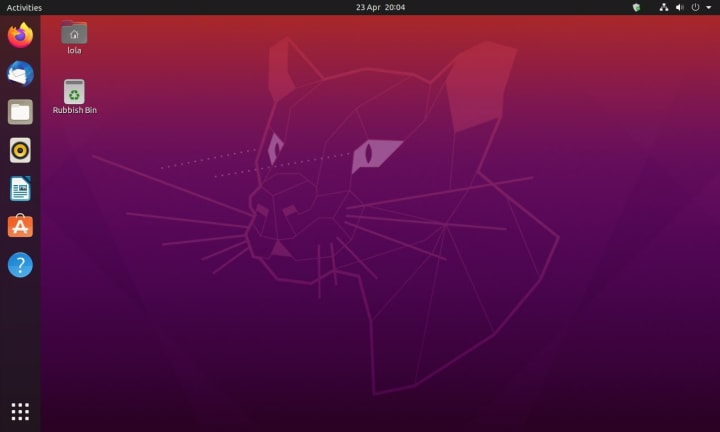
You should be able to log into your Linux VM! Just double-click the virtual machine in Hyper-V Manager to open it and log in.
Optional, but recommend steps
Install Net Tools
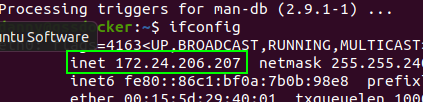
You'll need to know your Ubuntu's IP address, so I first recommend running sudo apt install net-tools.
Once complete, you can enter ifconfig to view your ipv4 address:
Grant SSH Access
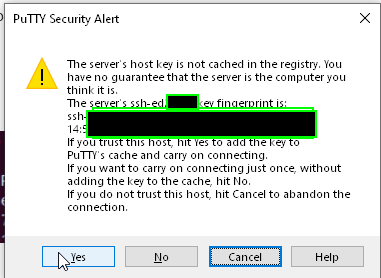
You will more than likely be accessing your Ubuntu VM using an SSH tool such as putty, so I recommend grant SSH access at the very beginning.
sudo apt install sshThen, open Putty and enter the IP address. The first time you connect to it, it'll prompt you to save the host key. Click Yes.
You can now log in using the user and password you just created.
Step 2: Install Docker Repository
For more info on setting up docker, here is the doc I referenced when setting it up. You don't need to follow any steps in that link, though, as I've copied all the necessary commands below: https://docs.docker.com/engine/install/ubuntu/#install-using-the-repository
Note: Copying and pasting into a Ubuntu VM doesn't work very well, so I highly recommend opening this guide from a web browser inside your new VM If you aren't going to copy/paste from Putty. You can then simply copy and paste the below commands.
If you are familiar with SSH, feel free to use Putty to SSH into your new VM.
Open a Terminal and type:
sudo apt-get updateThen, install a docker repository using:
sudo apt-get install apt-transport-https ca-certificates curl gnupg-agent software-properties-commonNext, add Docker's official GPG key:
curl -fsSL https://download.docker.com/linux/ubuntu/gpg | sudo apt-key add -After that, verify you have the key with the fingerprint by typing this:
sudo apt-key fingerprint 0EBFCD88Finally, set the STABLE repository with this command:
sudo add-apt-repository \ "deb [arch=amd64] https://download.docker.com/linux/ubuntu \ $(lsb_release -cs) \ stable"Step 3: Install Docker Engine
Run this command to install Docker on Ubuntu:
sudo apt-get install docker-ce docker-ce-cli containerd.ioAfter it completes, lets test to see if Docker is running:
Type sudo systemctl is-active docker. If it returns ACTIVE, then you've confirmed that docker is now running.
That's it! You have now successfully installed Docker on a Ubuntu VM. Now comes the fun part: adding containers.
I have created more step by step documents to add containers such as BookStack, Mealie, Overseerr, or Nginx Proxy Manager here: https://smarthomepursuits.com/category/self-hosted/docker/.