Part 3: Roborock S7 Home Assistant: Automations, Schedules, and Voice Commands
This is part 3/5 of my How To Setup Roborock robot vacuums in Home Assistant guide.
In Part 1, I’ve shown you how to:
- Initially vacuum setup your Roborock S7
- Connect to MiHome App
- Extract the token (for use with a Lovelace card)
- Added Roborock S7 to Home Assistant
- Added the Xiaomi Lovelace cards for basic commands
In Part 2, I’ll showed you how to:
- Customize your Vacuum map card to include clickable zones
- Add text/icons overlays on the Vacuum Map Card
- Create a Lovelace dropdown menu of rooms you can tell your vacuum to clean up
In Part 3 (this guide), I'll show you how to:
- Create a few automations
- Schedule room cleaning
- Configure Google Assistant to allow for voice commands
In Part 4, I'll go over how to:
- Control the mop from Home Assistant
In Part 5, I'll show you:
- How to vacuum multiple rooms in an automation (by calling each
script.vacuum_xyzscript). This allows you to select the order and schedule vacuuming for as many rooms as you'd like.
In Part 6:
- Vacuum & Mop Lovelace card
Please follow both Part 1 and Part 2 guides first, as we will be using the scripts we already created.
Roborock Home Assistant Automations
I'm just going to post the YAML below. You can copy and paste these into the YAML editor within the Automations tab. You should only need to change the date/time and entity ID.
These can all be configured via the UI as well. For the trigger, set a Time and for the Action, Call Service and choose one of the scripts you've already created.
Note: Just for your reference in my yaml below, my vacuum's name is Rosie.
#1: Tell Vacuum to Go To A Point
This automation would be useful to send your vacuum to a specific point, such as the trash can, at a certain time of day.
alias: 'Rosie: Go To Trash Can' description: '' trigger: - platform: time at: '14:00:00' condition: [] action: - service: script.turn_on target: entity_id: script.vacuum_trash_can mode: single#2: Set Vacuum Speed Then Go To Target
This script will first set the vacuum speed to "Silent" before going to the designated area. I also added a 3 second wait timer give the vacuum a few seconds to change speeds before moving. Capitalization for the speed "Silent" is required.
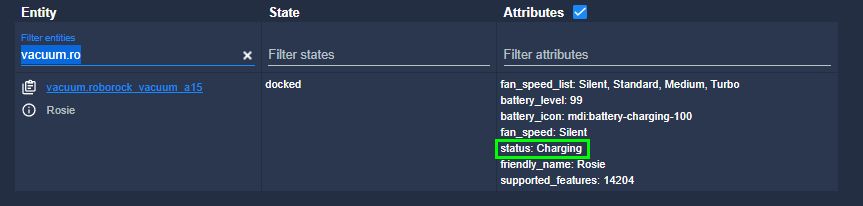
To view your fan_speed_list options, go to Developer Tools > search for your vacuum.
alias: 'Rosie: Vacuum Speed Silent then go to Target' description: '' trigger: [] condition: [] action: - service: vacuum.set_fan_speed data: fan_speed: Silent target: entity_id: vacuum.roborock_vacuum_a15 - wait_for_trigger: [] timeout: '3' - service: script.vacuum_sink mode: single#3: Vacuum 2 Zones
This script will vacuum 1 zone, then the next, and then return to base once complete. You can choose a maximum of 5 zones.
alias: 'Rosie: Vacuum 2 Zones' sequence: - service: xiaomi_miio.vacuum_clean_zone target: entity_id: vacuum.roborock_vacuum_a15 data: repeats: 1 zone: - - 22474 - 25558 - 23025 - 26115 - - 23877 - 25073 - 24428 - 25630 mode: single#4: Notify When Zoned Cleaning is Complete
This will send you a notification whenever a "Zone" cleaning has been completed. You can check the statuses of your robot vacuum from Developer Tools as well.
This is a great alternative to the built-in MiHome notifications as you can now create notifications when the vacuum starts, stops, starts charging, hits a certain battery level, etc.
alias: 'Rosie: Notify When Zoned Cleaning is Complete' description: '' trigger: - platform: state entity_id: vacuum.roborock_vacuum_a15 attribute: status from: Zoned cleaning to: Returning home condition: [] action: - service: notify.mobile_app_pixel_5_danny data: title: Zone cleaning complete! message: Returning to base mode: singleSetup Roborock With Google Assistant for Voice Command Cleaning
For this setup, I am using the Google Assistant configuration with Nabu Casa. If you are using duckDNS or Alexa, the steps may slightly differ.
Expose Vacuum Entities
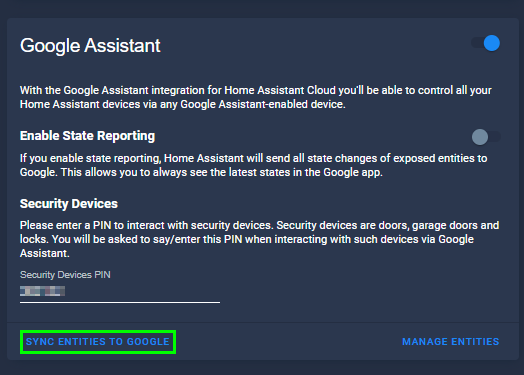
First, go to Configuration > Home Assistant Cloud. Scroll down to Google Assistant.
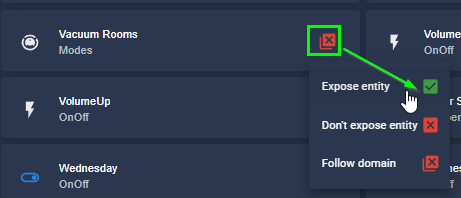
Under the Not Exposed Entities section,find any vacuum-related entities you created that are not exposed to Google Assistant yet. This means that Google doesn't know about them, therefore you can't trigger them using your voice.
Then go back to the Google Assistant setup page and click Sync Entities to Google.
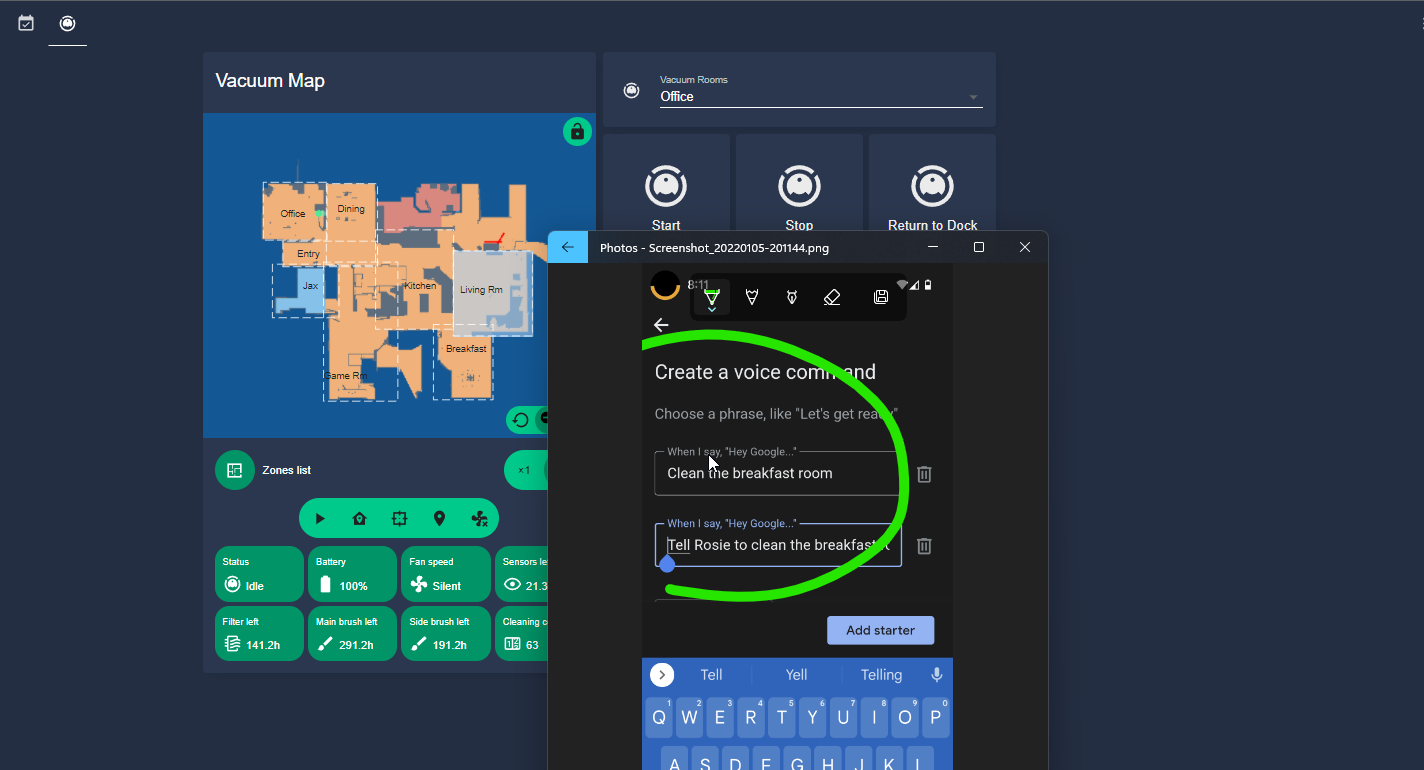
Create Google Home Routine
This will let you create custom voice commands. Rather than saying, "Hey Google, Turn on Vacuum Breakfast Room", you can configure your command to something like "Hey Google, clean the breakfast room".
Open your Google Home mobile app. Click the purple 'Routines' button.
Then click the + symbol at the bottom.
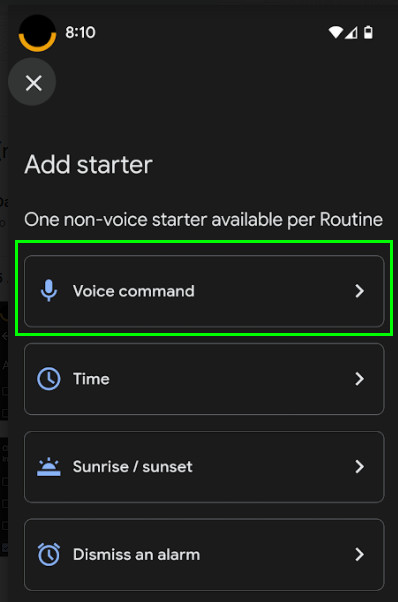
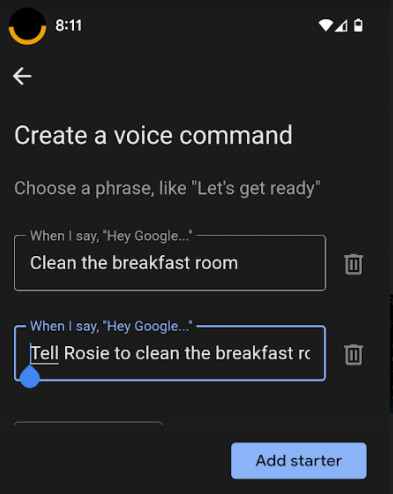
Add Starter
Click Add Starter > Voice Command.
Enter a few phrases you might use then click Add Starter.
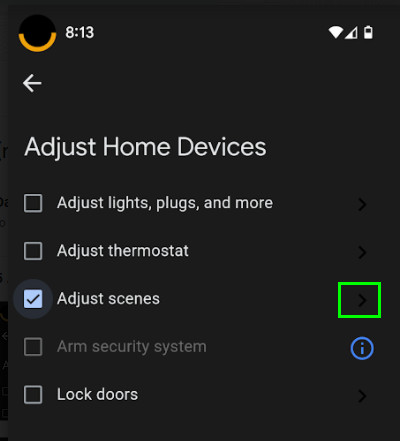
Add Action
Click Add Action > Adjust Home Devices > Adjust Scenes. Then click the arrow at the far right; you should see the scripts you've exposed to Google.
Once you click Done and Save, you can now test it out! If all goes well, you can now successfully use Google Assistant to trigger a Roborock zone cleaning!
Wrapping Up
Hopefully you guys enjoyed this final part of my Adding Roborock robot vacuum/mop to Home Assistant series!
The only thing I couldn't figure out was how to create an automation that runs more than 5 zones. I tried creating multiple scripts and "calling" the 2nd script, having the robot return to base first, stopping the robot, and a bunch of other options but couldn't figure it out. So, if you were able to figure that out - please let me know in the comments below!