How to Add SmartThings Motion Sensor to Home Assistant
Are you looking for a simple guide to add a SmartThings motion sensor to Home Assistant in 2021? If so, this step by step tutorial should be exactly what you are looking for.
This simple post is part of my “How to Migrate from SmartThings to Home Assistant” series, where I show you how to migrate all of your sensors and devices over as quickly and easily as possible. This process is super easy and takes less than 5 minutes from start to finish.
- How To Add SmartThings Button to Home Assistant
- How To Add SmartThings Water Sensors to Home Assistant
- How To Add SmartThings Multipurpose Sensors to Home Assistant
Keep in mind, you will need a Zigbee USB hub connected to your raspberry pi first before you can pair it to Home Assistant. I use a GoControl Nortek zwave + zigbee hub on a raspberry pi b3+ or VMware Workstation VM. I have a step-by-step guide home assistant zigbee guide here, if needed.
For reference, here is what the motion sensor looks like. The Model Number is GP-U999SJVLBAA.
Step 1: Unpair Device from SmartThings Hub
If your motion sensor is currently already paired to SmartThings, I recommend deleting the device. You can either do that through the new Samsung SmartThings app, or through the https://graph.api.smartthings.com/.
Step 2: Factory Reset Your Motion Sensor
Remove the backplate. Locate the tiny hole on the back of the sensor.
Insert a paperclip for 5 seconds. Once it flashes red a few times, remove the paperclip. Your device has now been reset and is ready to be paired to home assistant.
Step 3: Pair to Home Assistant
This next steps assumes you've already plugged in your Zigbee hub into your raspberry pi and installed the Zigbee Home Automation (ZHA) integration.
- Launch home assistant.
- Configuration > Integrations > Zigbee > Configure.
- Click + Add Device.
- Insert the paperclip into the back of your SmartThings motion sensor for 5 seconds. You should see it flicker from red to green.
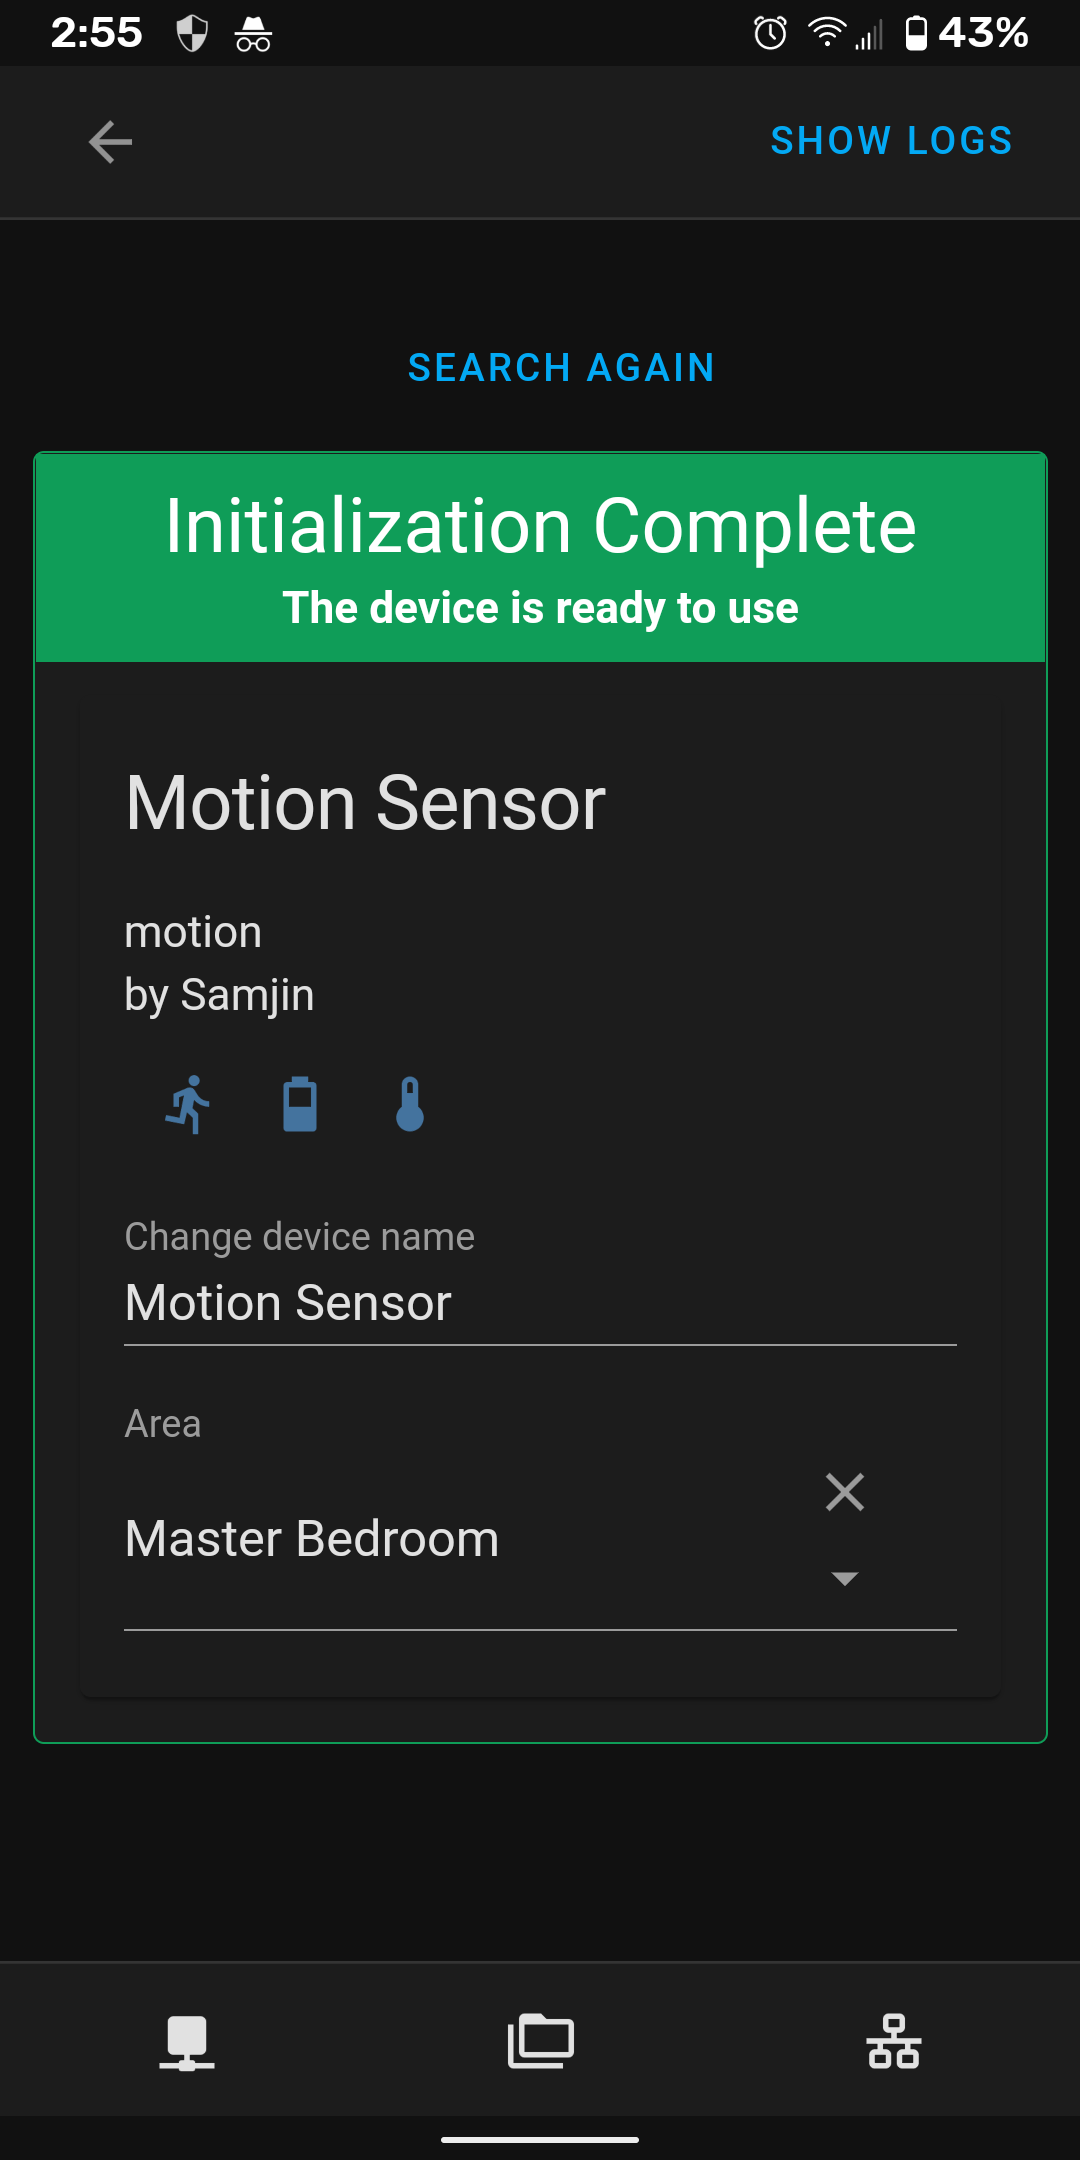
- In a few seconds, you'll see a Samjin motion device. This is your motion sensor.
- Change the name, assign it to an area, and then add it to your Lovelace dashboard if you'd like to.
Step 4: Create Home Assistant Automations using SmartThings motion detector
The next step is the fun part: creating home assistant automations! And the best part is this method doesn't require you to use the SmartThings integration.
For this test automation, we're going to turn off my office lamp if no motion is detected for 10 minutes.
There are two ways you can create automations - through Automations web interface, or by editing the automation.yml file. I'll show you how to do it both ways below.
Create Automations using Web Interface
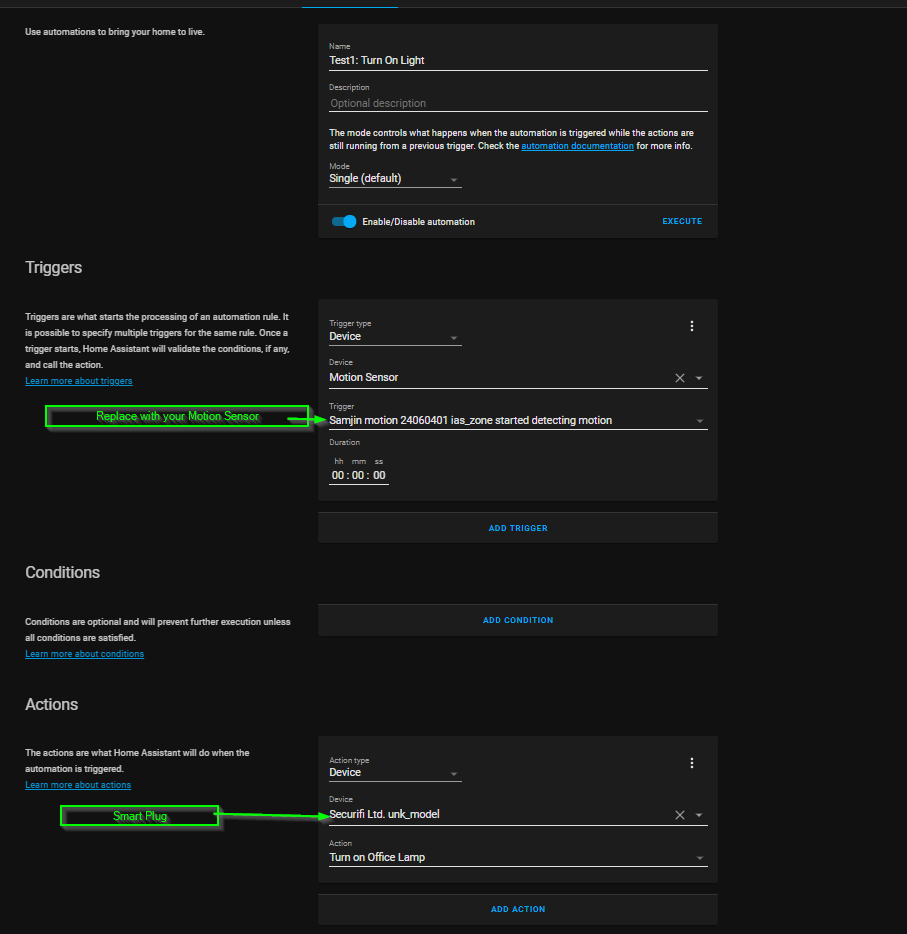
For this, you'll be creating two automations. One to turn on the light if movement is detected. And the 2nd one to turn off the light if movement hasn't been detected for 10 minutes.
- Configuration > Automations > Add Automation.
- Start with a blank automation.
- Automation #1: Turn On Light
- Automation #2: Turn Off Light after No Movement for 10 minutes
Create Automation by editing Automation.yaml
Install File Browser integration, if you don't already have that installed.
Select the folder in the top left corner.
Then click automations.yaml
Scroll to the very bottom of the automation.yaml file.
Copy and paste my code into your automations.yaml file. Replace the device_id and entity_id with the id's of your own motion sensors and smartplugs. You will need to reboot afterwards (Supervisor > System > Host System > Reboot)
As always, take a snapshot beforehand and install the addon Terminal & SSH, just in case you need to edit the automation file via the terminal. Incorrectly editing the automation.yaml can cause issues after you restart
Disclaimer: The above warning happened to me. Luckily, the error message showed me which line caused the issue and I was able to delete the newly added lines to the automations.yaml file via File Editor.
alias: 'Turn On Light if motion is detected' description: '' trigger: - type: motion platform: device device_id: cca2e265707d968d649852ed13b082b4 entity_id: binary_sensor.samjin_motion_24060401_ias_zone domain: binary_sensor for: hours: 0 minutes: 0 seconds: 0 condition: [] action: - type: turn_on device_id: c278a5755f450161a163acd4f57f0f35 entity_id: switch.securifi_ltd_unk_model_04cb3a05_on_off domain: switch mode: single - id: '1609886221074' alias: 'Test1.1: If no movement after 10 sec, turn off light' description: '' trigger: - type: no_motion platform: device device_id: cca2e265707d968d649852ed13b082b4 entity_id: binary_sensor.samjin_motion_24060401_ias_zone domain: binary_sensor for: hours: 0 minutes: 0 seconds: 15 condition: [] action: - type: turn_off device_id: c278a5755f450161a163acd4f57f0f35 entity_id: switch.securifi_ltd_unk_model_04cb3a05_on_off domain: switch mode: singleWrapping Up
That's it! I found it incredibly easy to pair both of my SmartThings motion sensors to home assistant. The hardest part was figuring out how to create automations. I probably checked 10+ hassio forum posts, and sort of pieced those together until I found a solution that works for me.
Hopefully this guide makes it super easy for you too, if you have also decided to migrate from SmartThings to Home Assistant.


