Yes/No Actionable Notification for Home Assistant on Android
In this guide, I'll show you how to create a a Home Assistant actionable notification that prompts you to perform an action (click yes or no) from a push notification.
Depending on what option you choose, a different action is performed.
Use Case
My use is as follows:
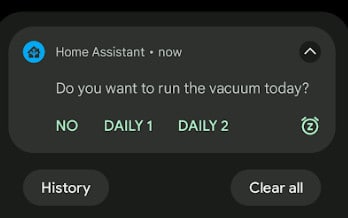
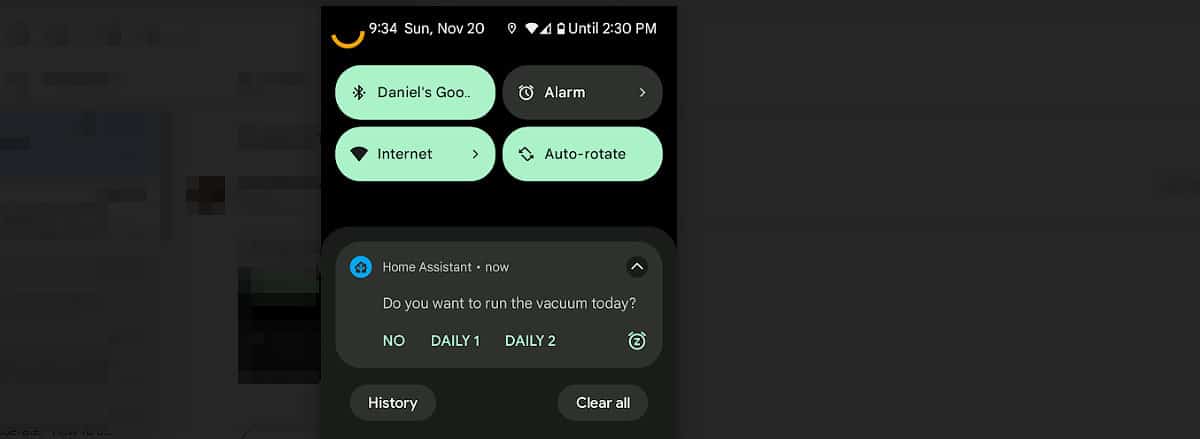
I've added an NFC tag to Home Assistant and placed it near my front door. When I scan it on my way out, I want to receive an actionable notification that asks "Do you want to run the vacuum today?"
Sidenote: I have an extensive "How To Add Roborock to Home Assistant" series of guides, but in case you haven't read that, I basically have a map of my house with defined zones. Each zone is a "room". I then have automations that vacuum certain rooms in sequence. (I choose not to vacuum my entire house at the same time due to vacuum battery life + the dust bin often gets too full from dog hair. By doing just a few rooms at a time, it returns to my auto-empty dock to empty itself.) I want to call those grouped room scripts(below) via actionable notification.
- Vacuum Group 1 - vacuums the front entry, dining room, kitchen, and living room
- Vacuum Group 2 - vacuums the breakfast room, gameroom, master bedroom, and master bathroom
I chose to use an NFC tag for this instead of a daily scheduled automation because I sometimes work from home or sometimes company is over and my Roborock S7 robot vacuum can be kind of loud and distracting, so I prefer to run it when I'm not home. I also didn't want it to trigger based on my GPS location/wifi connection, as sometimes I just walk to mailbox or and don't want the notification every single time I leave.
So now I just scan the tag when I leave for work in the morning. Clicking a smart button would work also but NFC tags are way cheaper and prevents my kids from pressing a button.
Android Limitations
You can only have 3 actions in an Android actionable notification. For iOS, you can have up to 10.
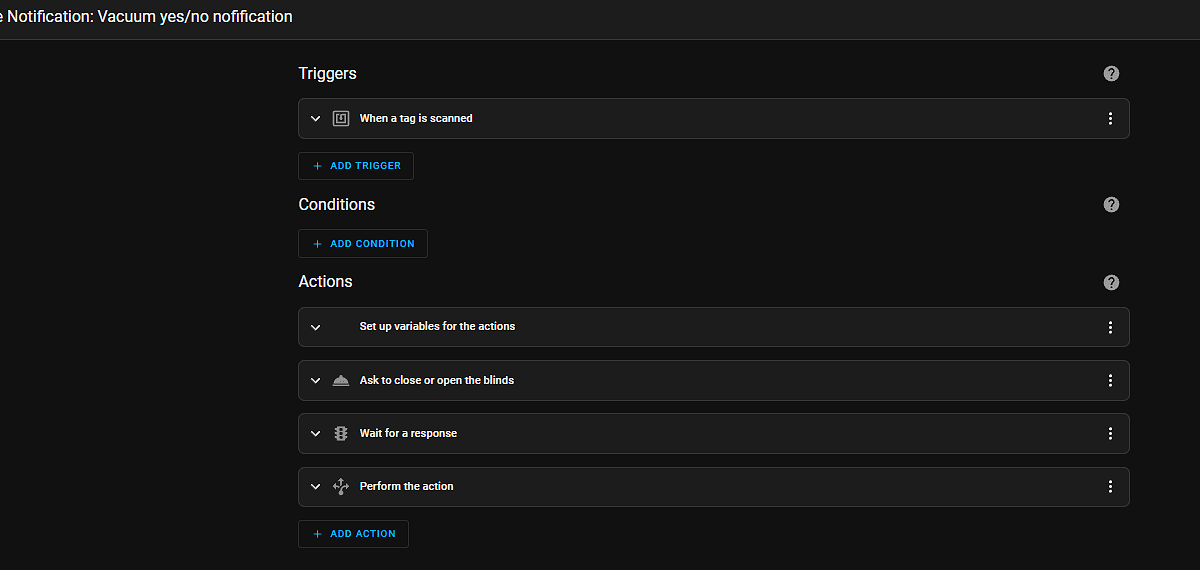
Actionable Notification YAML
You can create an actionable notification automation from the GUI, but I found it's easier to just copy and paste the code below into the YAML editor and change out the relevant info. Most of this info was in the Home Assistant actionable notification docs.
First, we need to set up the variables and their names. Variables are needed because we want different things to happen depending on what we click. If we didn't use variables, then all 3 actions would run the same automation, which I don't want to happen. (I don't want automation.vacuum_daily1 to run when I click NO, for instance.)
I color coded the YAML below for quick idenfication. I bolded the action names that you'll need to update if you use different variable names than me.
- action_no
- action_vacdaily1
- action_vacdaily2
Replace the notify service with your mobile phone.
Under the Actions: section, this is where you add the 3 actions you created. Changing the title here changes the button title in the actionable notification.
Wait for trigger. This section waits until I choose one of the 3 options.
Perform the action. This section defines what happens when each button is pressed. If I press Daily 1, then it calls my automation that cleans a group of rooms. If Daily 2 is pressed, then it calls a different automation to clean a different group of rooms. Change these out with whatever action you want to perform - whether it's turning an input boolean on/off, turning off lights, enabling a scene, etc.
Note: Paste all the YAML below into a new automation. Then, once pasted, switch to 'edit in visual editor". You can change out your variable names, message data, and actions to performfrom the GUI without having to build out this automation from the gui. Much easier to do it this way than recreate via the gui to begin with.
alias: "Actionable Notification: Vacuum yes/no notification" description: " trigger: - platform: tag tag_id: 3765b896-b9ea-4bbc-a4d4-ae61e8d9fc3a condition: [] action: - alias: Set up variables for the actions variables: action_no: "{{ 'NO_' ~ context.id }}" action_vacdaily1: "{{ 'VACDAILY1_' ~ context.id }}" action_vacdaily2: "{{ 'VACDAILY2_' ~ context.id }}" - alias: Ask Danny to run the vacuum service: notify.mobile_app_pixel_5_danny data: message: Do you want to run the vacuum today? data: actions: - action: "{{ action_no }}" title: "NO" - action: "{{ action_vacdaily1 }}" title: DAILY 1 - action: "{{ action_vacdaily2 }}" title: DAILY 2 - alias: Wait for a response wait_for_trigger: - platform: event event_type: mobile_app_notification_action event_data: action: "{{ action_no }}" - platform: event event_type: mobile_app_notification_action event_data: action: "{{ action_vacdaily1 }}" - platform: event event_type: mobile_app_notification_action event_data: action: "{{ action_vacdaily2 }}" - alias: Perform the action choose: - conditions: "{{ wait.trigger.event.data.action == action_no }}" sequence: - service: Input_boolean.turn_off target: entity_id: input_boolean.home - conditions: "{{ wait.trigger.event.data.action == action_vacdaily1 }}" sequence: - service: automation.trigger target: entity_id: automation.vacuum_daily_1 data: {} - conditions: "{{ wait.trigger.event.data.action == action_vacdaily2 }}" sequence: - service: automation.trigger target: entity_id: automation.vacuum_daily_2 data: {} mode: singleWrapping Up
That's it! You have now successfully set up an Android actionable push notification that prompts for user input - click Yes or No - when something is triggered.
I purposely left this article short and sweet, as the info is all in the Home Assistant Actionable Notification doc. It's a very long doc but I recommended reading it over. My goal with this post was to explain in a little more details exactly how to perform a YES/NO actionable notification with Home Assistant on an Android device, and how to create one as quickly as possible.
Let me know if this guide helped you out!