How To Add Pihole inside iFrame of Organizr
If you're anything like me, once you've setup Organizr on your computer to manage all of your media server applications, like Sonarr, Radarr, Tautulli, Plex, etc, you're soon going to want to add EVERYTHING you frequently access to it.
However, you may notice that some applications can't be added inside the Organizr v2 iframe. Pihole is a great example of this.
By default, you can add Pihole to Organizr as a new tab, but it won't load inside the iframe - it will only open in a new window.
Wouldn't it be nice to view your Pihole stats directly on your Organizr homepage? Or inside your Organizr tab?
Luckily for you, you can!
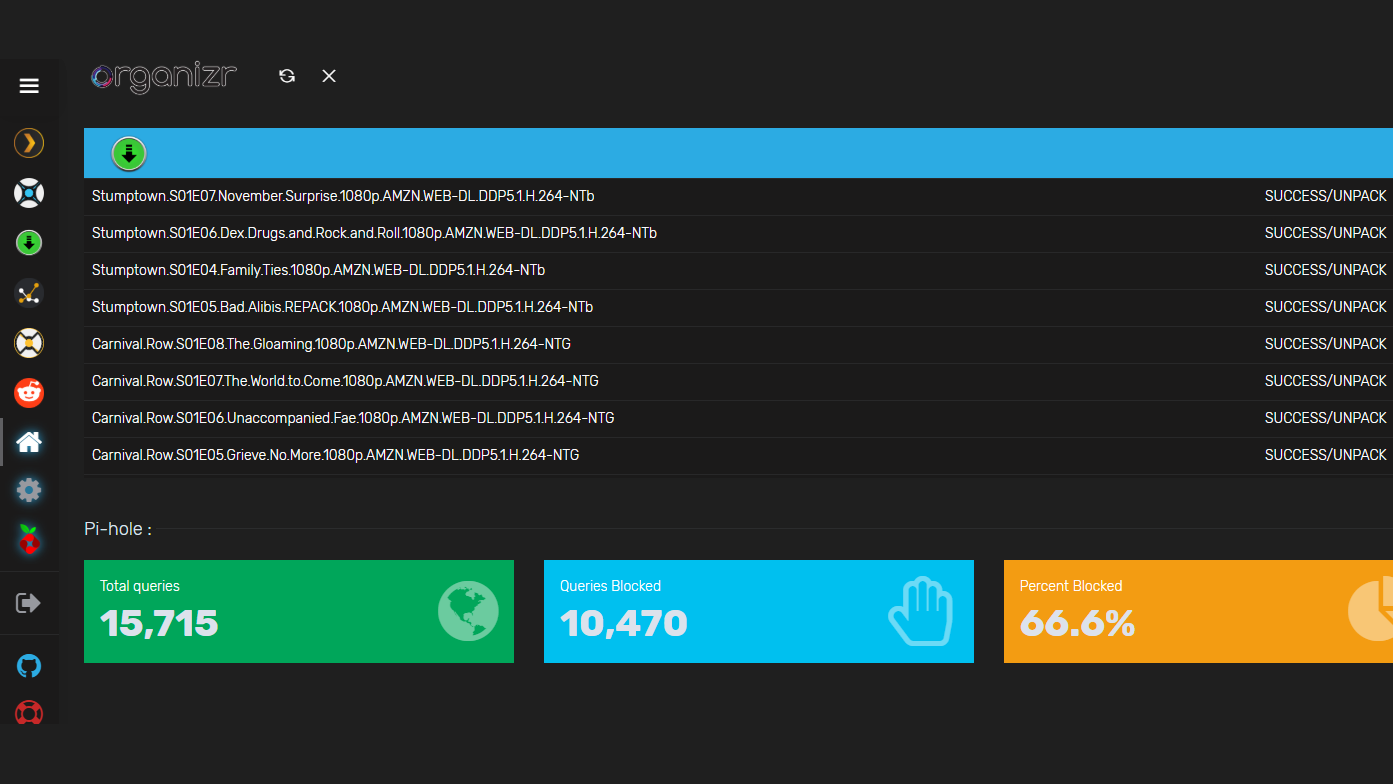
In this how to add Pihole to Organizr v2 guide, I'm going to give you the step by instructions. The end result will look like this:
Helpful Articles
Edit the Pihole Configuration File
Log into your raspberry pi. Open a terminal and type:
sudo nano /etc/lighttpd/lighttpd.confEnter your raspberry pi credentials. By default, they are pi and raspberry.
Scroll to X-Frame Options
Scroll down until your locate the "X-Frame-Options" => "DENY" option.
Type # to comment out that line.
Press CTRL+X to save. Press Y to confirm.
Restart your Pi
The last step is to reboot your pi to save the configuration changes.
Type reboot in the terminal. Or, if you are on the rpi desktop, you can click the raspberry pi icon > Shut Down > restart.
Add Pihole to Organizr
To add a Pihole tab to Organizr, simply add a new tab like normal.
- Click Settings.
- Tabs > Click + icon to add a new tab.
- Give your tab a name, and enter your pihole IP address and port number.
- Name: PI-HOLE
- Tab URL: http://192.168.68.128/admin
- Tab local URL: leave blank
- Ping URL: leave black
- Choose Image: Search for pi
Hint: If you don't know the ip address associated with your pihole, type ifconfig in a terminal.
Make sure Pihole Type is set to iFrame
If Pihole wasn't already added to Organizr, you won't need to change anything here.
However, if you previously had Pihole set to open in a new tab, you'll need to the change the type from New Window to iFrame.
Click Settings > Tabs > Type > iFrame.
Add Pihole as Homepage Item
Click on the Homepage Items menu. Scroll down to Pihole.
Enable it and add your pi hole URL:
That's it! You should now see your pihole stats showing up inside the Homepage tab just like this:


