Loaner Laptop Checkout/Checkin Powershell Script
If you work in the IT department, chances are that you loan out laptops to your users every once in a while. They may need something temporary to use when giving a presentation, if their work computer breaks, or simply for testing something. In our case, we had to loan out a lot of laptops during the Work From Home shift so our users can VPN into the office from home.
We currently use a combination of PDQ Inventory for computer assets and SnipeIT for license management. However, we didn't have a great way to track "temporarily" loaned out devices to our end users. We ended up tracking everything in a .CSV file manually. While this definitely works, it's not very efficient. For example, if we looked up the computer name in PDQ, we have no reference point of WHO the laptop was checked out to without opening up the CSV.
So, I decided to create a powershell script that uses a CSV backend to create a simple asset checkin and checkout system.
How It Works
This system is actually made up of two scripts: One for checking out the asset, and another for checking the asset back in.
The CheckOut script prompts the IT technician to enter a computer name, asset tag, type of asset, and username who is checking out the item. Then, it fills in a column with the current date. Finally, it adds the data to a new row in the CSV, exports the CSV, and then updates the Active Directory description field to the username who checked out the item. This works great, because now I can check PDQ to see who the laptop was loaned out to, keeping everything in one system.
The CheckIn script works backwards. It prompts the IT technician to enter a computer name (which corresponds to the ComputerName column name). It then adds the current date to the CheckInDate column. This allows you to add data to a a single cell in a CSV.
Create CSV File
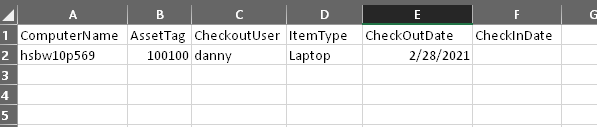
First, open Excel and create a new CSV file with 6 columns. The columns names are:
- ComputerName
- AssetTag
- CheckoutUser
- ItemType
- CheckOutDate
- CheckInDate
Then, save the file somewhere like C:\Scripts\Final\Loaners.csv. Make sure to Save As a .csv, not the default .xlsx.
Loaner Laptop Checkout Script
The variable $Newline has {0},{1},{2} etc. This corresponds to the number of columns in our CSV. Even though I have 6 columns, for the checkout script I am only adding data to the first 5 (not the CheckInDate column). So, I just have {0},{1},{2},{3},{4}. If you have 10 columns, then add 9.
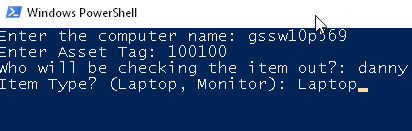
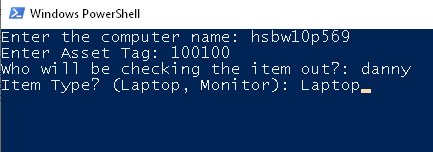
$ComputerName = Read-Host "Enter the computer name" $AssetTag = Read-Host "Enter Asset Tag" $CheckoutUser = Read-Host "Who will be checking the item out?" $ItemType = Read-Host "Item Type? (Laptop, Monitor)" $CheckoutDate = (Get-Date -Format MM/dd/yyyy) $LoanerList = Import-csv C:\Scripts\Final\Loaners.csv -header "ComputerName", "AssetTag", "CheckoutUser", "ItemType", "CheckoutDate" $NewLine = "{0},{1},{2},{3},{4}" -f $ComputerName,$AssetTag,$CheckoutUser,$ItemType,$CheckoutDate $NewLine | add-content -path C:\Scripts\Final\Loaners.csv Set-ADComputer -Identity $ComputerName -Description "Loaned to $CheckOutUser $CheckOutDate"When you run this script, here's what it looks like:
Then, it updates the CSV:
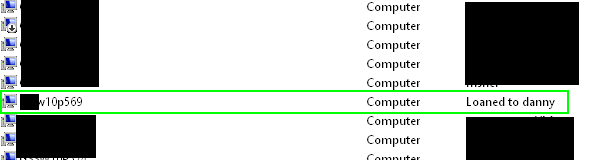
Then, it updates the Description field in active directory, so I can see who it's checked out to. PDQ Inventory picks up that AD Description field, so I can quickly see who it's loaned to there.
Loaner Laptop Checkin Script
The next step is to create a script that allows you to check the device back in by adding the current date to the CheckInDate column of the entered computer name, and then marks the AD description as Available. This allows me to create a PDQ Dynamic Collection of available computers, so I know how many we have available to check out.
$csv = import-csv C:\Scripts\Final\Loaners.csv $ComputerName = Read-Host "Enter computername that is being checked in" $CheckInDate = (Get-Date -Format MM/dd/yyyy) $outputFile = New-Object System.Collections.ArrayList ForEach($row in $csv){ If ("$ComputerName" -eq $row.ComputerName){ Write-Output "Changing CheckInDate to '$CheckInDate'" $row.CheckInDate = $CheckInDate } $outputFile.Add($row) | Out-Null } $outputFile | Export-Csv C:\Scripts\Final\Loaners.csv -NoTypeInformation Set-ADComputer -Identity $ComputerName -Description "Available Loaner"Here's where it updates the CSV based on the computer name I've entered:
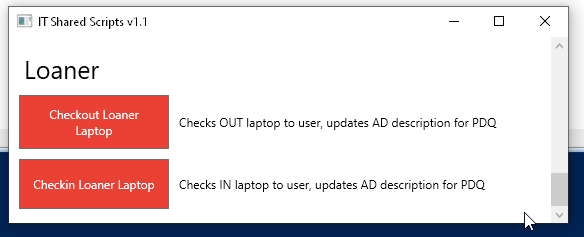
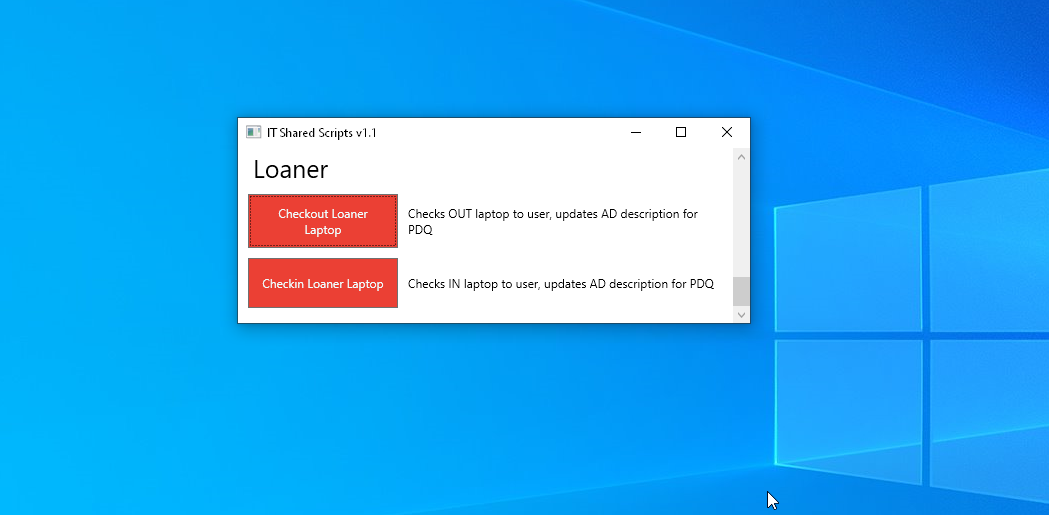
Adding Loaner Scripts to a Powershell Menu
If you'd like to add these two scripts to a simple Powershell Menu GUI like the image above, I have a guide for that as well. My menu has all kinds of commonly used scripts for things like creating a new AD user, sending IT welcome emails, moving computer objects to a different OU, and much more.
Optional Changes
If you decide to put these scripts into a menu, you may notice that the Powershell window stays open after the scripts completes. To make the window automatically close after the script is ran, add this to the last line of each script: ::Exit(1)
If you'd like to CheckIn an asset tag instead of Computer name, then open your 2nd script. Change the variable $ComputerName to $AssetTag and update throughout the script, and then comment out the last line which updates the AD description. Then, you can use this script to checkin non-computer devices, such as monitors, webcams, docking stations, etc. Here's what that script would look like:
$csv = import-csv C:\Scripts\Final\Loaners.csv $AssetTag = Read-Host "Enter asset tag # that is being checked in" $CheckInDate = (Get-Date -Format MM/dd/yyyy) $outputFile = New-Object System.Collections.ArrayList ForEach($row in $csv){ If ("$AssetTag" -eq $row.AssetTag){ Write-Output "Checking Asset in on '$CheckInDate'" $row.CheckInDate = $CheckInDate } $outputFile.Add($row) | Out-Null } $outputFile | Export-Csv C:\Scripts\Final\Loaners.csv -NoTypeInformation #Set-ADComputer -Identity $ComputerName -Description "Available Loaner"Wrapping Up
Hopefully this guides help out, whether you are trying to append data to a CSV in powershell, change value in a single cell with Powershell, update existing value in CSV, select a row, add data to a column in a CSV with powershell, or more generally - just managing CSV files in Powershell.