How to Automatically send IT Welcome emails with Powershell
Whenever a new employee starts at your organization, chances are that you typically send out an email template with all the necessary info they'll need. These include things like how to submit an IT ticket, connect to the VPN, map a printer, or how to setup various accounts and tools.
On my quest to automate sending these welcome emails, I decided to see if I could accomplish this task with Powershell. We have Office 365 at our organization, so for this script to work - we first need to authenticate to Azure, and then authenticate again to send out the email.
The script works by attaching a .pdf and then sending to a target end user.
Create Email Template and Save to folder
First, you'll need to create your welcome email and save it as a .pdf file to a folder. For this example, I am saving it to C:\Scripts\Final and the file is called WelcomeEmail.pdf.
This does work with other file types, like .msg, but I noticed .msg Outlook files don't open by default on Android, so I opted to send a pdf attachment instead.
Powershell Script to Auto Send Welcome Emails
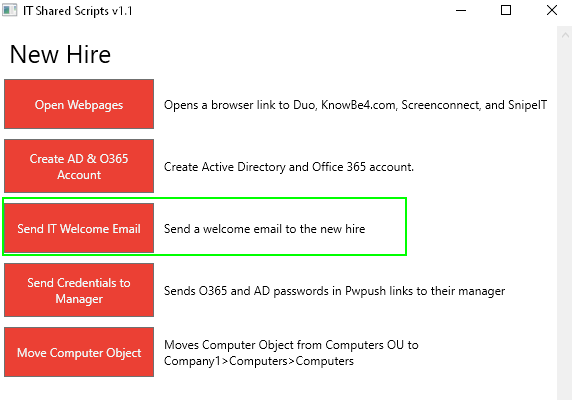
Write-Host -ForegroundColor Black -BackgroundColor Green "Enter O365 credentials to send welcome email." $UserCredential = Get-Credential Write-Host "Send email to who?" -ForegroundColor Black -BackgroundColor Green -NoNewline $EmailAddress = Read-Host $Session = New-PSSession -ConfigurationName Microsoft.Exchange -ConnectionUri https://outlook.office365.com/powershell-liveid/ -Credential $UserCredential -Authentication Basic -AllowRedirection Import-PSSession $Session ## Define the Send-MailMessage parameters $mailParams = @{ SmtpServer = 'smtp.office365.com' Port = '587' # or '25' if not using TLS UseSSL = $true ## or not if using non-TLS Credential = $UserCredential From = 'user@domain.com' To = "$EmailAddress" Subject = "IT Welcome Email $(Get-Date -Format g)" Body = 'Attached is the IT Welcome Email. Please read through this during your first day.' Attachment = 'C:\Scripts\Final\ITWelcome.pdf' DeliveryNotificationOption = 'OnFailure' } ## Send the message Send-MailMessage @mailParams Write-Host -BackgroundColor DarkCyan "Welcome email sent!" Start-Sleep -s 5 [Environment]::Exit(1)If you'd like to create a Powershell GUI Menu to launch your scripts like I have, here's how I set that up. Otherwise, just right-click the .ps1 file and Run With Powershell.
Once I click that button, the script launches. Here's what it looks like:
Optional Additions
The last line of code is ::Exit(1). This just closed the open Powershell window automatically after the script completes so you don't have to click the X in the top right corner.
If you want to delay sending the welcome email, you can do that with this command. This would be used if you are incorporating this into your O365 User creation script and want to wait a few seconds to make sure the mailbox has been created. Start-Sleep -s 30
If you run into any issues sending with SMTP, you may have to check your Office 365 settings for your account to ensure you have enabled the ability to send emails via SMTP.