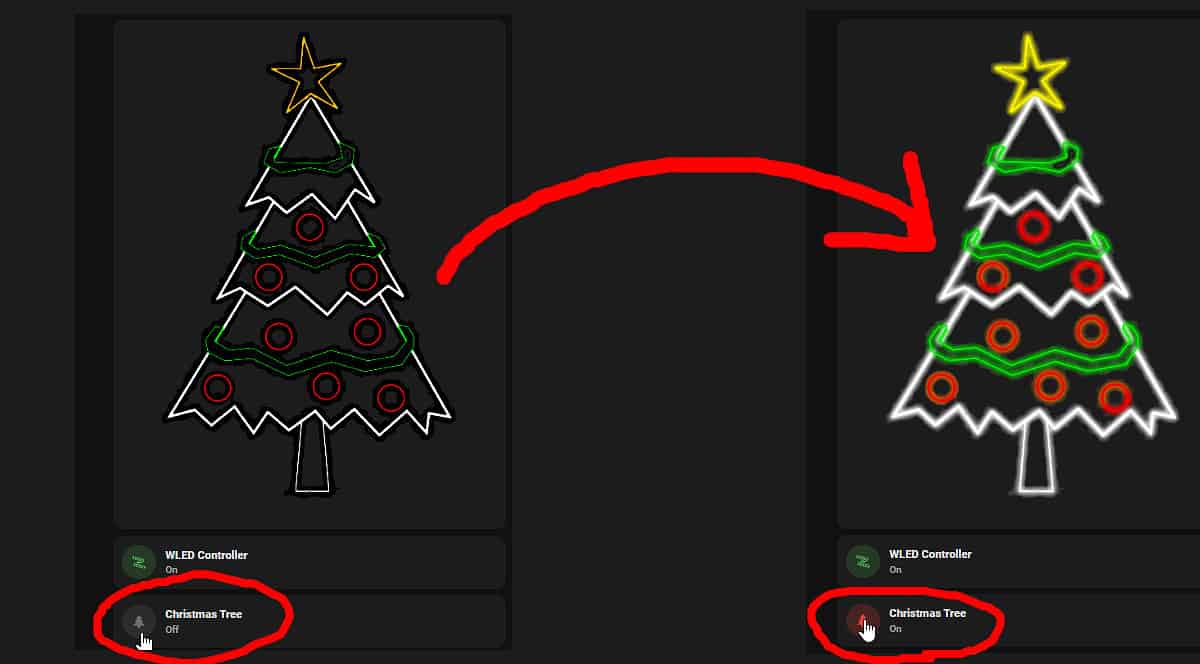
Home Assistant Christmas Tree Card
Follow this guide if you'd like to create a Home Assistant 'Christmas tree' card that "lights up" when the smart plug connected to your tree gets turned on. This is a great way to quickly see at a glance (on one of your Fire tablets running Fully-Kiosk and Wallpanel) if one of your trees are on or off.
No HACS integrations needed for this. Just a smart plug ( I use Sonoff S31 zigbee plugs) and an image you found from Google.
Step 1: Find a Christmas Tree image on Google
Find a suitable image on Google. This looks best if you search for "Christmas tree art", "Christmas tree drawings" or "Christmas tree digital art" instead of using real photos of a tree. You could also use LED strip images, or even take a photo of your tree if you'd like.
Ideally, transparent PNG's would be best. If they aren't transparent, that's OK. I'll show you how to remove the background in the next step.
Step 2: Edit Photo
For this step, you'll need to edit your photo using Photoshop or the free alternative Photopea. I'm using Photopea in this guide.
Go to https://photopea.com in a web browser. Click Open From Computer.
Remove Background
To remove the background, click the Magic Wand tool.
Click your background to highlight it. Then press Delete on your keyboard.
You'll also need to click into any enclosed areas and delete the background from there as well. The magic wand tool may not be perfect (unless the image you find has very defined edges), which is why I recommend finding a transparent .png to begin with.
Adjust Levels
Next, we need to edit the image. We'll be making two versions - a light one, and a dark one. The light copy will be used when the light is turned on, and the dark version will be used when the light is off.
Click Image on the topbar of Photopea. Then click Adjustments > Levels.
A slider will open up. To create the darkened (tree turned off) image, click the black cube and slide to the right.
Then, export the completed image. File > Export As > PNG. Save it with a name like "Christmas-tree-off".
Repeat the process for the "Christmas Tree turned on" image, except grab the white slider and slide to the left. Export and save the 2nd photo as "christmas-tree-on"
Upload images to Home Assistant
File Editor > www folder.
Upload the two photos and make note of the path. If you haven't uploaded images to Home Assistant before, I recommend creating a folder first. You can name it something like "cardimages".
Create Two Conditional Cards (to show if tree is turned on or off)
Next, you need to add two conditional cards. You'll also need the entity name of the smart plug connected to your tree.
Add Card > Conditional.
Tree "Off" Card
In the Conditions tab, enter your Christmas tree plug and set the state to off. Under the Card tab, enter the path /local/cardimages/christmas-tree-off.png
Tree "On" Card
Repeat the process above, except use the state of ON and use the path /local/cardimages/christmas-tree-on.png.
Test it Out
For testing, it's probably going to be easiest to add your smart plug to the dashboard. Then just click the toggle button, and it the image should be replaced depending on the state!
Here's a demo of it in action:


