Install Fully-Kiosk + Wallpanel in Home Assistant for Fire Tablets
In this guide, I'll show you how to add your Kindle Fire to Home Assistant using Fully-Kiosk browser. I'm then using the Wallpanel integration to set a screensaver slideshow, and am using an external motion detector to turn off the screensaver when someone walks up to the tablet.
This setup works really well (much better than trying to use the Kindle's built-in camera) and I highly recommend anyone who uses a Fire tablet to do the same!
Once it's all setup, your setup will look like this:
Let's get started!
Overview
Fully-Kiosk is an application you can install on your Kindle Fire (fireOS) tablet. It allows you to remotely control your Kindle Fire from a web browser or Home Assistant, set a screensaver, or black out the screen. You can also use it to enable "Kiosk-Mode", which can disable touch, buttons, and more with a PIN code.
Although Fully-Kiosk supports motion detection from the Kindle Fire camera to turn off the screensaver, during my testing the motion detection has been pretty unreliable - especially at night or in dark rooms. So, I am only using Fully-Kiosk for the remote administration capability, to set the "Start URL" (The URL that launches automatically your tablet restarts), and for the Home Assistant integration.
I then use Wallpanel to configure the slideshow and have placed an Aeotec Motion Sensor near the tablet. Whenever I walk up to the tablet, motion is detected by the external sensor, and it turns off the Wallpanel screensaver.
Don't worry - I'm including all of the settings I use in Fully-Kiosk and Wallpanel below, so if you follow this guide exactly, you too can a tablet that turns the screen on or off when motion is detected.
Step 1: Install Fully-Kiosk on Kindle Fire
There's a lot of great guides out there showing you how to install the .apk file onto your Kindle Fire, so I won't be going over that here. I followed along with this video.
Fully-Kiosk is only $8 as a one-time cost per device.
Step 2: Enable Remote Administration
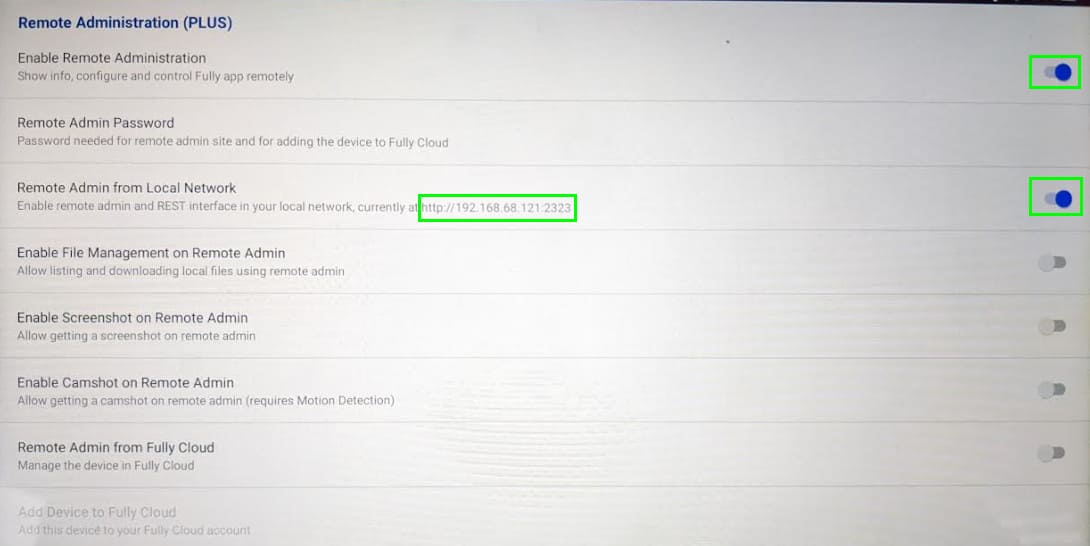
After you purchase and activate your license, the first thing you should do is enable Remote Administration (Launch Fully-Kiosk on the tablet > swipe from the left > Settings > Remote Administration.)
- Toggle ON "Enable Remote Administration" and then set a password.
- Toggle ON "Remote Admin from local network". This will allow you to manage the Fully-Kiosk settings from your web browser instead of the tablet. An IP address on that screen will show you how to access the remote administration webpage.
3. Launch Remote Administration from web browser
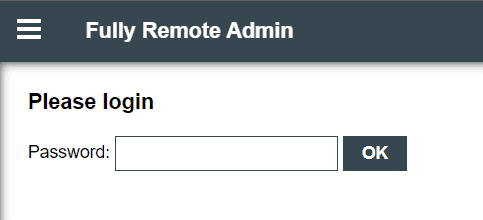
Next, go to the URL from the "Remote Admin from Local Network" from your computer. For me, that is 192.168.68.121:2323
Type the password you created for Fully-Kiosk:
Step 4: Configure Settings
Next, you'll want to configure some of the settings. I kept almost everything default except for what I changed below.
Web Content Settings
- Start URL:Set this to a Home Assistant View that you want to load everytime your Fire tablet restarts or Fully-Kiosk is launched (i.e. - http://192.168.68.124:8123/lovelace/firetablet)
- Username & Password is recommended
Web Browsing Settings
- Enable Pull to Refresh: Toggle ON
Advanced Web Settings
- If "Keep Screen On while in Fullscreen Mode" is ON, toggle OFF
Tools & Appearance
- Everything is toggled off
Screensaver
- Screensaver Timer: Set to 0 (This disables Fully-Kiosks' screensaver. Remember: We are using Wallpanel to manage the screensaver.) The rest of the values and options here should be disabled or left default.
Device Management
- Keep Screen On: Toggle ON
- Keep Screen On (Advanced): Toggle ON
- Screen Orientation: Horizontal
- Screen Off Timer: 0
- Launch on Boot: Toggle ON
Power Settings
- Toggle off everything
Kiosk Mode
Some of the options can or should be enabled after you initially set everything up. For example, you probably don't want to lock the tablet or set a kiosk PIN during this initial setup or you'll constantly be entering the pin.
- Enable Kiosk Mode: Toggle OFF
Motion Detection
- All settings should be toggled OFF (Since we aren't using motion detection from the fire tablet camera)
Device Motion Detection
- Toggle OFF everything
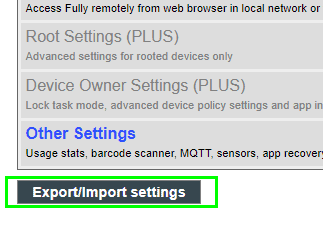
Export/Import Settings
Once all the settings changes have been made, it's a good idea to export them as a backup. If you ever make changes that cause unexpected behavior, you can always restore your settings.
Step 5: Install Wallpanel Integration from HACS
Launch Home Assistant, then click HACS from your sidebar. Search for the "Wallpanel" integration and install it.
Once installed, reboot Home Assistant from Settings > System > Restart. Once HA comes back up, navigate to one of your dashboards.
Click the 3 dots in top right corner > Edit > Raw Configuration Editor. Paste the YAML at the TOP just below your resources. (If you place it at the bottom, it won't load.)
There are a LOT of options you can configure, but I've bolded the important ones below.
- enabled_on_tabs: Sets the screensaver for a specific Home Assistant "View" dashboard
- idle_time: 0
- This disables the screensaver from starting automatically on it's own.
- We'll be controlling when to turn it on/off from an Automation instead (Step 6-8)
input_boolean.firescreensaver. In the next step, we'll be creating that entity. This allows us to toggle on/off the screensaver, which will later be used in an automation.The rest of the settings can be left at default for now.
Note: If you don't want an animated card showing the weather in front of the image, remove everything in red. If do want to include the weather card, install Lovelace animated weather card from HACS and replace the weather.my_ecobee with your own weather entity.
wallpanel: enabled: true enabled_on_tabs: - firetablet debug: false hide_toolbar: true hide_sidebar: true fullscreen: false idle_time: 0 keep_screen_on_time: 86400 black_screen_after_time: 7200 control_reactivation_time: 1 screensaver_stop_navigation_path: /lovelace/firetablet image_url: http://picsum.photos/${width}/${height}?random=${timestamp} image_fit: cover image_list_update_interval: 3600 image_order: sorted image_excludes: [] show_exif_info: false fetch_address_data: true exif_info_template: >- ${address.town|address.city!prefix=!suffix= // }${DateTimeOriginal!options=year:numeric,month:long} screensaver_entity: input_boolean.firescreensaver info_animation_duration_x: 30 info_animation_duration_y: 11 info_animation_timing_function_x: ease-in-out info_animation_timing_function_y: ease-in-out info_move_pattern: random info_move_interval: 0 info_move_fade_duration: 2 cards: - type: vertical-stack cards: - type: custom:weather-card details: true forecast: true hourly_forecast: false name: Weather entity: weather.my_ecobee current: true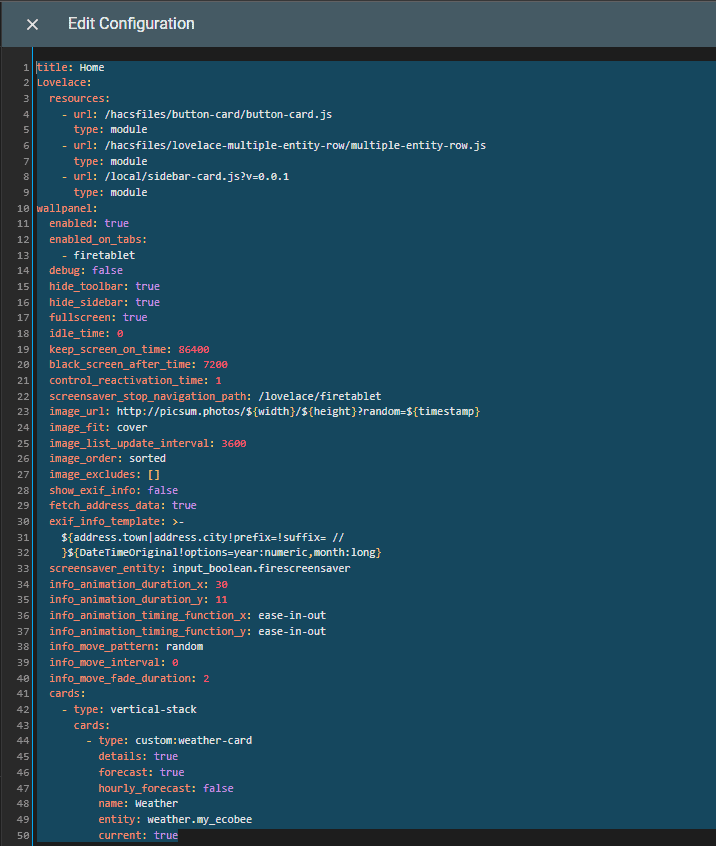
Step 6: Create Toggle Screensaver entity
Like I mentioned earlier, we set the idle_time to 0. So at this point, the screensaver will never start on it's own.
But because we set the screensaver_entity: to input_boolean.firescreensaver in the Wallpanel config, we can instead use that to toggle the screensaver on or off.
We just need to create that screensaver entity now.
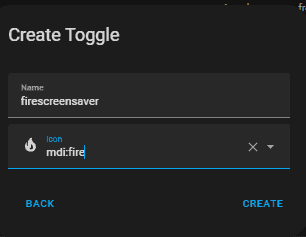
Settings > Devices & Services > Helpers tab.
Create Helper > Toggle > Name it "firescreensaver"
As you can see, creating that helper now gives us the entity input_boolean.firescreensaver which matches the wallpanel config name. If you name your helper something different, make sure to update the Wallpanel config from Step 5.
Step 7: Add Motion Detector to Home Assistant
Since we aren't the Fire tablet's camera, you'll need an external motion sensor. I'm using an Aeotec SmartThings Motion Sensor.
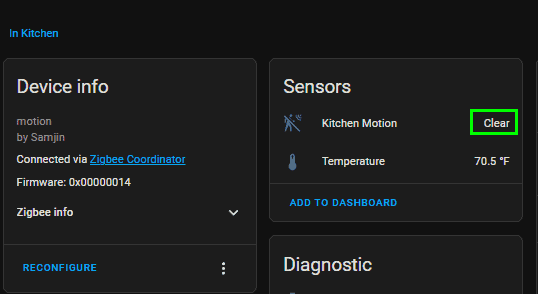
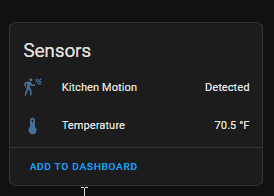
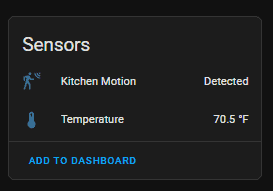
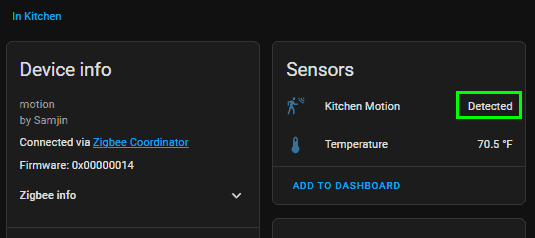
Add that to Home Assistant like normal. Once added, you should see a few of the entities like this. Notice the two state names - Clear and Detected. This is what we're going to use in the automation that turns on or off the screensaver.
Step 8: Create Automation to toggle ON/OFF screensaver when motion is detected
For this motion sensor, it takes about 20 seconds for the state to change from Detected to Clear. So if I set the seconds: value to 5, it will actually turn the screensaver on after 25 seconds (20 for state change + 5)
This automation basically states:
- If Kitchen Motion detector detects motion, then toggle off the firescreensaver entity (turns off the screensaver)
- If Kitchen Motion detector stops detecting motion after 25 seconds, then toggle on the firescreensaver (starts screensaver)
Note: Although the states are "clear" and "detected", Home Assistant changes these to ON and OFF when you save the automation. Just something to be aware of.
Settings > Automations. Create a new automation > Edit in YAML > Paste the code below.
- Blue: Binary sensor name for your external motion detector
- Green: Time until screensaver starts
- Purple: This is the name of the helper we created in Step 6
alias: If motion detected, turn off wallboard screensaver description: " trigger: - platform: state entity_id: - binary_sensor.kitchen_motion from: "off" to: "on" id: motion-detected - platform: state entity_id: - binary_sensor.kitchen_motion from: "on" to: "off" for: hours: 0 minutes: 0 seconds: 5 id: motion-cleared condition: [] action: - choose: - conditions: - condition: trigger id: motion-detected sequence: - service: input_boolean.turn_off data: {} target: entity_id: input_boolean.firescreensaver - conditions: - condition: trigger id: motion-cleared sequence: - service: input_boolean.turn_on data: {} target: entity_id: input_boolean.firescreensaver mode: singleThat's it! Your tablet should perform exactly as my demo video at the top of this tutorial does.
Wrapping Up
Hopefully you found this guide useful and simple enough to follow! I spent a lot of time tinkering with this setup. I first tried using Fully-Kiosk's "motion detection" setting, but it didn't always trigger. I also tried settings idle_time to 30 in the Wallpanel config so the screensaver would automatically start, but then it wouldn't always turn off when motion was detected. For the automation, I first tried using "If motion detector starts detecting motion" and "if motion detector stops using motion, but it also didn't always trigger. So that's why I'm using State change for the trigger which always work.
Good luck! If you run into any issues or you got it working by following my guide, let others know in the comments!