Automatically Turn Off 3D Printer After Print Completes
In this guide, I'm going to show you how to create a simple automation that will turn off your 3D printer once a print job has completed.
Not only is this super handy for energy/power consumption, but it's also a safety feature - especially if you tend to print things overnight or when you are not home. There's no reason to keep your 3D printer running with the bed and nozzle heated if you aren't there to monitor it!
The way I'm accomplishing this is by:
- Waiting 5 minutes after a print has completed
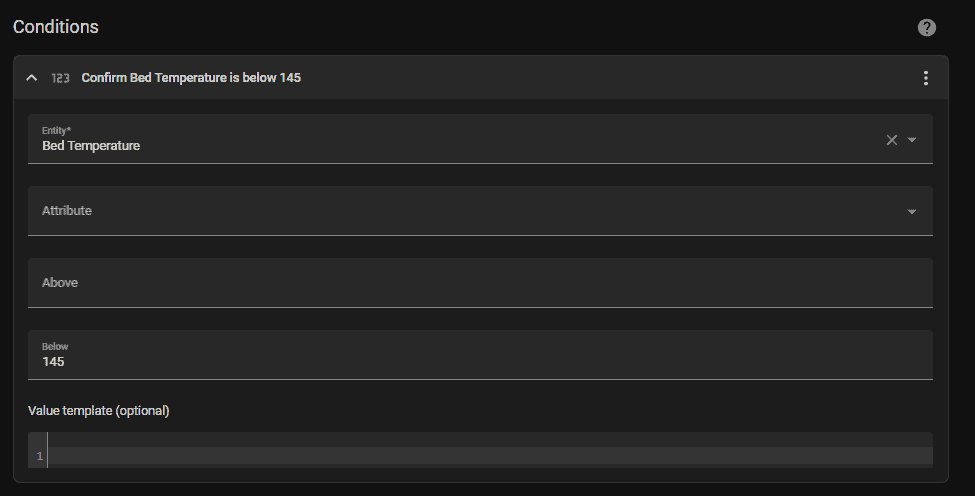
- Checking if the bed temperature hits a certain value (i.e - 145° Celsius, when it's configured to print at 60° Celsius)
Equipment List
I'm going to assume you already own a 3D printer, have an Octoprint server up and running, & have it integrated into Home Assistant. The only things you need for this to work are:
- A 3D printer (I'm using a Creality Ender 3 S1)
- Smart Plug (I'm using a Sonoff S31 Lite zigbee smart plug)
- Octoprint server. I'm running Octoprint on a Raspberry Pi 3B+
- Octoprint integrated with Home Assistant
How It Works
The setup for this is simple. For the majority of 3D printer owner; you probably have all of this setup already.
You basically flip the power switch on the 3D printer to ON and keep that switch on forever. Use the smart plug to turn it off when a print completes.
View Octoprint Entities in Home Assistant
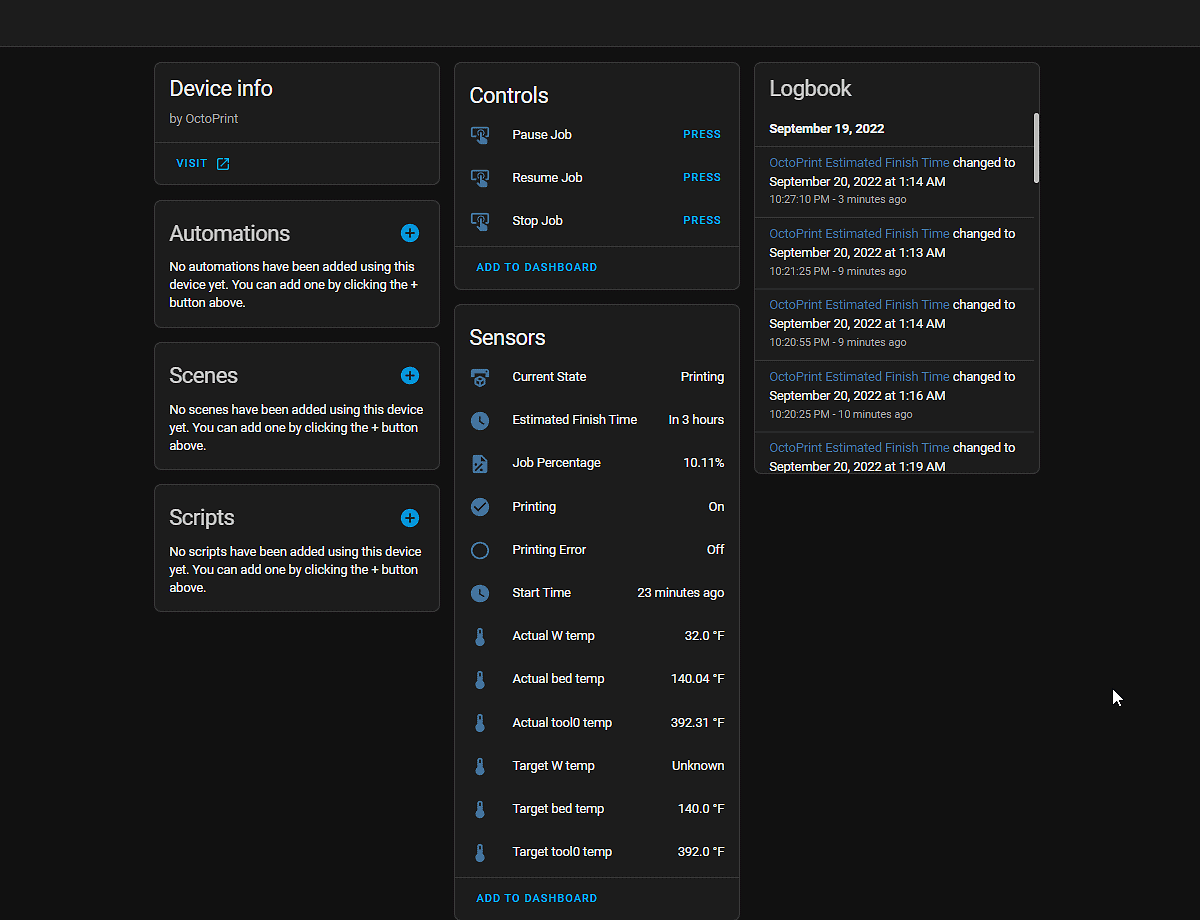
The first thing you'll want to do is view the list of available Octoprint entities in Home Assistant.
Below is an image of what is created with the default Octoprint Integration (not the MQTT Octoprint setup).
The first thing I noticed is that Home Assistant shows temperatures in Fahrenheit, but in the Octoprint UI - everything is displayed in Celsius. Celsius seems to be the default temperature used by every guide and post online, as well as most slicers/slicing software like Cura, so the first thing you should do is change the temperature output to display the values in Celsius instead of Fahrenheit.
For the majority of my prints (as well as the settings I configure in Cura), I usually set my temperatures as follows:
- Extruder Nozzle Temp: 200° C
- Bed/Build Plate temp: 60° C
Customize Temperatures from F° to C°
Since I am writing this guide in September of 2022, a lot has changed in Home Assistant.
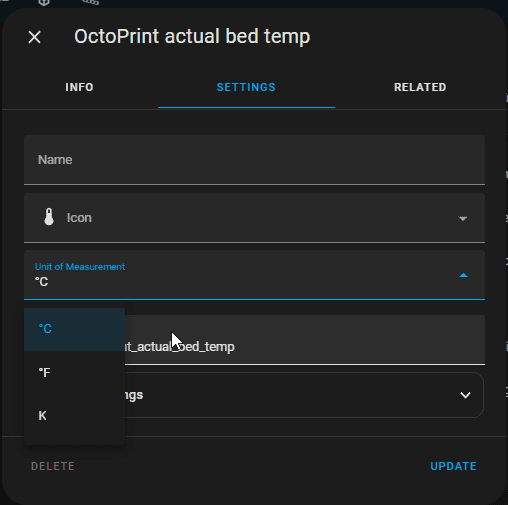
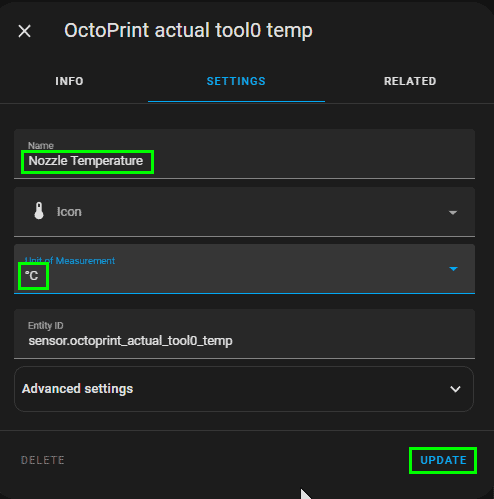
You could create custom template sensors to display the values in Celsius. You could even edit the customize.yaml file like some posts in the HA Community Forums suggest. However, the much easier option is to simply edit the "unit of measurement" value in the entity itself through the settings.
Like I mentioned in the intro, we are checking the bed temperature - if it hits a certain temperature, turn off the printer (more specifically, turning off the smart plug).
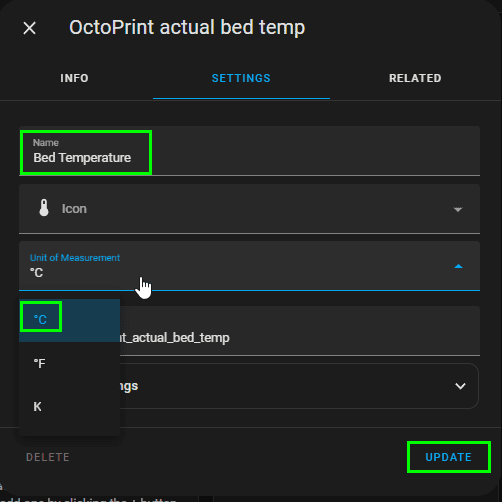
However, if you'd like to check for both the nozzle temperature & bed temperature, you can edit the unit of measurement values of both and use both in your Home Assistant automation condition. It's also a good idea to give your bed/nozzle entities a useful name (if you haven't already).
Settings > Devices & Services > Click Device under the Octoprint integration.
Under Sensors, select Actual Bed Temp and Actual tool0 temp. These correlate to the build plate/nozzle temps.
Click into each of those separately. Then, click the Settings tab and change the Unit of Measurement to Celsius. Name each of these while you are in there.
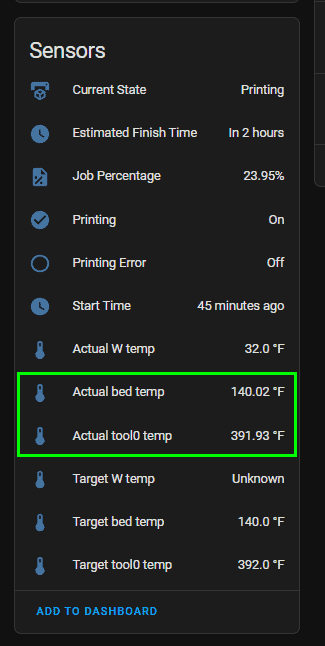
You should now see that it reports both temperatures in Celsius - same as what Octoprint/Cura displays:
Automation to Turn Off 3D Printer When A Print Job Completes
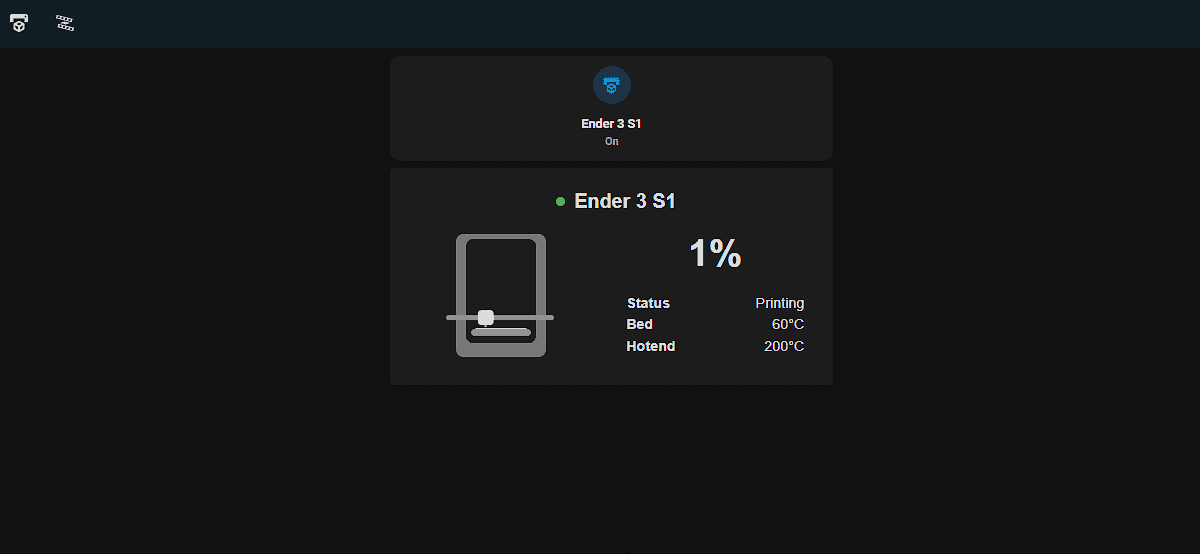
When Octoprint is added to Home Assistant, the state of your 3D printer is always "Operational". When it starts printing, the state changes to "Printing".
The idea behind this automation is that the your 3D printer bed will start to cool down after a print is completed. This is a default behavior when running a 3D printer. Home Assistant will then detect once it hits a certain threshold (145° C), and then turn off the connected smart plug.
So here's how I've setup my automation:
Create a new automation by going to Settings > Automations & Scenes.
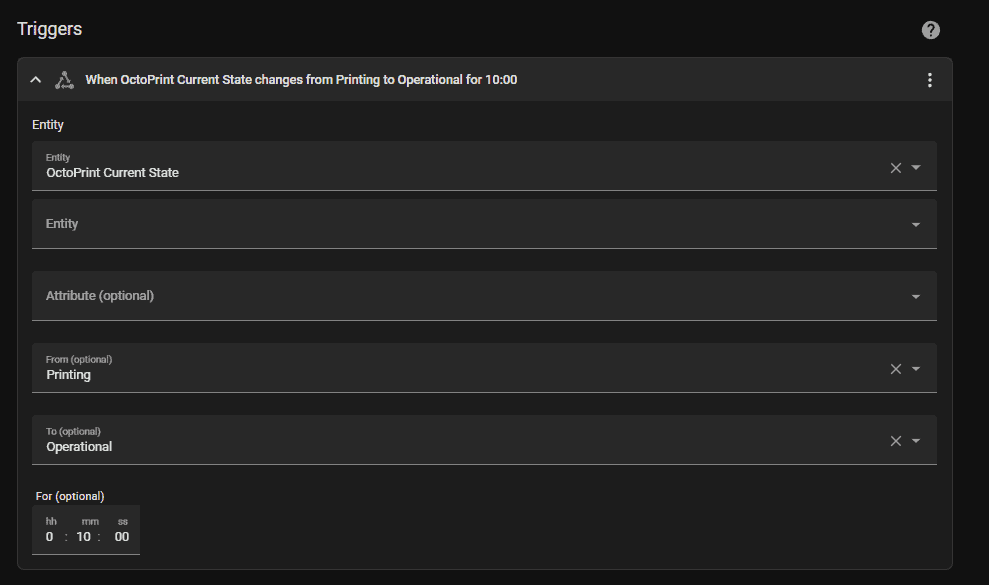
- Trigger: When state changes from Printing to Operational for 5 minutes
- Condition: When temperature reaches 145 degrees Celsius
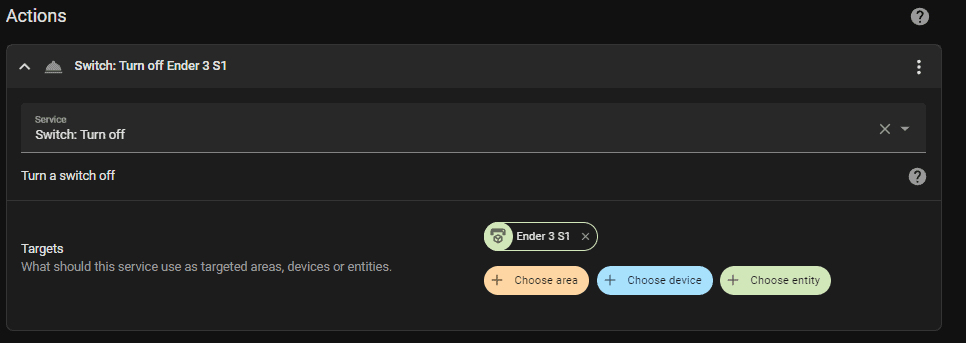
- Action: Call-Service to
switch.turn_offand select the smart plug
Basically, the automation says once the printer goes from a state of Printing back to the default Operational state, and the bed temperature cools down to 145° C, then turn off the printer.
Here's the full YAML if you just want to paste this into an automation. You'll only need to change out the entity name of the smart plug connected to your 3D printer.
alias: Turn Off 3D Printer After Print Completes description: " trigger: - platform: state entity_id: - sensor.octoprint_current_state from: Printing to: Operational for: hours: 0 minutes: 10 seconds: 0 condition: - condition: numeric_state entity_id: sensor.octoprint_actual_bed_temp below: 145 action: - service: switch.turn_off data: {} target: entity_id: switch.ender3_s1 mode: singleWrapping Up
That's really all there is to it! There's a bunch of different ways you could set up this automation, but I found that by checking for both the printer state as well as the bed temperature, it eliminates any potential faults. For example, if I created an automation that only checked for printer state, it may shut off if I'm simply trying to calibrate how level the print bed is when printing a very small test print.