SmartThings Garage Door Opener integration with MyQ
While smart garage door openers are already "smart", there's always room for improvement. For example, wouldn't it be nice to see if your garage was open from within the SmartThings app? Talk about the ultimate SmartThings garage door opener!
Believe it or not, you can! I had to do some digging, but eventually, I found a few different methods to open and close your garage door from within SmartThings.
You likely open the SmartThings app multiple times a day anyway, so this is a great way to keep tabs on your house without having to open up a separate app.
Before I start: In this guide, I'm going to show you how to connect a MyQ device to my Aeotec SmartThings hub. It was the cheapest way to make my "dumb" 12-year-old garage door opener "smart" without replacing it entirely. This device is fantastic and works with just about any garage door manufacturer, allowing you to control your garage door over wifi.
Sidenote: I've been using it for the last 2 years without any issues at all and highly recommend it. Even though I've had the MyQ Chamberlain device setup for years, I recently added it to my SmartThings ecosystem and thought I'd document the process for anyone interested.
Equipment List:
You will need the following items before you get started:
Is MyQ Compatible with SmartThings?
A commonly asked question is whether or not MyQ works with SmartThings. The answer is yes and no.
MyQ doesn't natively work with SmartThings, which basically means you can't just add a MyQ garage door opener as a new device within the new SmartThings app.
However, there are some third-party ways to integrate it, which is what I'm going to show you how to do in this guide.
Advantages of a SmartThings Garage Door Opener
There are several advantages of integrating SmartThings and MyQ together. After reading through this article, decide for yourself if it's worth your time and money to integrate the two. It takes about 15 minutes to setup from start to finish.
Open and Close the Garage Door from the App
The first is obviously being able to open and control your garage door from within the SmartThings app.
No more opening up the MyQ app!
View Garage Door Status at a Glance
There's a good chance that you open the SmartThings app multiple times a day anyway. Setting this up allows you to quickly check your garage door status without needing to open a second app.
Automations
Have you ever forgotten to close the garage door after crawling into bed? Do you leave for work in the morning through the garage?
Then you should definitely consider setting up some awesome SmartThings automations! Here are a few automations I use. Hopefully, it inspires you to create your own.
- Send a notification or text if the garage door sensor status is OPEN at 10 pm
- Automatically close garage door at 9:30 pm
- If I'm at home, then open the garage door at 7 am (Before I leave for work)
- If the weather is rainy, then close the garage door.
Getting Started
This guide assumes that your SmartThings hub is already set up, MyQ has been connected to your wifi, and your multipurpose sensor has been added to your home. I highly recommend adding your multipurpose sensor to SmartThings, mounting it to the garage door, and ensuring the tilt sensor works correctly before continuing.
As of writing this in September 2020, I could only find two working ways to get SmartThings working with MyQ: MyQ Lite or using this SimpleCommands script.
I attempted the SimpleCommands setup first but was unsuccessful, so I attempted the MyQ Lite route which was a breeze in comparison.
For this guide, I'm going to show you how to install MyLite via the community installer method. The Community Installer is a script that allows you to download the most popular smart apps by simply searching for them, rather than installing each of them manually.
Step 1: Add Multipurpose to SmartThings
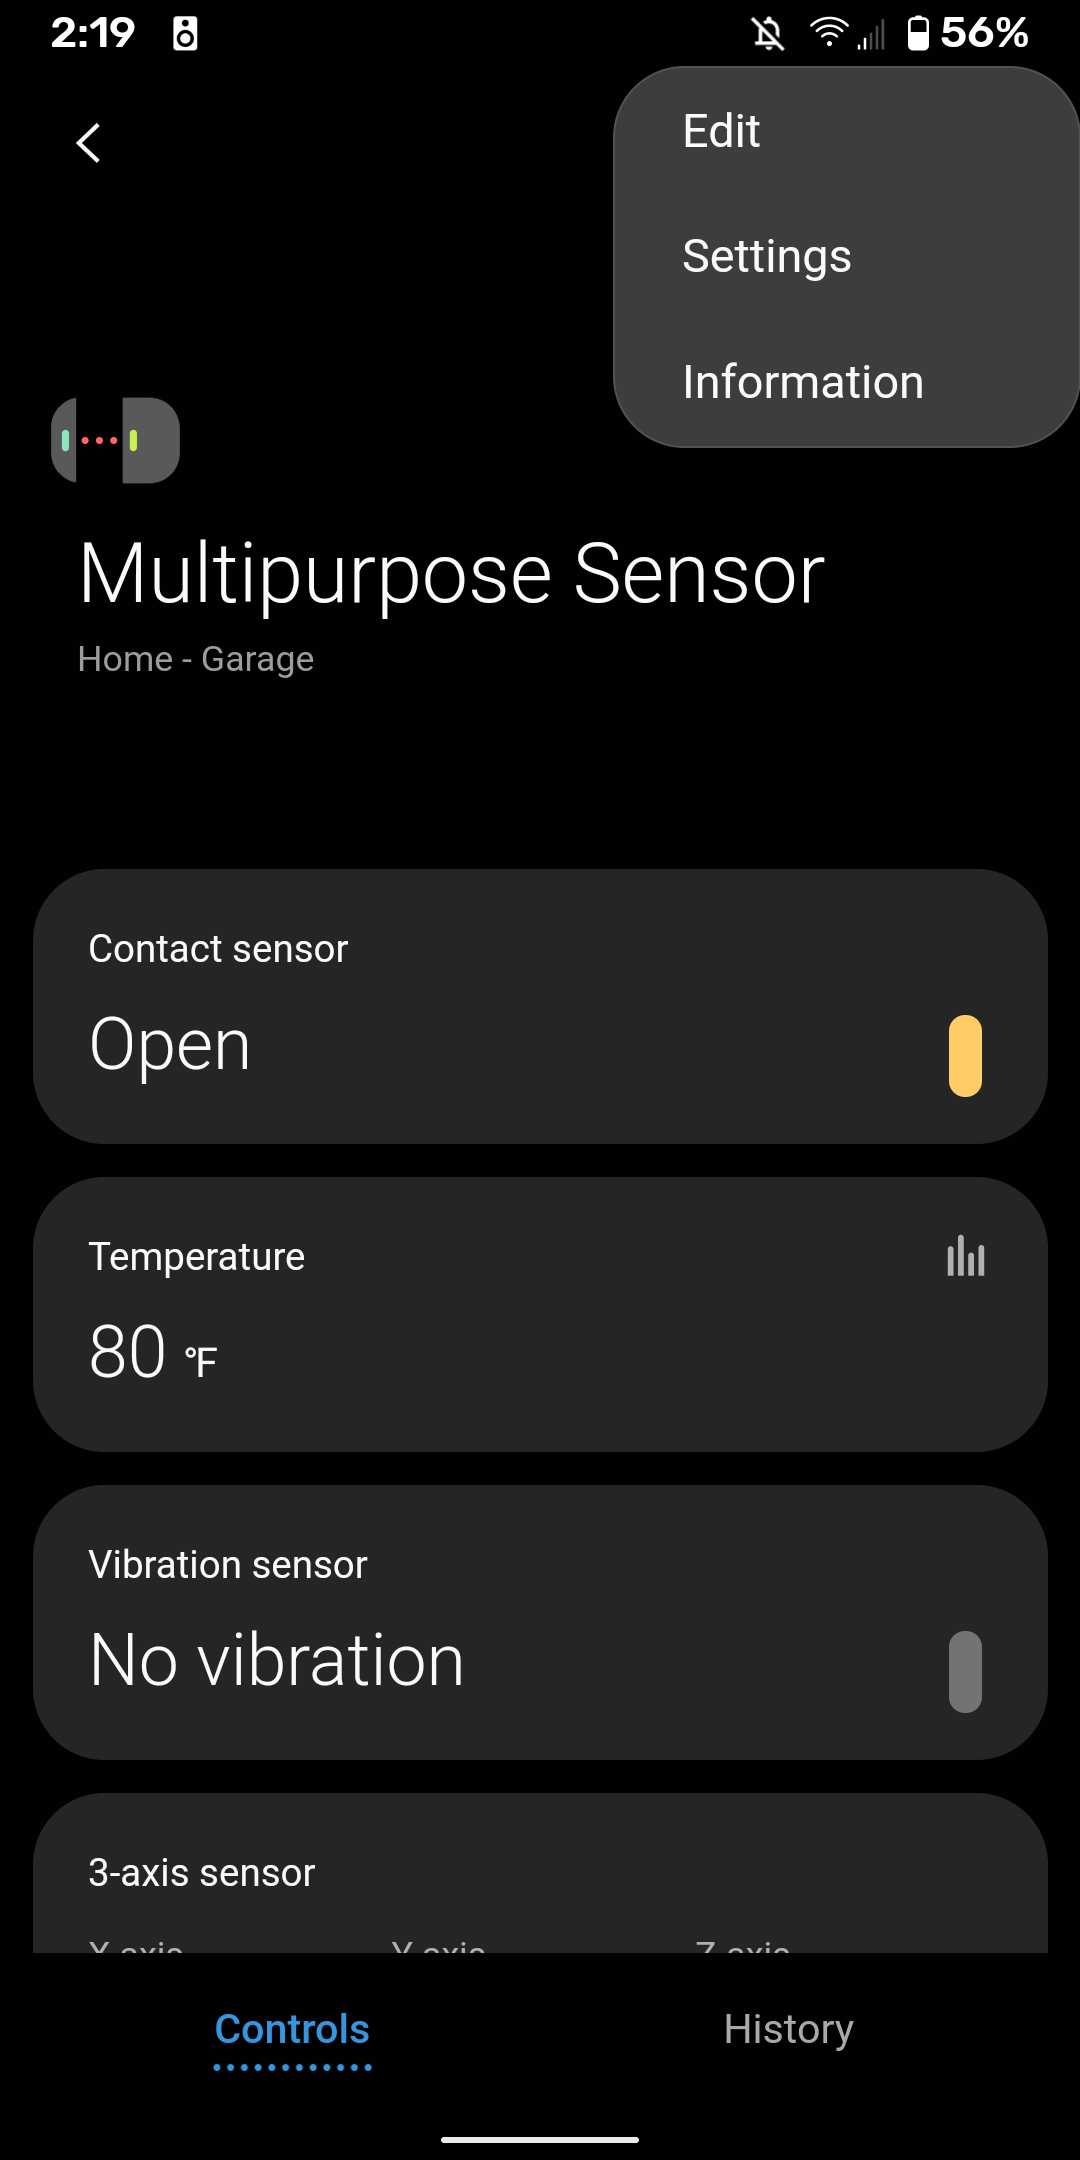
Add your multipurpose sensor to your SmartThings hub just like you would any other SmartThings device. Name it "Garage Tilt Sensor" or something similar. (FYI - mine is called Multipurpose Sensor for the rest of this guide)
Click into the sensor to edit it. Then, click the 3 dots in the top right corner to get to Settings.
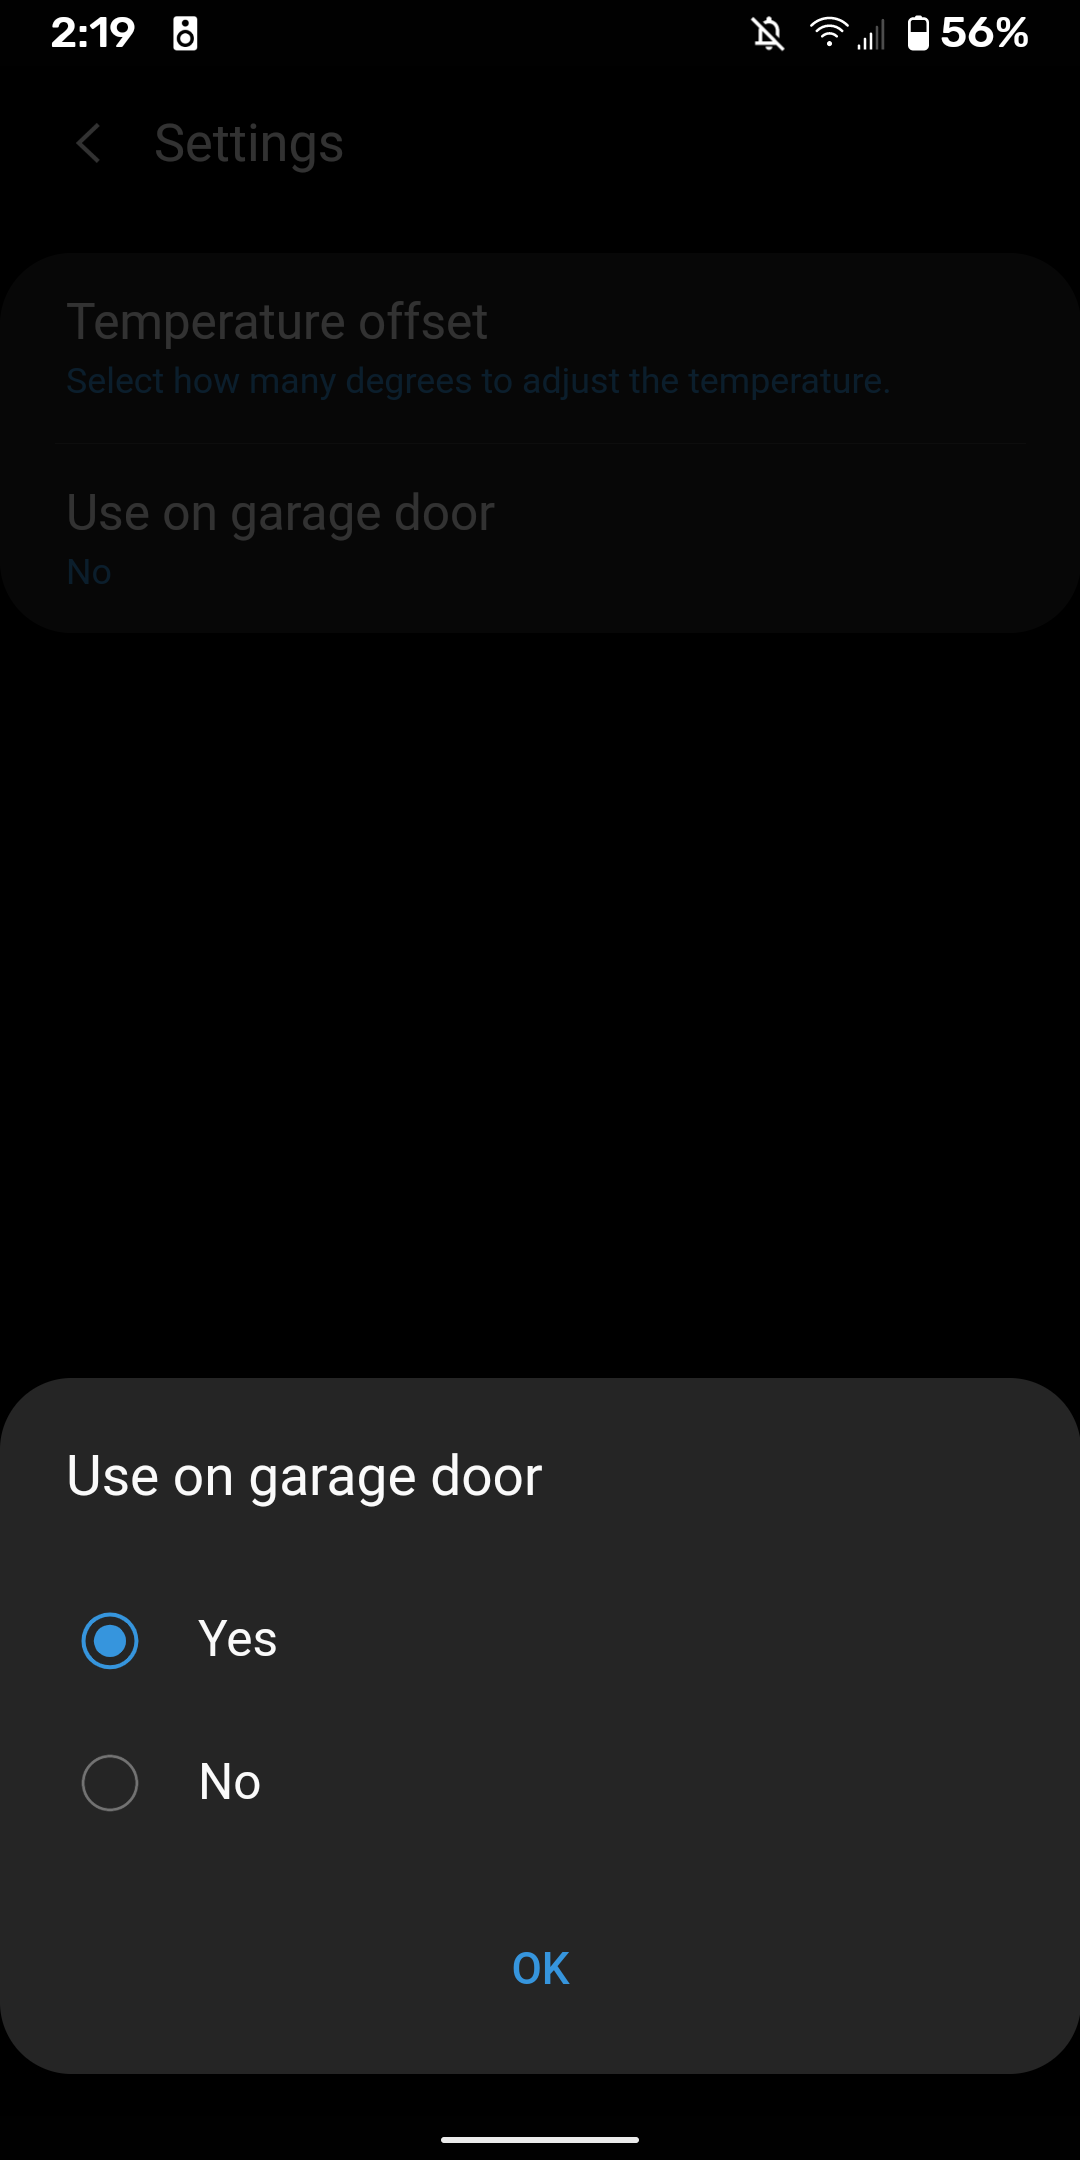
Change the "use on garage door" option to Yes. This enables the "tilt sensor" capabilities (instead of replying on the sensor magnet to determine if a door is opened or closed).
Optional: You can now move the sensor to your Garage "room" or hide it via SmartThings.
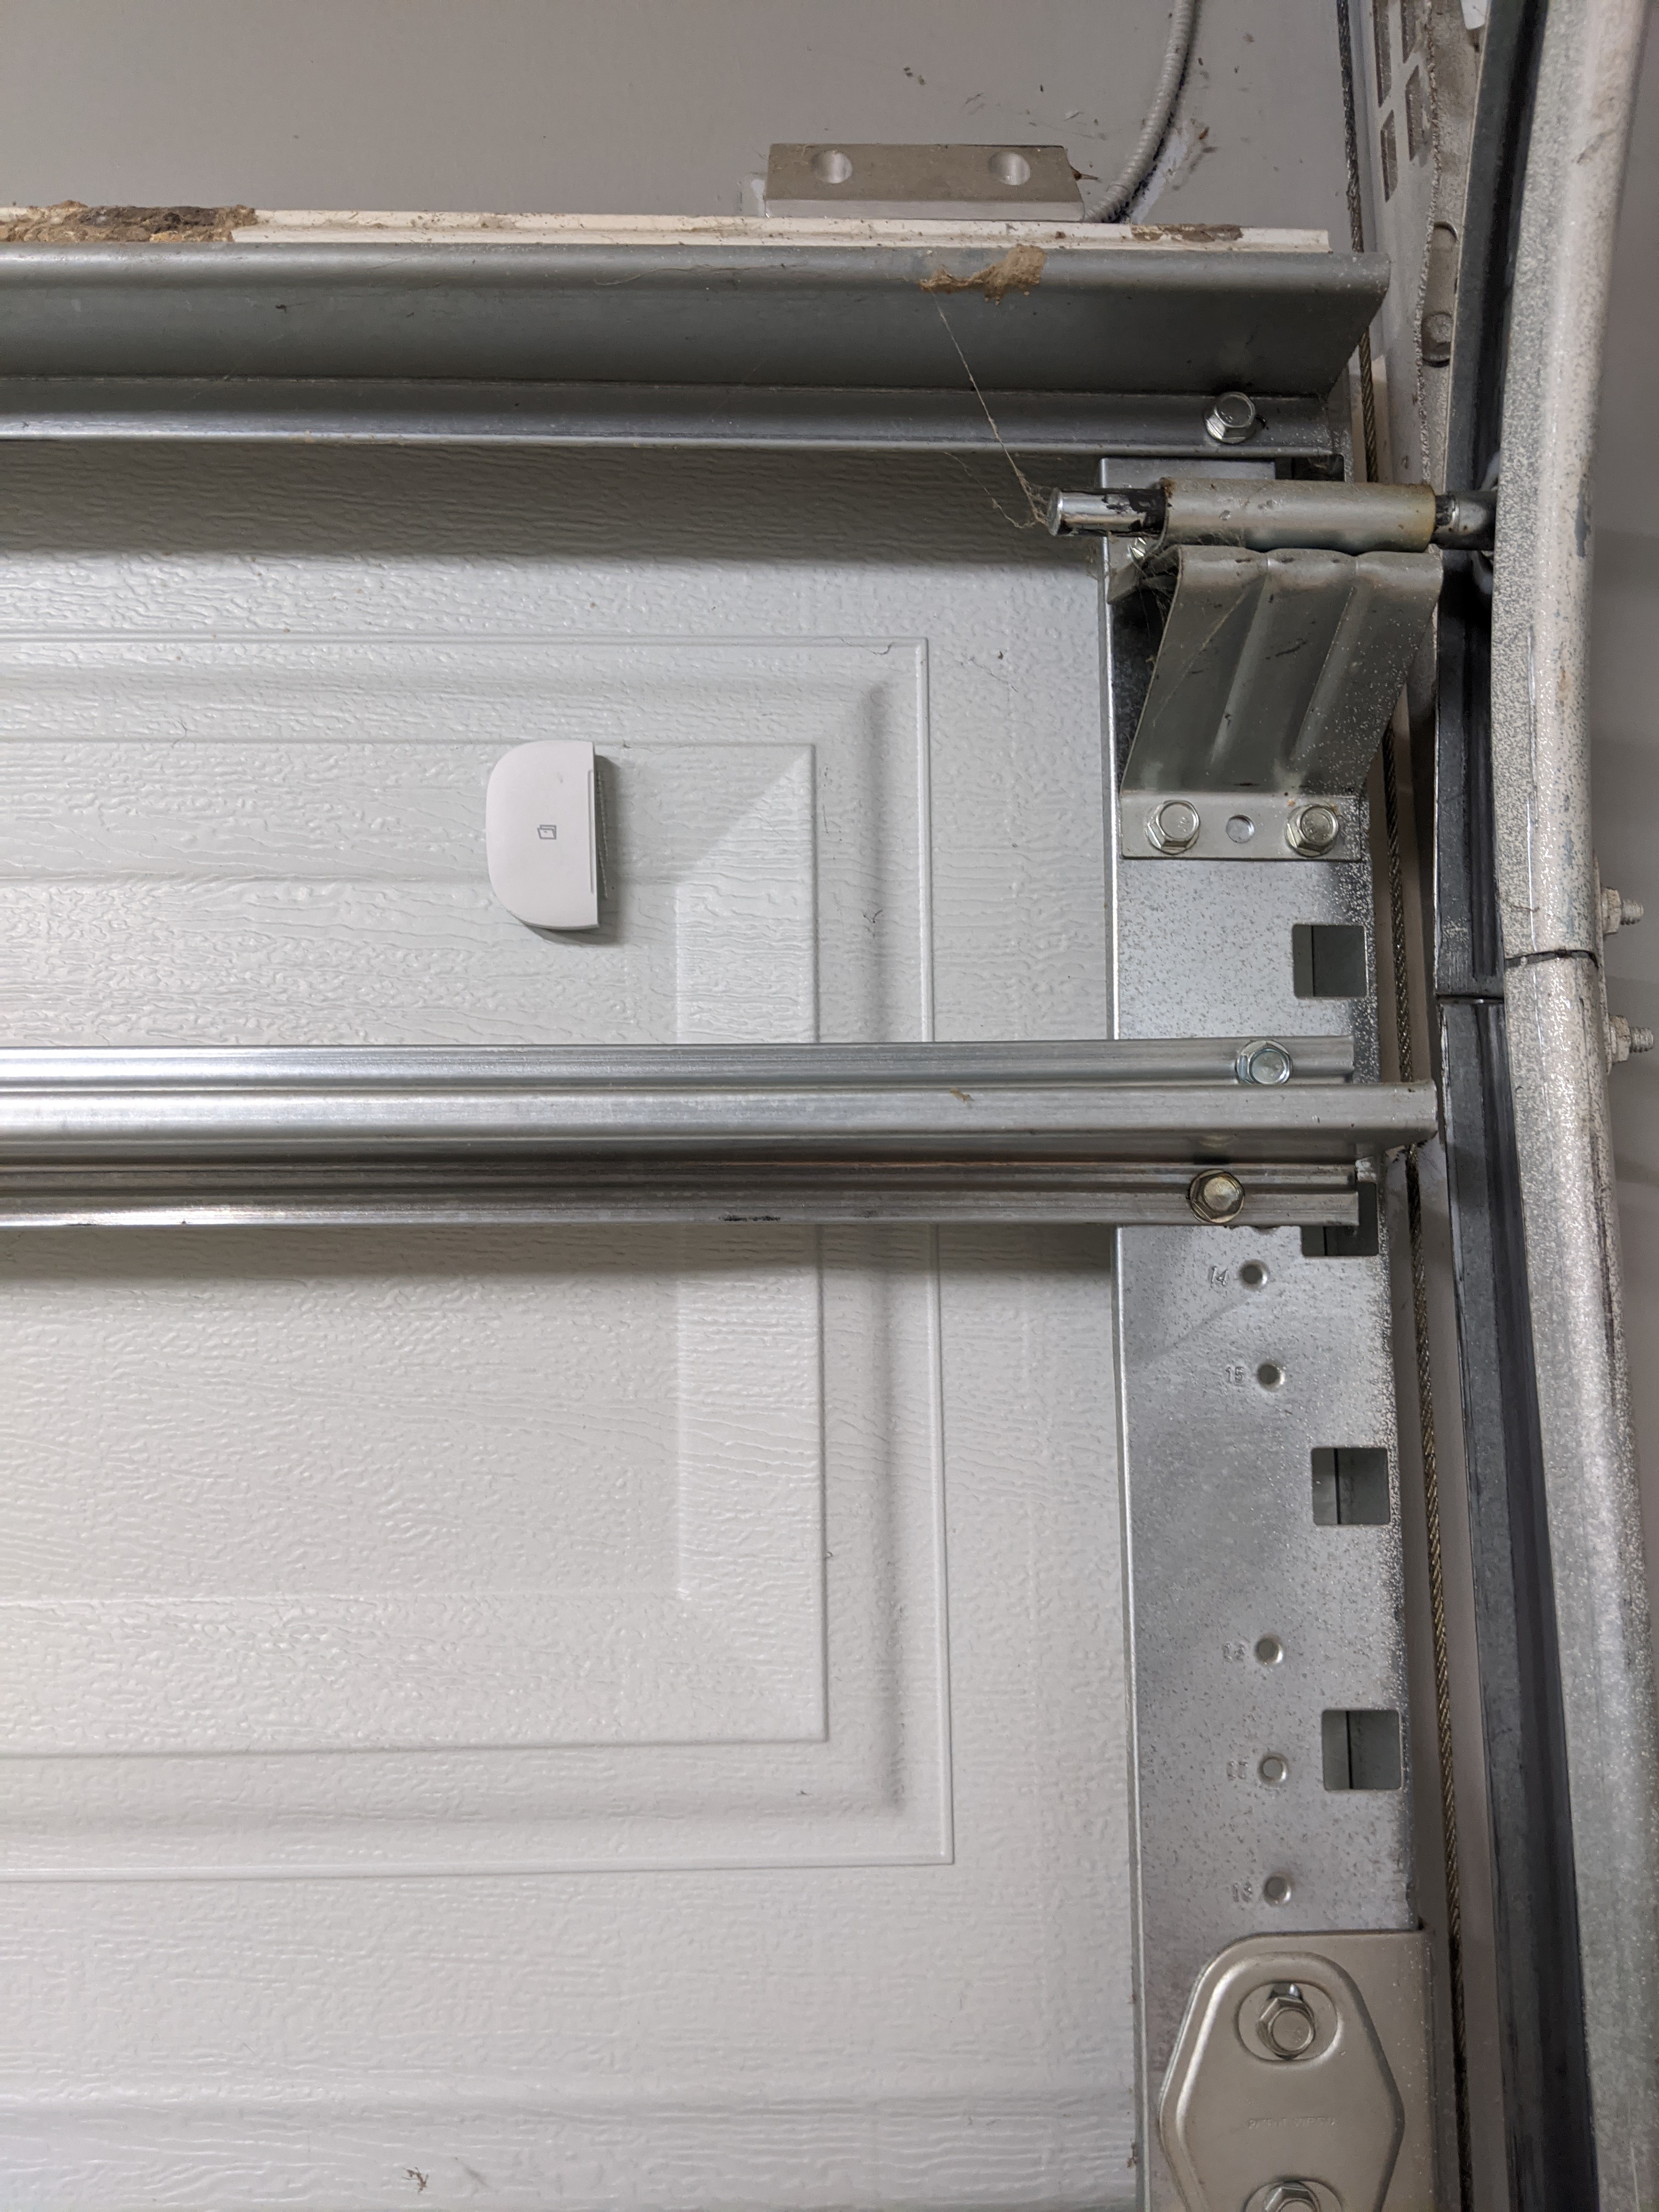
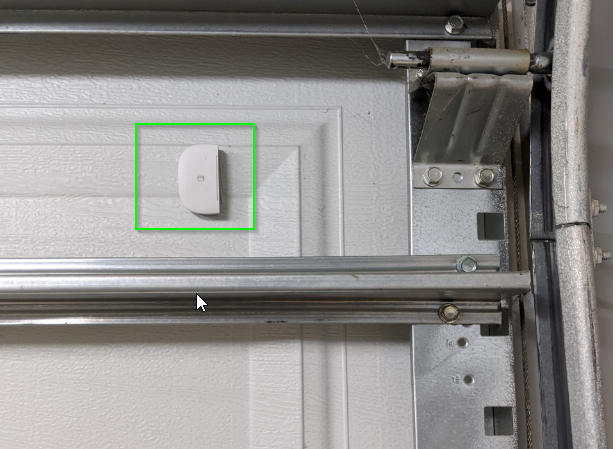
How To Mount SmartThings Sensor To Garage Door
Because this sensor acts as a tilt sensor, you don't need the magnet portion at all anymore (if using the SmartThings Multipurpose Sensor). Store the smaller magnetic piece somewhere safe; you may repurpose this sensor or move houses at some point.
After much trial and error, I determined that the best place to mount the sensor is on one of the top panels, flat side facing the wall. This is because the top panel "curves" the most when rolled up towards your ceiling, which triggers the open/closed much better than any other panel.
Step 2: Add Community Installer to SmartThings SmartApp
If you already have the community installer configured into SmartThings, skip to Step 5.
- Log into your SmartThings IDE URL: https://account.smartthings.com/ (This will automatically redirect to you log in to a URL like this https://graph-na04-useast2.api.smartthings.com/ )
- Copy everything on this page to your clipboard. This is the raw code for the Community Installer: https://raw.githubusercontent.com/tonesto7/st-community-installer/master/smartapps/tonesto7/st-community-installer.src/st-community-installer.groovy
- Go back to your SmartThings IDE URL > My SmartApps tab > New SmartApp:
4. Click the From Code tab, then paste in that code. Finally, click Create.
Step 3: Enable the Community Installer
Click My SmartApps. You should now see the new ST-Community-Installer smartapp which means it installed correctly.
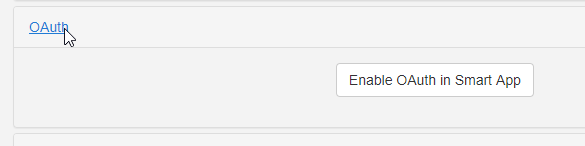
Click App Settings. Scroll to the bottom and find the OAuth section. Enable OAuth in Smart App and click Update.
Click Publish > For Me.
Step 4: Add Community Installer to Phone
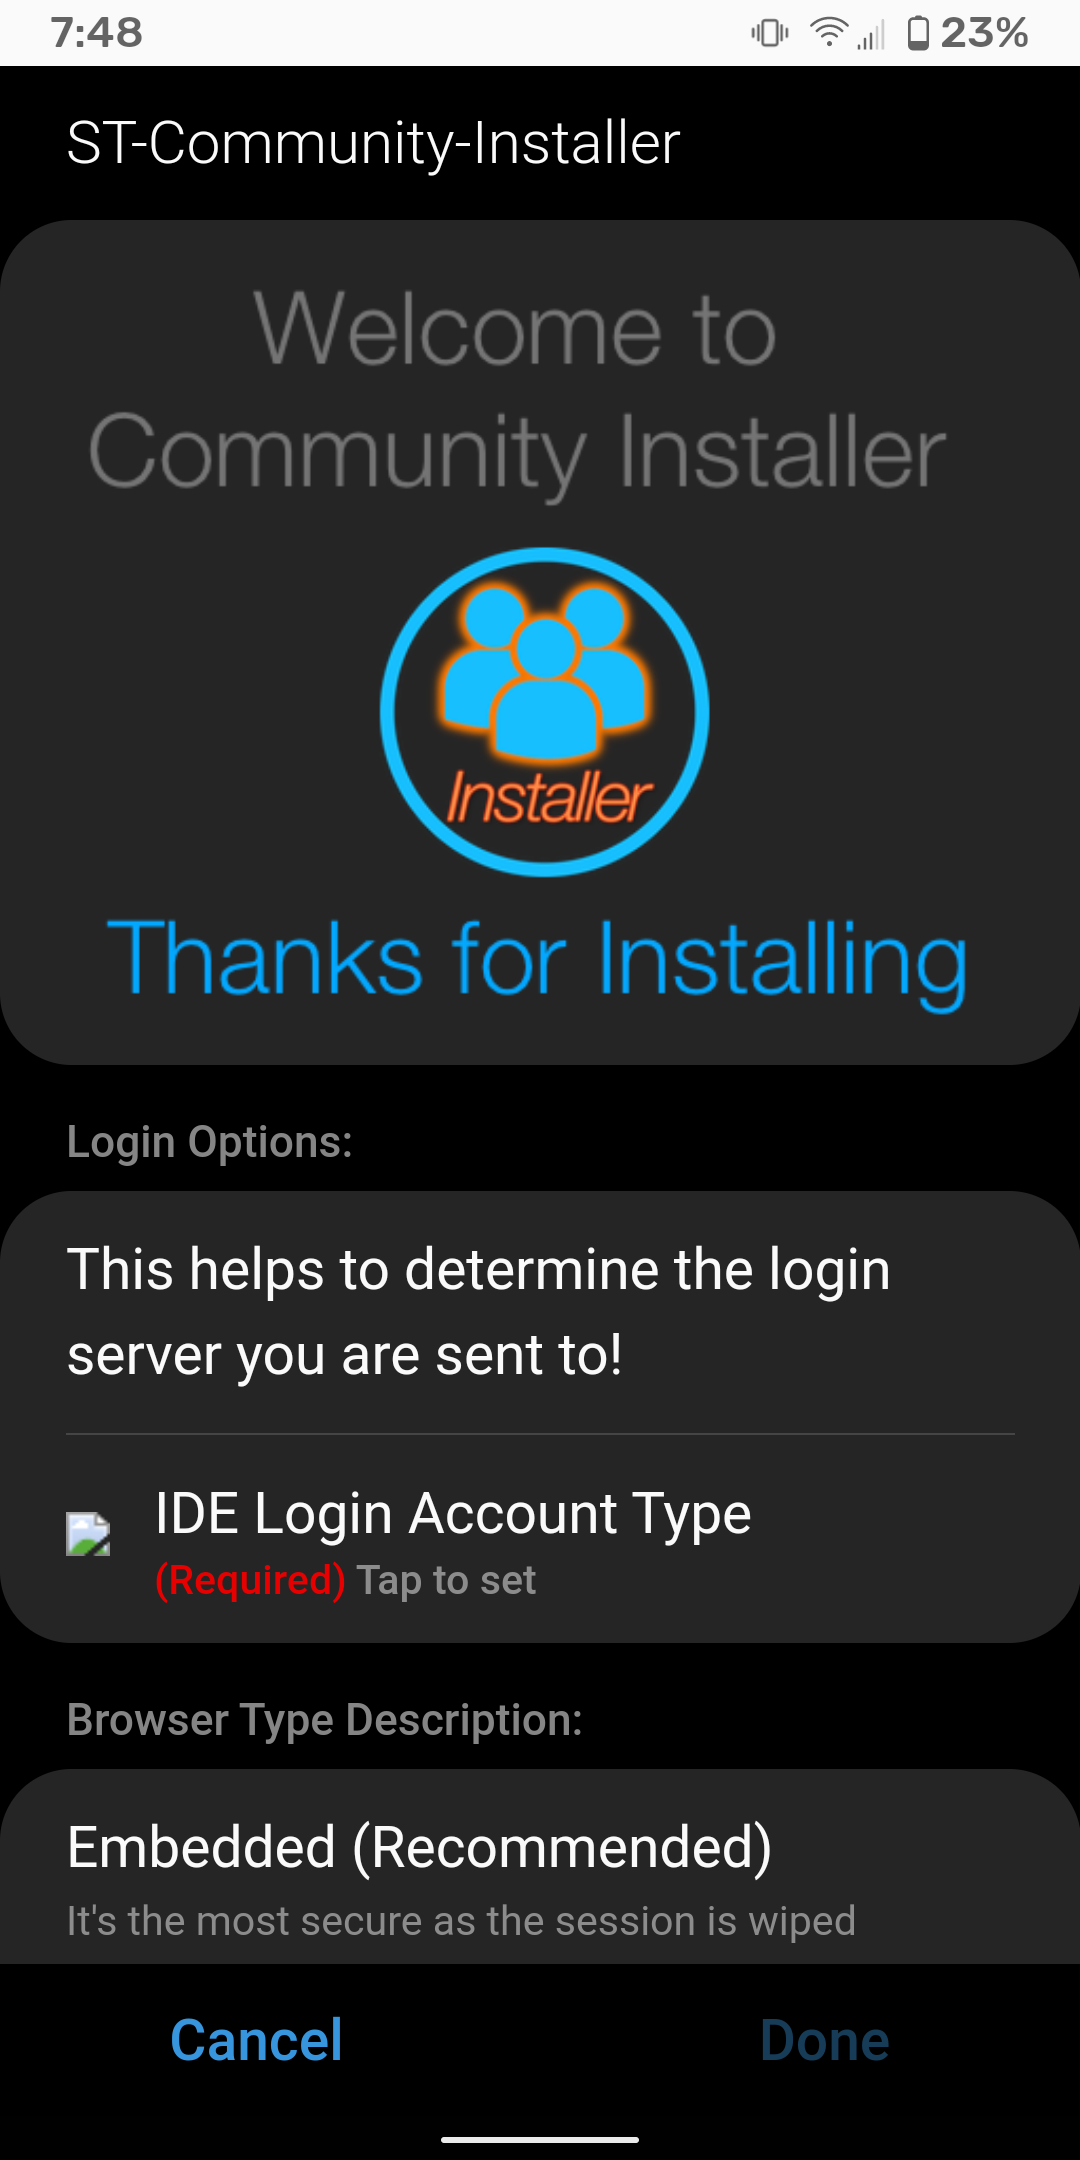
Grab your phone. Click SmartApps > click the + sign to add a smartapp and then scroll to the bottom. The ST-Community Installer should now be visible.
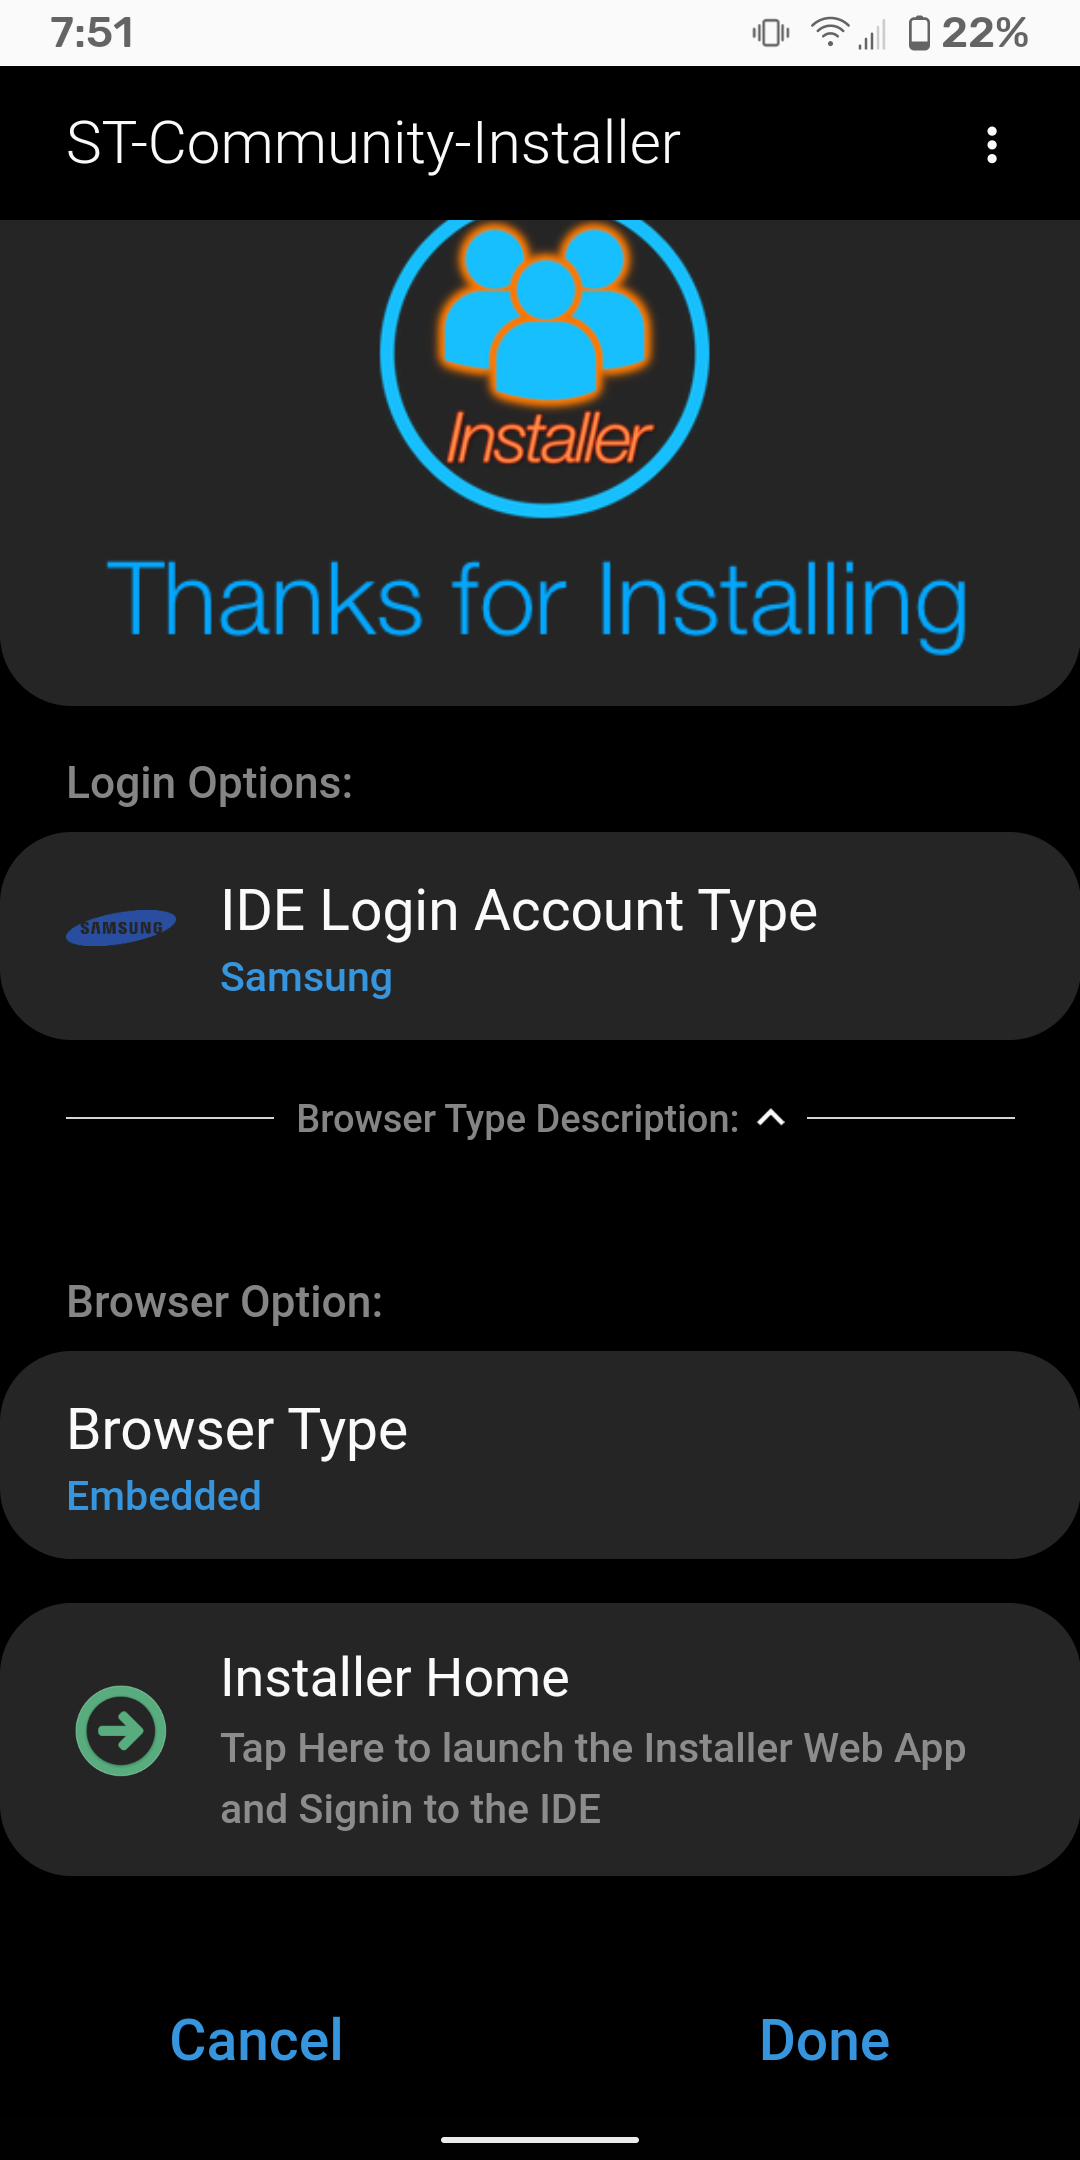
Click that, set your IDE login type, and sign in with either your SmartThings or Samsung account (The same account you used in Step 1.1)
After logging in, scroll down. Click Installer Home to launch the community installer web app.
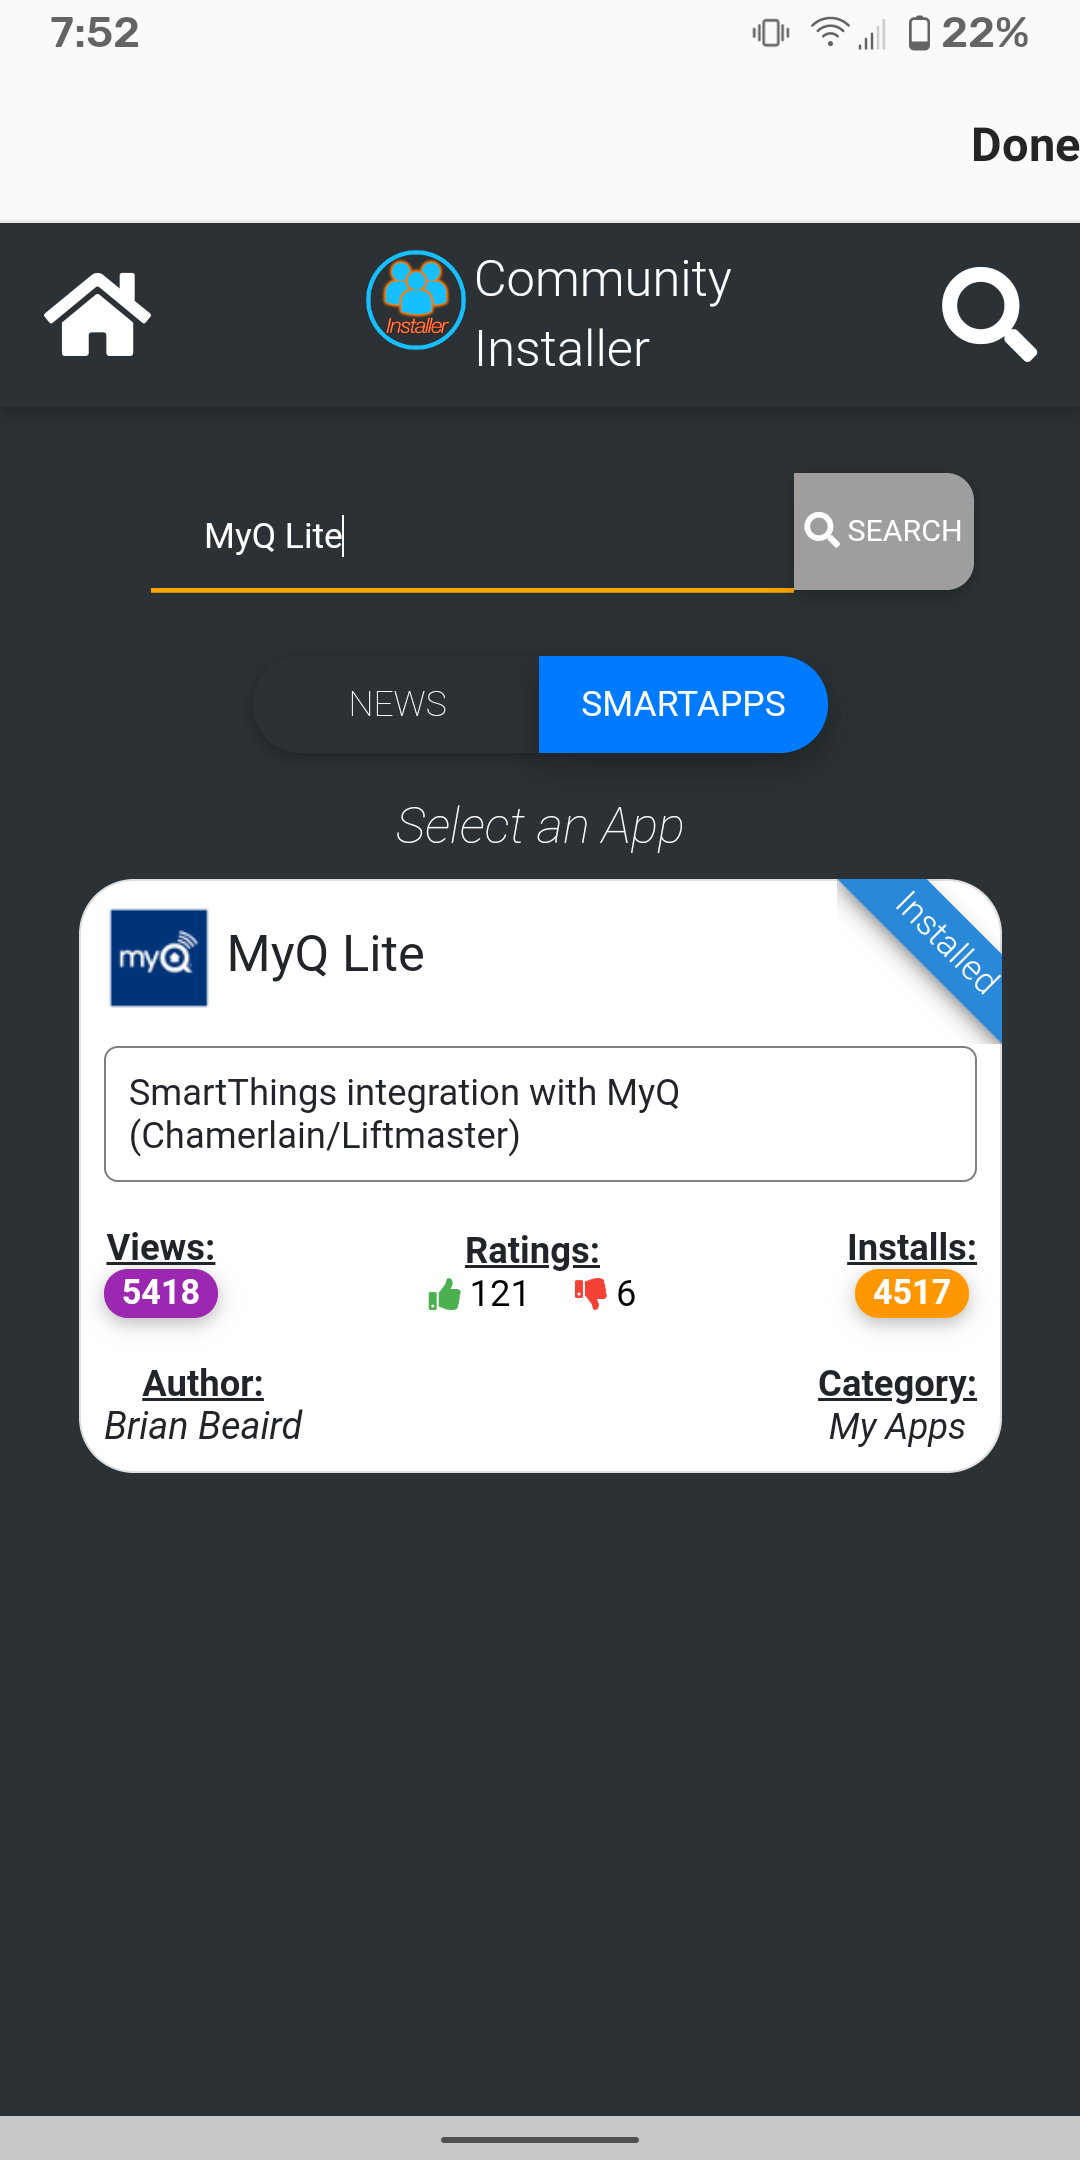
From there, just search for MyQ Lite and scroll down to install.
If all goes well, the MyQ Lite install should be complete!
Step 5: Configure MyQ Lite
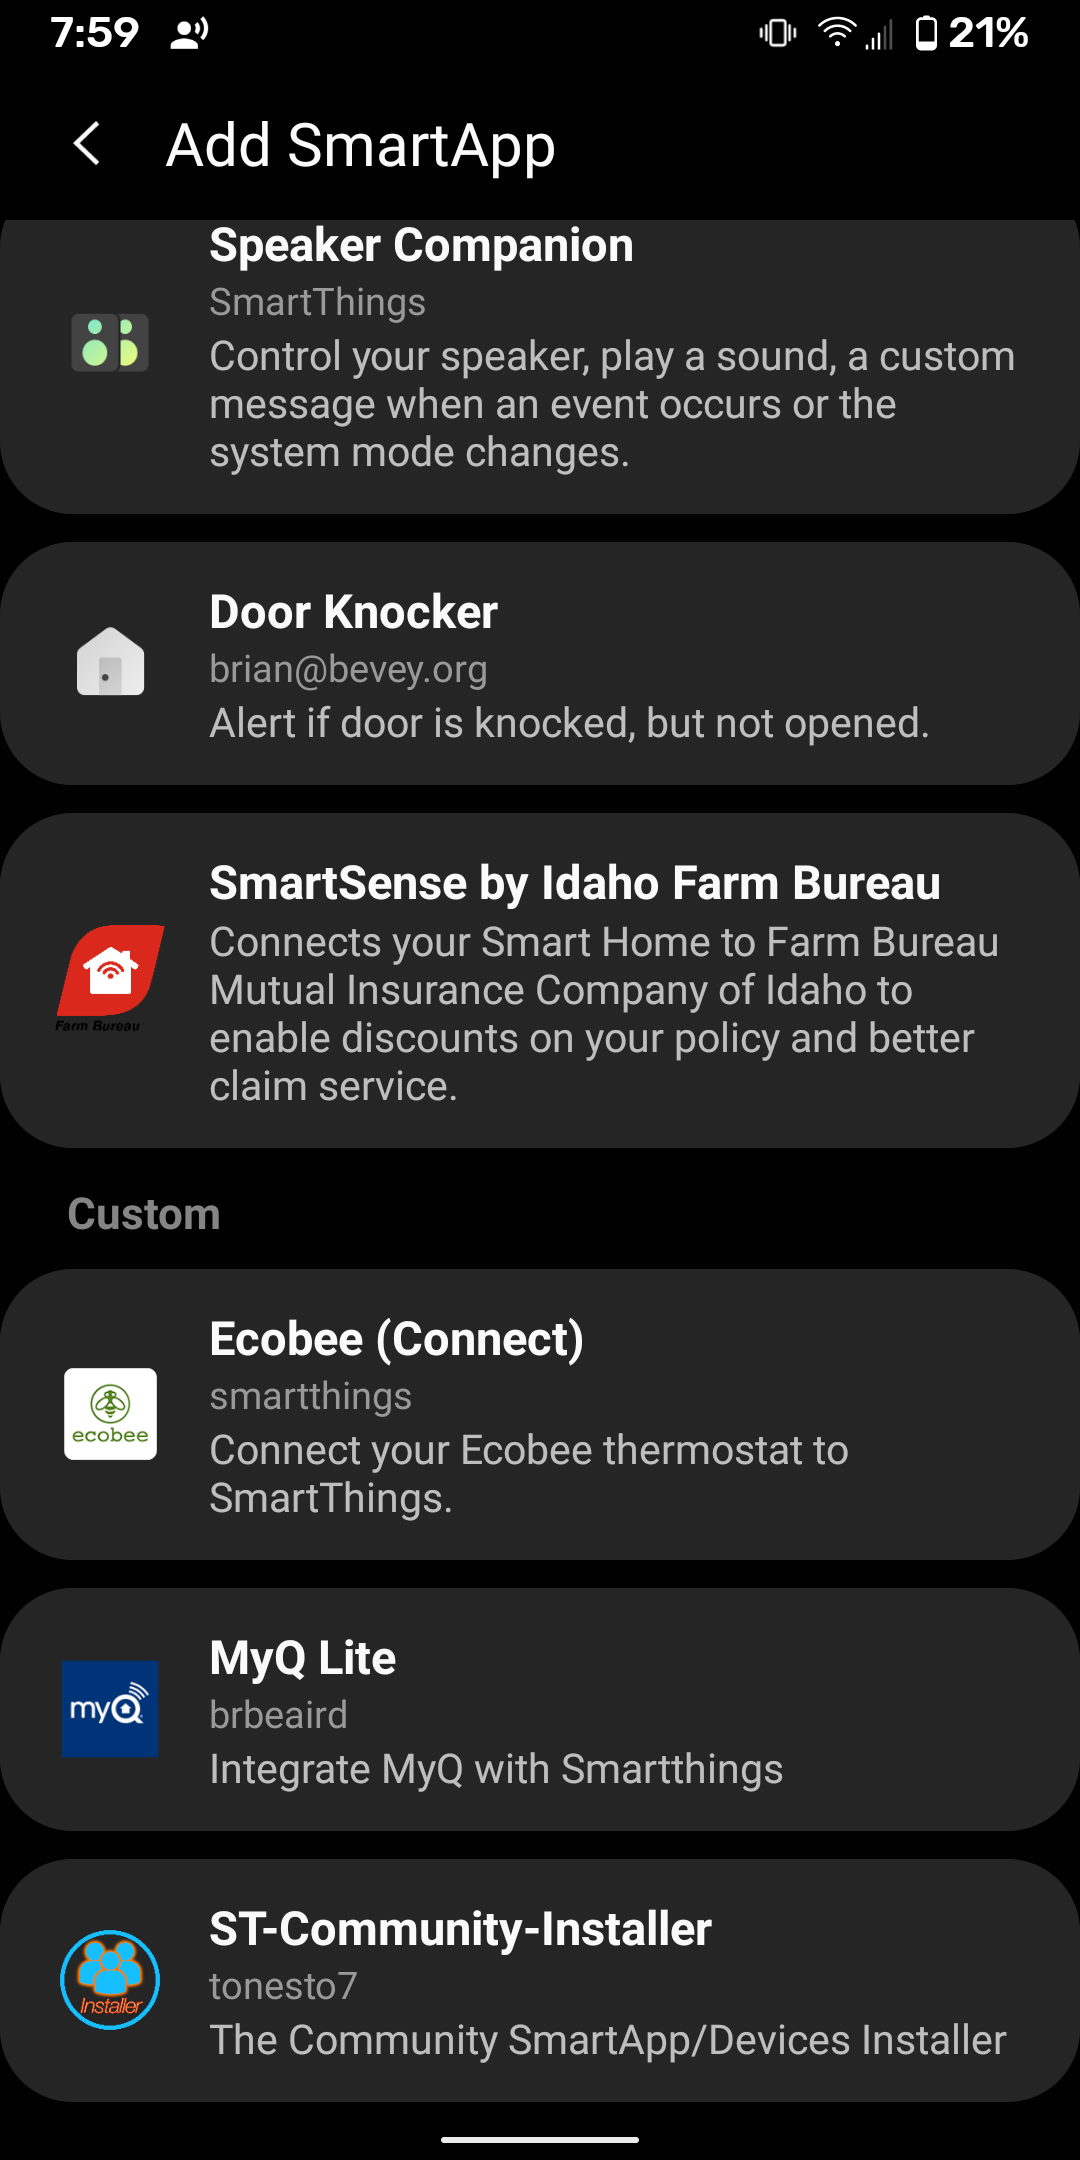
From your phone, click SmartApps > Add. Scroll to the Custom section and select MyQ Lite.
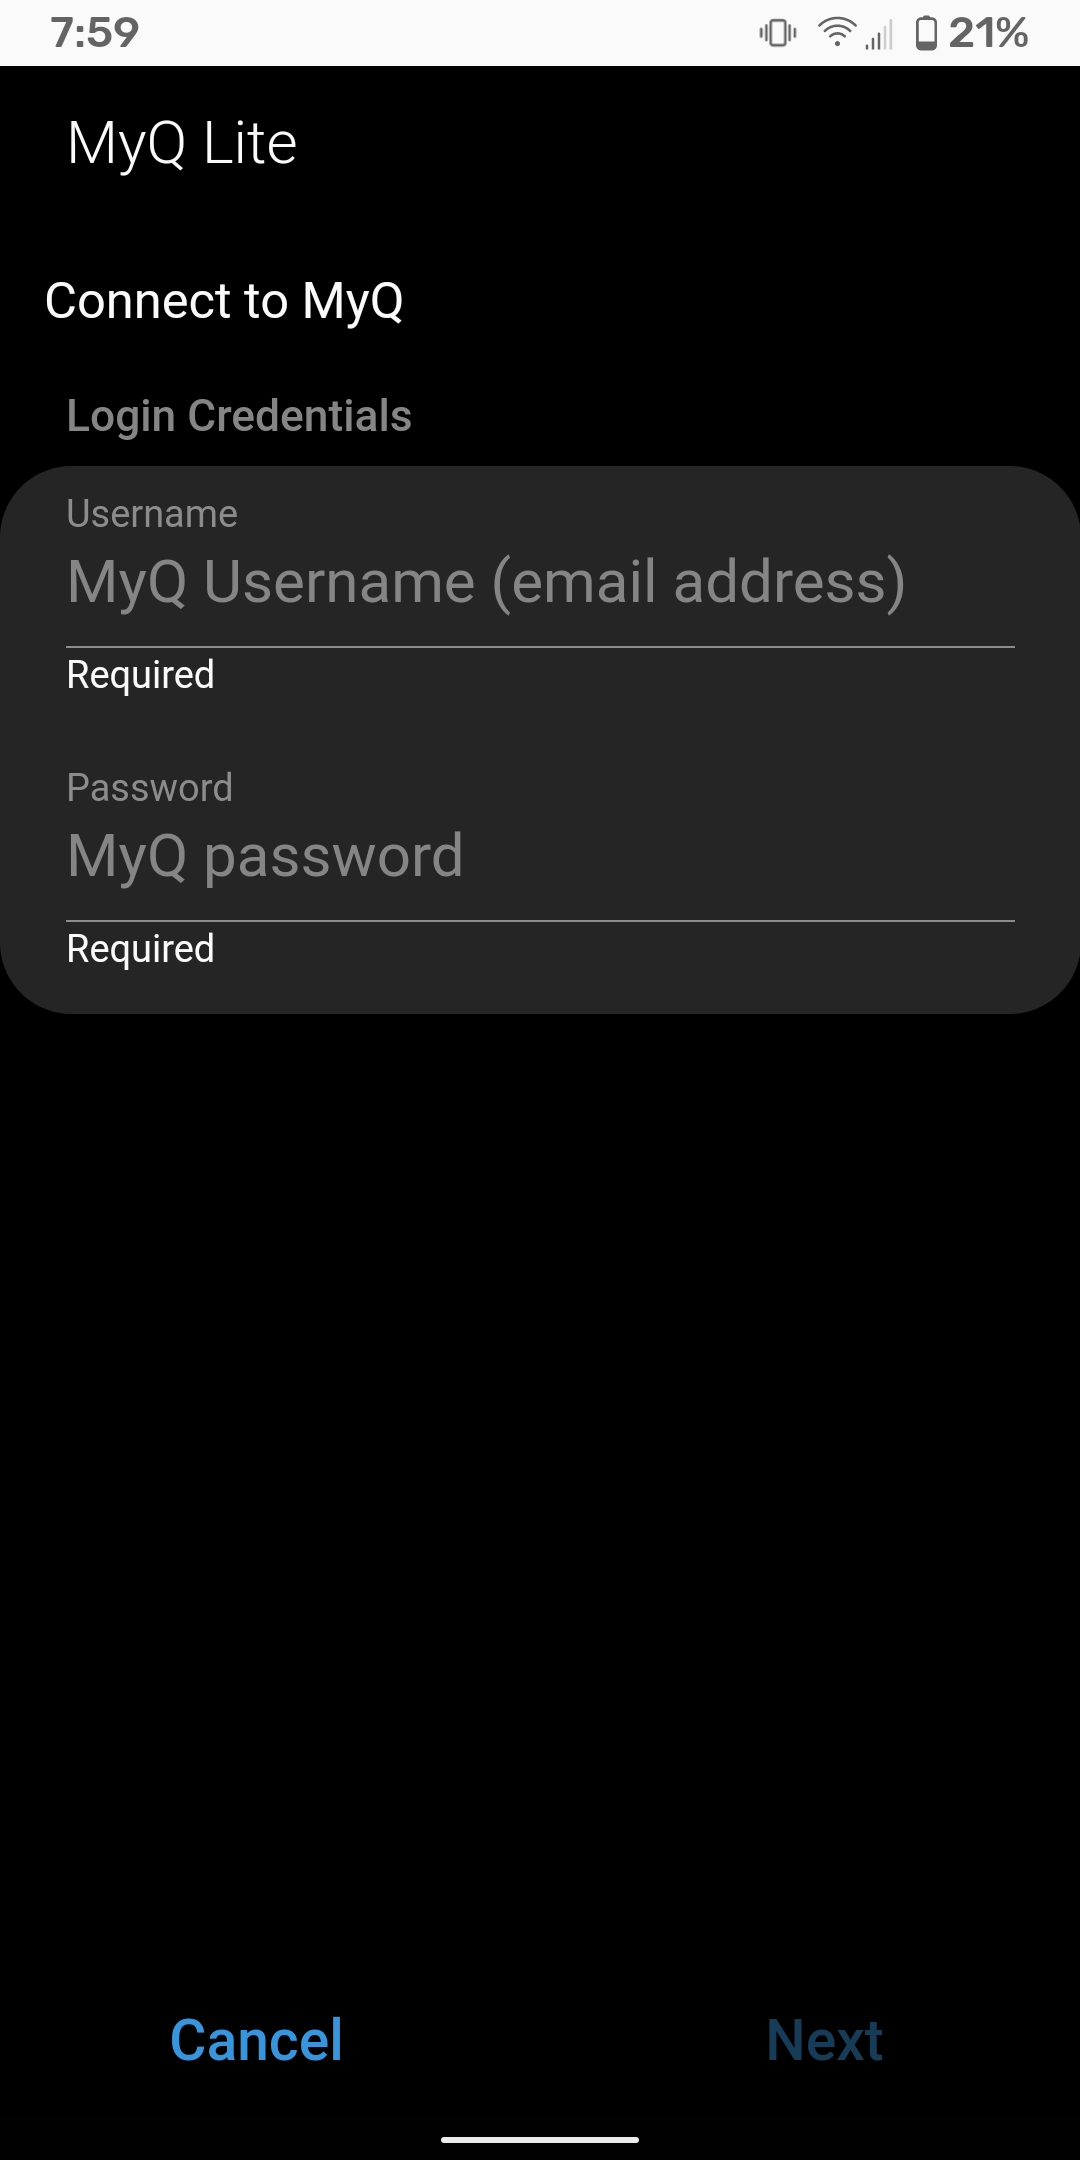
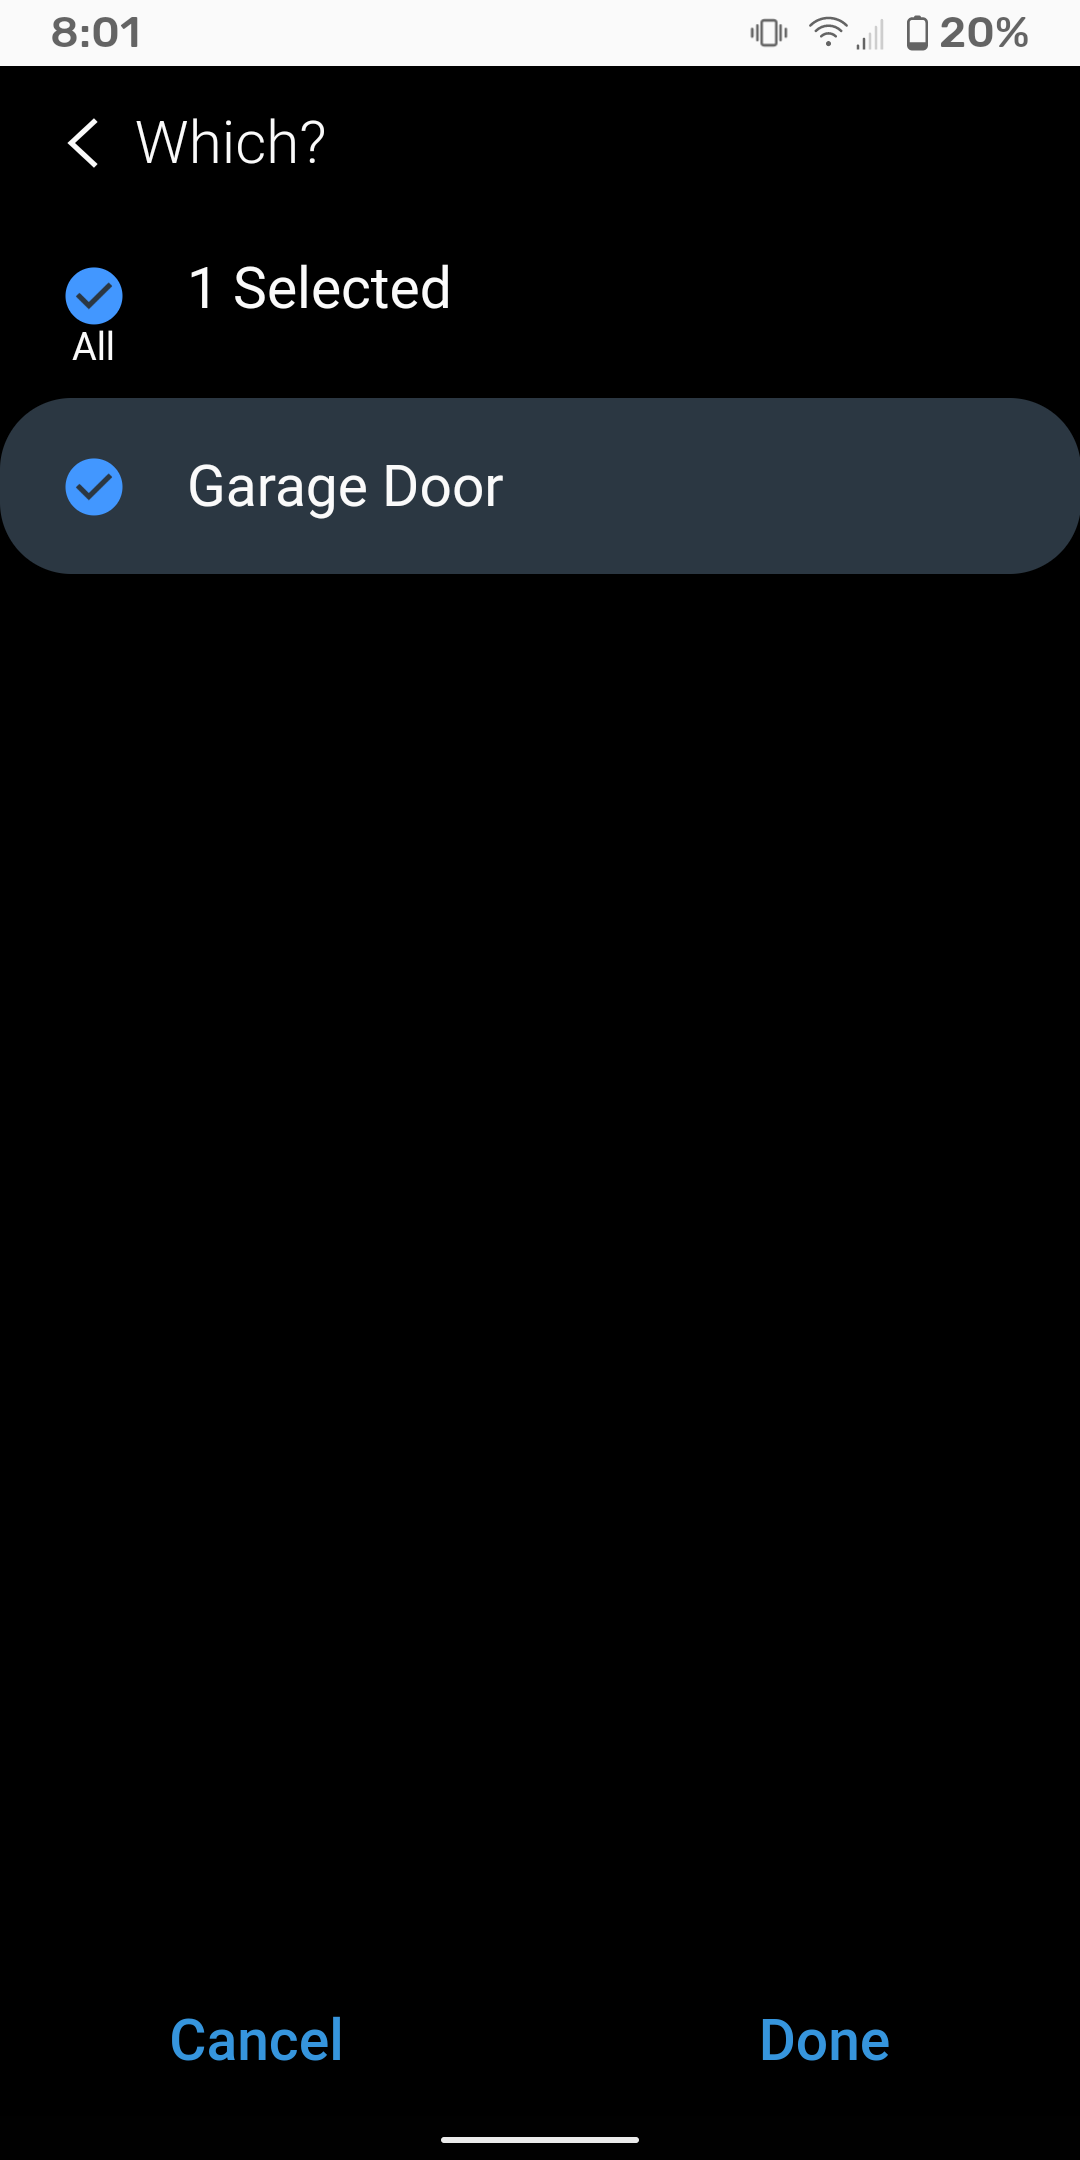
Sign in with your MyQ credentials. Once signed in, you should be able to tap to select your MyQ Chamberlain "Garage Door".
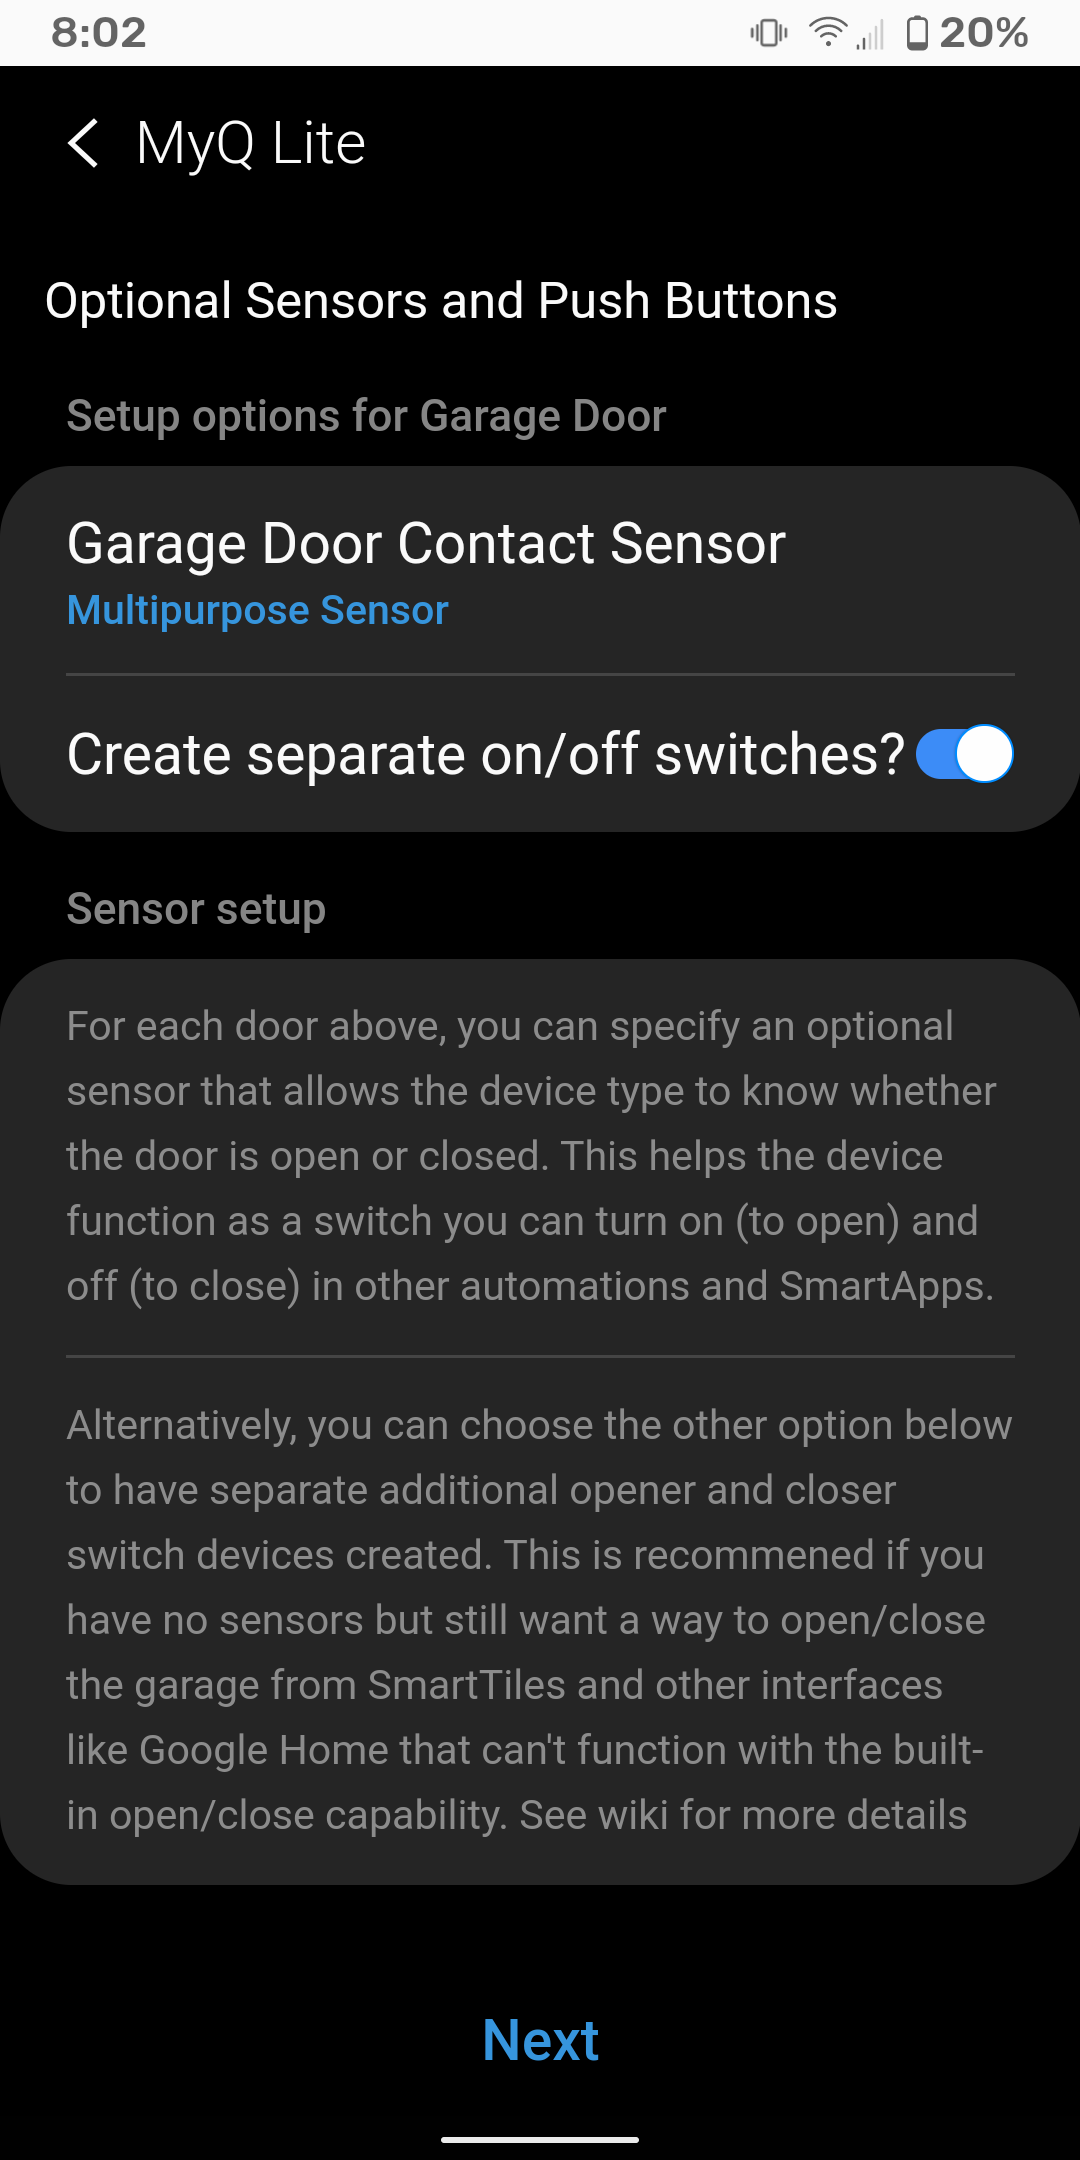
If you've already set up a multipurpose sensor (mine is named "Multipurpose Sensor"), select it now.
If you want two separate virtual switches (one to Open and a separate one to Close), select that option.
Finishing Up
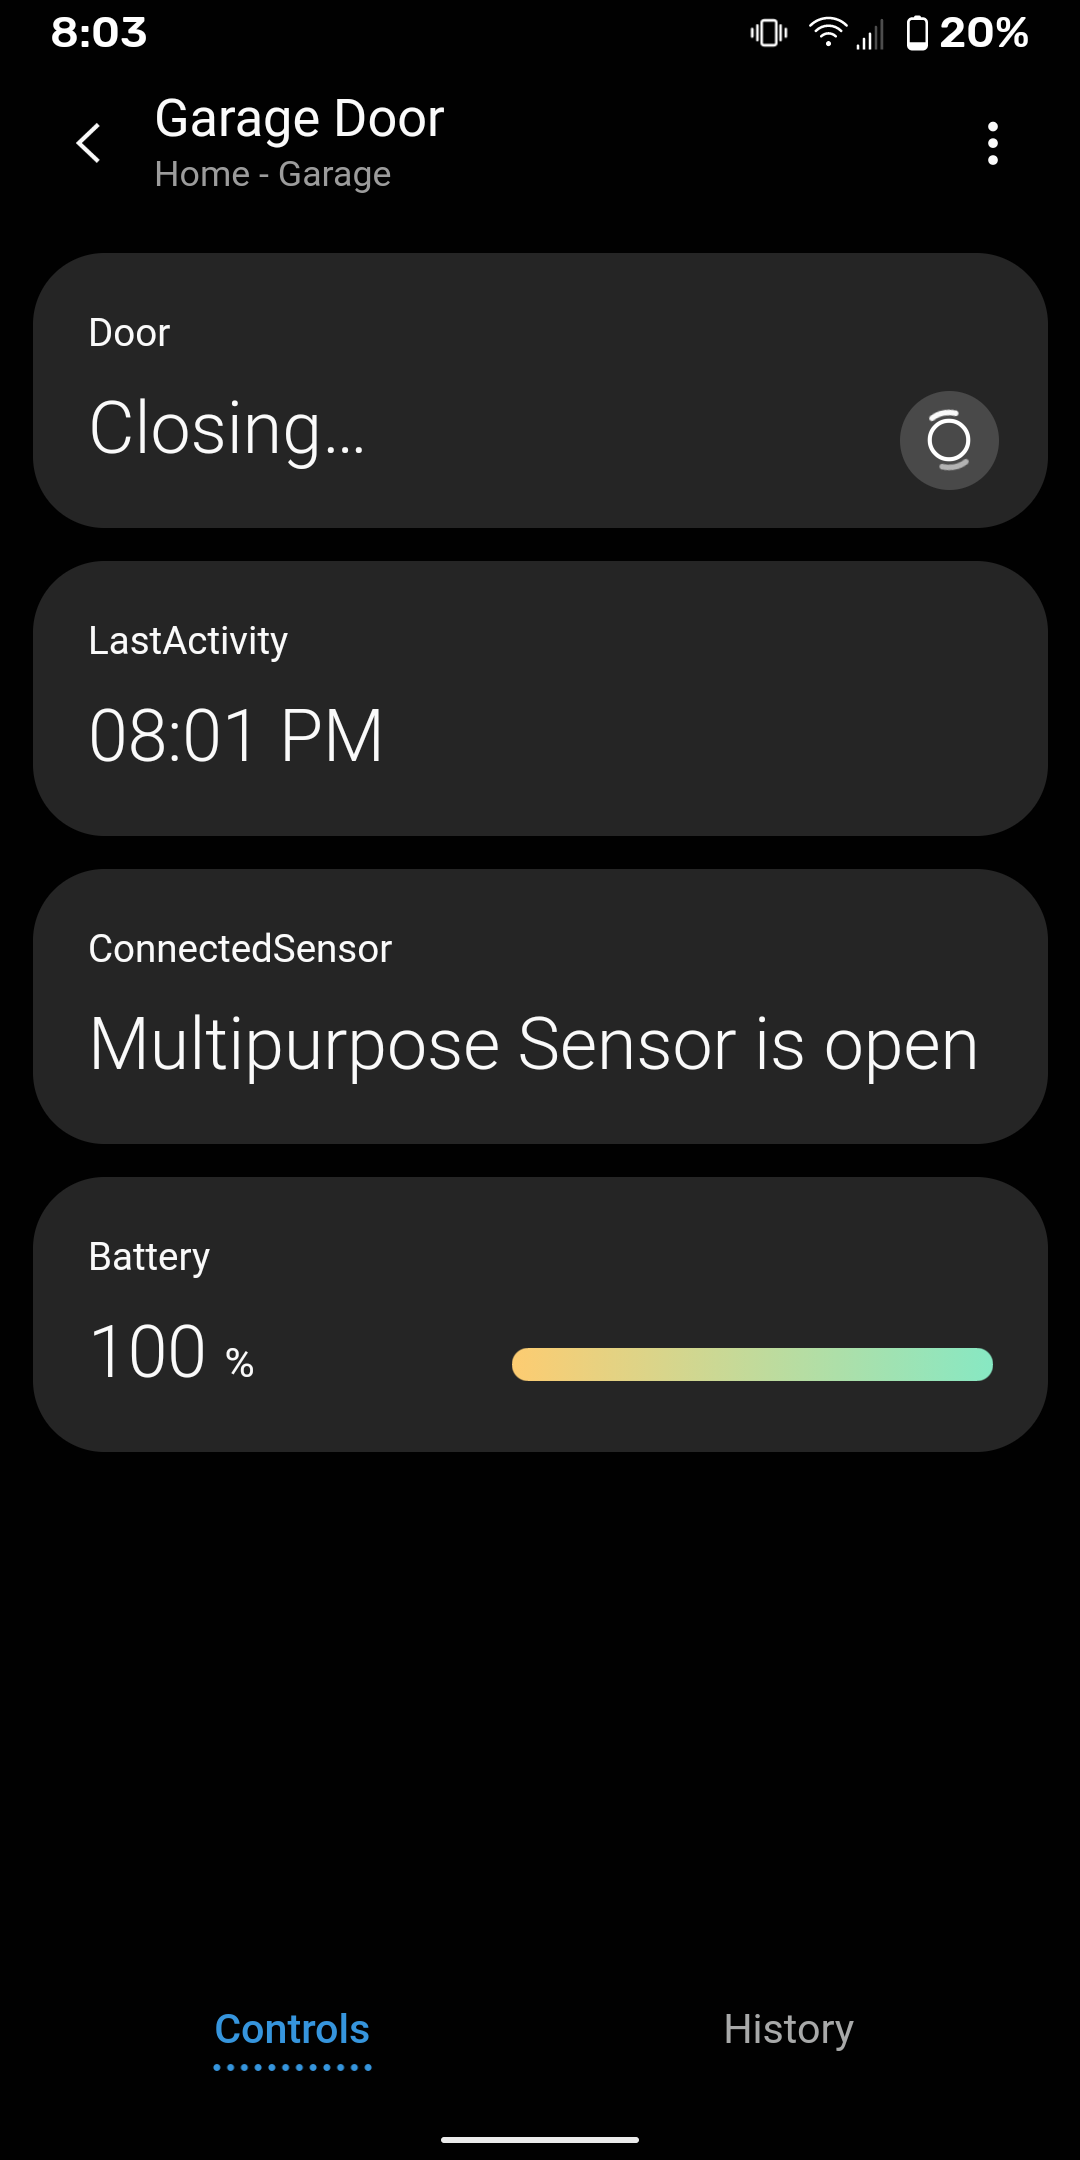
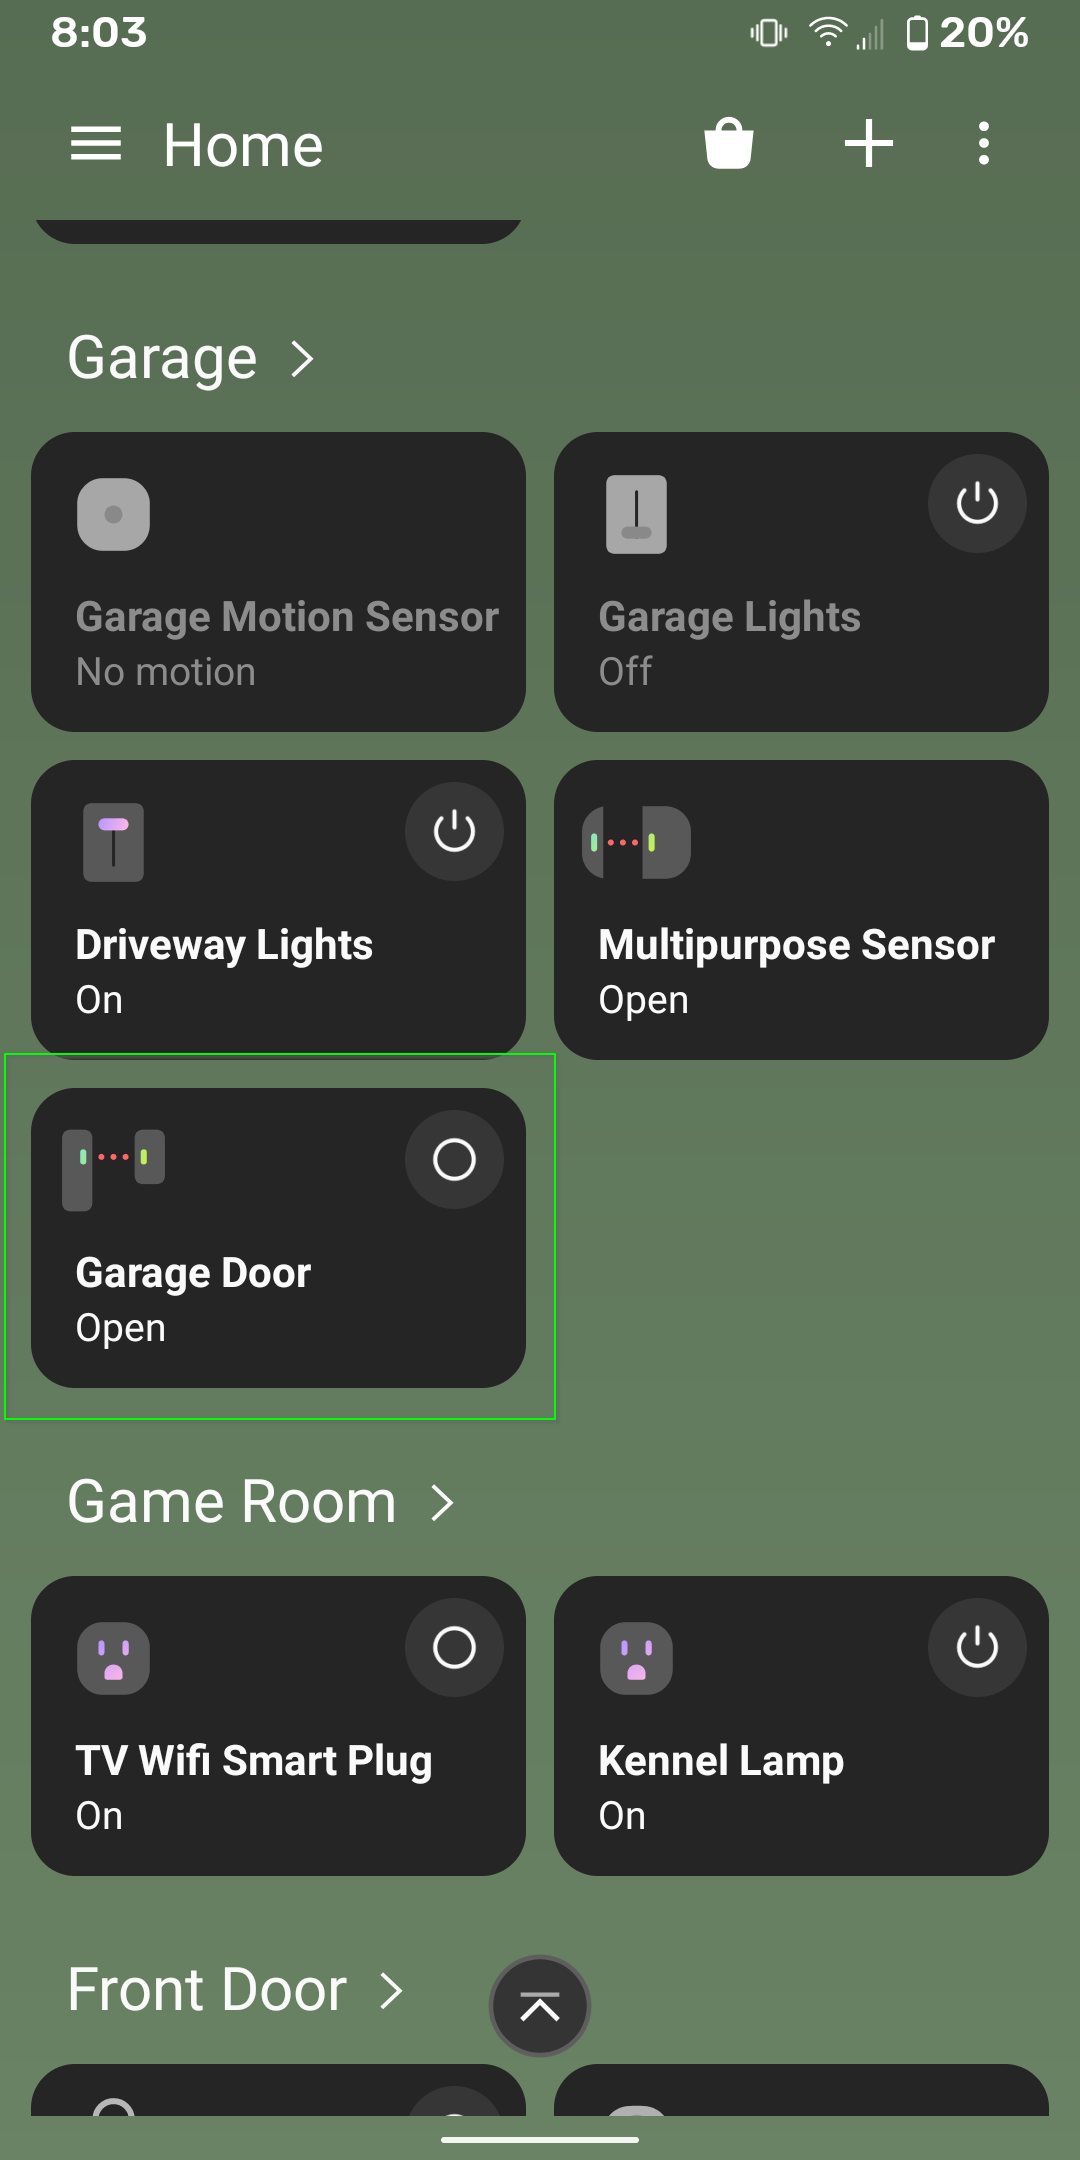
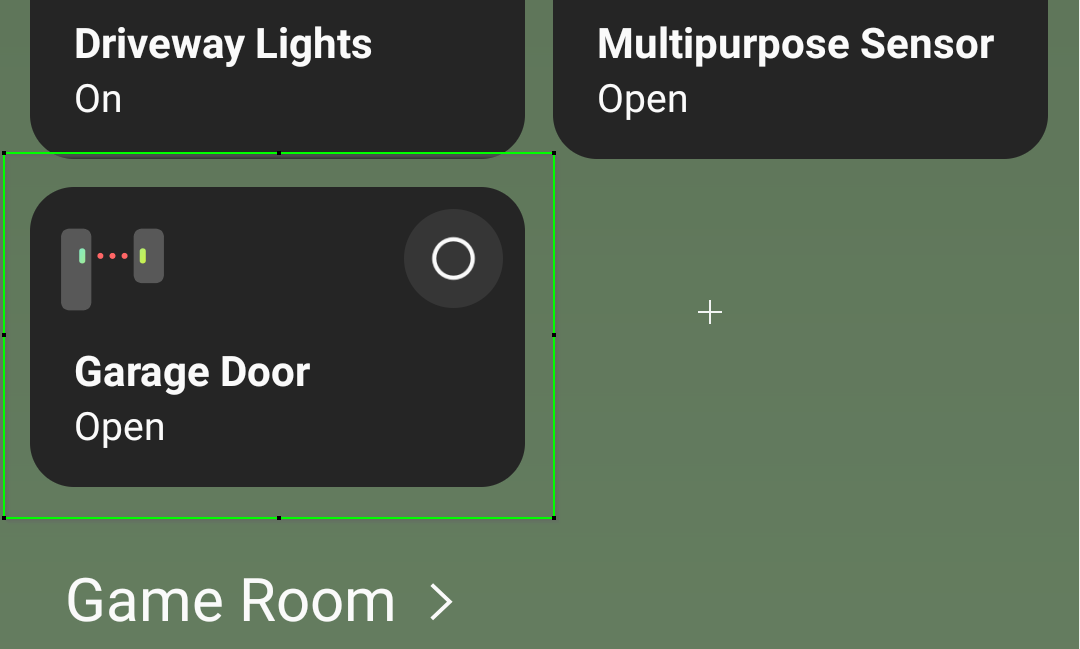
That's it! You can now control your MyQ garage door opener using MyQ Lite. And because we've paired a SmartThings multipurpose sensor with it - you can see the status of your garage door from within SmartThings ON your Garage Door device!
You didn't think I'd leave you hanging, did you?
Here's the reward for all your efforts - a SmartThings garage door opener! The only downside is that the garage door icon just looks like any other multipurpose sensor; I wish it had a garage door icon instead.