Play Custom Audio Through Google Home Speakers Using SmartThings Automations
In my last post, I walked you through how to add Google Home devices into SmartThings using WebCore and cast-web api. This allows you to "broadcast" any text you to any (or all) of your Google Home speakers! This is a great way to make Google speak.
Note: this is very different than saying "Hey Google, turn on the lights!". This works backwards; you are triggering a SmartThings automation to speak text or play sounds or music once something happens.
Now that I've set cast-web api up, I've used this for all sorts of automations. Here's a few use cases I created:
- If Ring Doorbell gets pushed, broadcast "There's someone at the front door!" to my Office Google Mini
- If a leak is detected, broadcast to all Google devices "There's a leak!".
- If garage door is left open at 10pm, broadcast to bedroom Google Mini "You forgot to close the door!".
My kids and I had a blast testing this out. They would give me a bunch of random phrases, I'd type them in, and then I'd let them test with a SmartThings button (also works with this Hank-Z button). Cast-web api works great for text-to-speech - I highly recommend setting it up.
However...I wasn't quite content. Halloween was coming up and I had this idea in mind.
What if I could download creepy .mp3 files to my PC, stick a Google Mini outside my front door, and freak out trick-or-treaters?
After a lot of trial of error, I'm happy to report that I was able to!
Overview
In this guide, I'm going to show you how to play custom audio tracks through your Google Home speakers, which are triggered by SmartThings automations.
To do this, we are:
- Installing a basic webserver (WAMP) on our Windows 10 computer
- Dropping our .mp3 files into a folder
- Browsing to those "hosted" .mp3 files via a local URL, such as this: http://192.168.68.105:8080/project/witchLaugh1.mp3.
For this Halloween demonstration, I'm going to show you this simple if-then automation:
If motion is detected by Ring Doorbell, then play witch laughing sounds on Front Door Google Mini.
Step 1: Install Cast-Web API & Webcore
Install Cast-Web API and Webcore. Don't worry if you've never used Webcore before, the instructions are step-by-step in the link above.
Step 2: Install WAMP
Install WAMP with all defaults from here.
I'm not going to go over all the details of how to install WAMP, but this is the guide I followed: https://www.c-sharpcorner.com/article/how-to-install-wamp-server-in-windows-10/
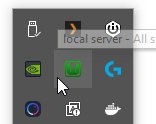
After installing WAMP, search for WAMP from the Start Menu to launch. Your WAMP icon should be green like this:
If not, left click the WAMP icon > Start All Services:
If it shows up orange or red, then you'll probably need to change the default ports Apache and/or MySQL are listening on. In my case, I had to change both the MySQL and Apache ports, which took less than 30 seconds total. I followed these instructions here.
If you still get stuck, comment below and I'd be happy to help.
Step 3: Create "Projects" folder
The next step is to create a folder for your .mp3 files. Browse to C:\wamp64\www.
Right click and create a new folder called "Projects".
Step 4: Download .MP3 files
This method will work for any media stored on your local computer. If you don't have any music or sounds, you can download DRM-free sounds from a website like this: https://www.freesoundeffects.com/free-sounds/scary-and-horror-10085/
Download your file to the C:\wamp64\www\projects folder you just created.
Step 5: Test from a browser
If all goes well, you should be able to play the audio file from a URL like this: http://localhost:8080/project/ghost1.mp3, changing just the name of the audio file to whatever your sound file is named.
Localhost means you can only access it "locally" from the computer you are on. Obviously this isn't going to work with cast-web api. So, let's test playing the audio file from your computers' IP address instead.
Open Command Prompt (type CMD into Start) and type ipconfig. Your IP address is the IPv4 Address:
If it works on localhost, it should also work using your IP address. The format it will be in is: http://192.168.68.105:8080/project/witchLaugh1.mp3
Step 6: Test from a different computer or your Phone
The next step is to check whether or not you can open http://192.168.68.105:8080/project/witchLaugh1.mp3 from a browser on your phone. By default, you should see a "Forbidden" error like this. The only reason you might not see this error is if WAMP was already installed.
403 Forbidden You don't have permission to access / on this server.That is a normal error and something that can be easily fixed. See Step 7 below.
Step 7: Fix Forbidden Error 403
Once you install WAMP server, the default settings have extremely locked down permissions. If using WAMP server 3, follow these steps to fix them:
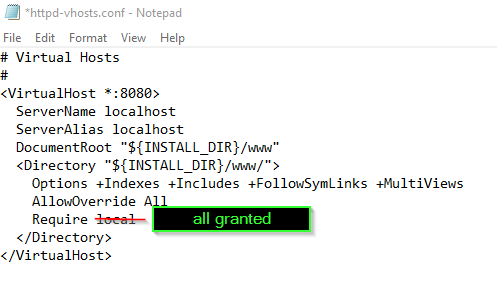
Click the WAMP server icon > Apache > httd-vhosts.conf
It will open Notepad. Change "local" to "all granted" and save.
Now test opening your IP address URL from your phone again. This time it should work: and your audio should play right away!
http://192.168.68.105:8080/project/witchLaugh1.mp3
Create Webcore Piston
The next step is to program your SmartThings Button (or Hank-Z button, whichever device you want) to play the audio file once click.
The automation we are going to create is If Office button gets pushed, then play track on Google Mini.
Log into your WebCore dashboard: https://dashboard.webcore.co/
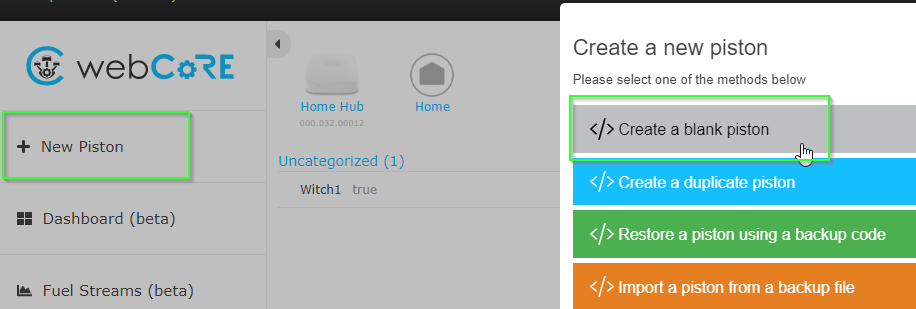
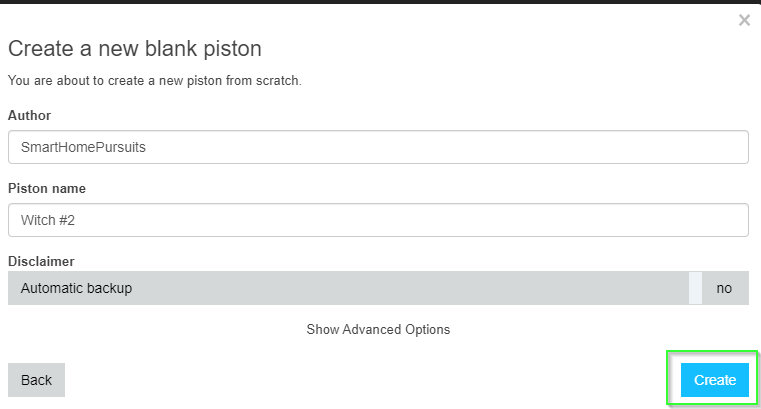
New Piston > Create a Blank Piston. Give your piston an author (you) and a name:
Under Execute, click Add an if:
Click Condition > Add a Condition. Change your settings to match the image below.
Under Then, click Add an Action.
Change the Location dropdown to your Google speaker device (mine is called Google Mini Cast).
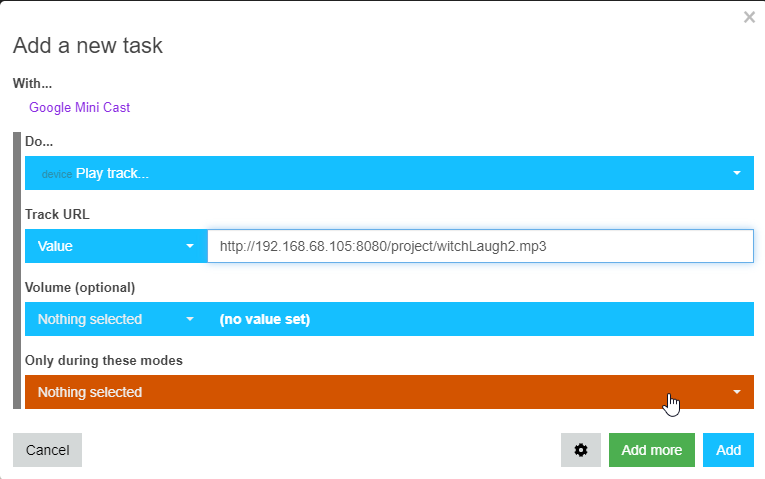
On the Add a Task screen, search for "play track" and enter your IP URL into the Track URL Value field:
Click Add, and then Save.
That's it! You can now press your button and it will play ANY custom audio file you place into your WAMP webserver.
Wrapping Up
Hopefully this tutorial helps you out!
Adding custom audio to your Google Home devices is a game-changer when it comes to creating automations. You can even record your own voice and have it broadcast throughout your home! The ideas are literally endless.
Let me know in the comments below how you've used this throughout your smarthome!