List Hyper-V VM Names using Powershell
In this post, I'm going to show you how to get a list of virtual machine names from a list of Hyper-V host servers. Once you have this info, you can export the results to a CSV.
This is a very simple command and is a great way to query a list of Hyper-V host servers on your network to find out what guest VM's are configured
The Powershell script below can also be expanded to include a number of other properties, such as the path of the .vhdx, ProcessorCount, CreationDate, Uptime, and much more, which I have included at the end.
Why list Hyper-V Names from Powershell?
There are a number of reasons you may want to export the VM names. Here's just a few examples:
- If a host server dies, you might want to know what VM's to restore
- If a VM gets accidentally deleted, you can view your export to see which host to restore it to
- For management and asset management purposes
- Server auditing. Run this as a scheduled task monthly or yearly to see the change in total virtual machines over a given period.
Powershell Script to List Hyper-V Hosts and Virtual Machines
To do this, first open Powershell ISE as administrator.
We are using the Get-VM cmdlet and a $hosts variables. Each host gets put in parenthesis with a comma between then. This will then enumerate the list of hosts and return the properties that we've specified.
Finally, we are exporting the results to a .CSV with the date appended to the filename.
#Type Hyper-V host server names in $hosts variable $hosts = "host1","host2","host3" Get-VM -ComputerName $hosts | select ComputerName,name,state | Export-Csv -Path C:\users\username\desktop\VMList-$((Get-Date).ToString("MM-dd-yyyy")).csv -NoTypeInformationThe only thing you'll need to modify in the script above is the path and add your host server names.
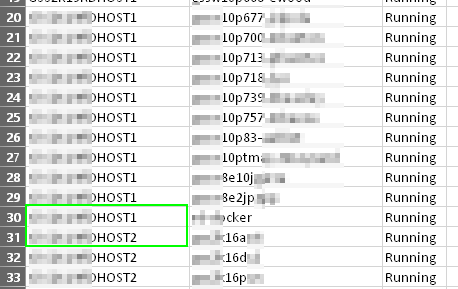
And here is what the output looks like. Notice that each guest VM shows the correct parent host server name in the first column.
- ComputerName = Hyper-V Host
- Name = Guest VM name
- State = State of the running (i.e. - running,
List Additional Properties for each VM
If you would like to see all the available options to include, here's the command you'd use:
Note that you don't want to run this against all hosts in the $hosts variable or it could take a long time. Instead, just run this against 1 host - the same properties will be available for all hosts, so there's no real point in having it loop through every VM to find this info.
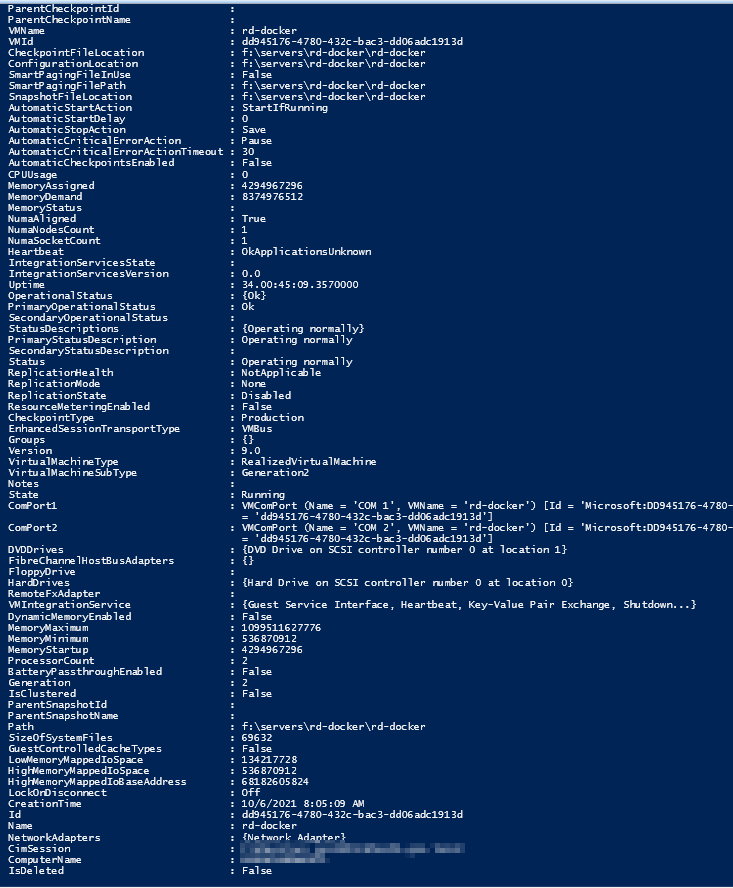
We are basically querying 1 host with a wildcard to show us all available properties.
Get-VM -ComputerName "gss2k19rdhost1" | Select *And as you can see, you now have all of these additional properties:
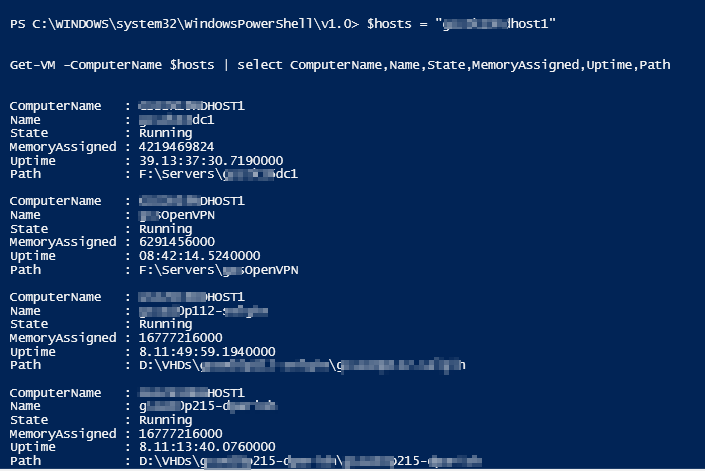
Let's say you wanted to include Path, Uptime, and MemoryAssigned. You're new command would look like this:
###Type Hyper-V host server names in $hosts variable $hosts = "host1","host2","host3" Get-VM -ComputerName $hosts | select ComputerName,Name,State,MemoryAssigned,Uptime,Path | Export-Csv -Path C:\users\username\desktop\VMList-$((Get-Date).ToString("MM-dd-yyyy")).csv -NoTypeInformationWrapping Up
Hopefully this guide helped you out! I run this script monthly and set the path to an IT file share. I don't have to reference it very often, but there have been times where a VM was deleted and I spent entirely too long trying to figure out which host that VM was on. This script will virtually eliminate the need to manually track down the correct location.