How To Run VMware Workstation Virtual Machine in the Background
In this guide, I will show you how to run your Vmware Workstation VM in the background and automatically after reboot, using either a batch file in the Startup folder or Windows Task Scheduler. This means that after your host computer or server restarts, your VM will automatically startup without you needing to launch the VMware Workstation Player. This will also force it to run it to run in the background, so you aren't left with an open program taking up space on your taskbar.
On previous versions of VMware, you could simply click the X on the player window, and an option pops up asking if you want to run it in the background. I'm not sure why they removed this feature in Workstation 16, but this is a simple way to achieve the same effect.
Other useful guides:
- https://smarthomepursuits.com/how-to-automatically-connect-usb-drives-to-vmware-workstation-on-power-on/
- https://smarthomepursuits.com/how-to-migrate-home-assistant-from-raspberry-pi-to-vmware-workstation/
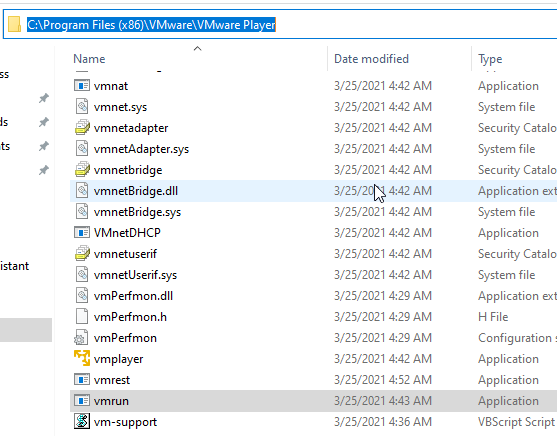
Verify VMware Installation Folder
By default, VMware should be running at C:\Program Files (x86)\VMware\VMware Workstation. Inside that folder is a VMrun.exe.
Once confirmed that is correct, you can move onto the next step.
Locate Path to .VMX File
Browse to the path where your virtual machine configuration file (.vmx) is stored. In this example, I am going to automatically start Home Assistant after rebooting my Windows 10 host PC.
Mine is located in C:\HomeAssistant:
Option 1: Run Home Assistant VM After Login
This option will automatically launch your Home Assistant VM after logging into your PC. To do this, we will be creating a simple batch file and placing it into the Startup folder. If using a USB zwave/zigbee dongle (I'm using the Nortek GoControl), then make sure to follow this guide to automatically connect USB drives to VMware Workstation.
Go to your desktop. Right-click > Create new text document.
Double-click to open, and then paste this command. You will need to change the path to your own .vmx file.
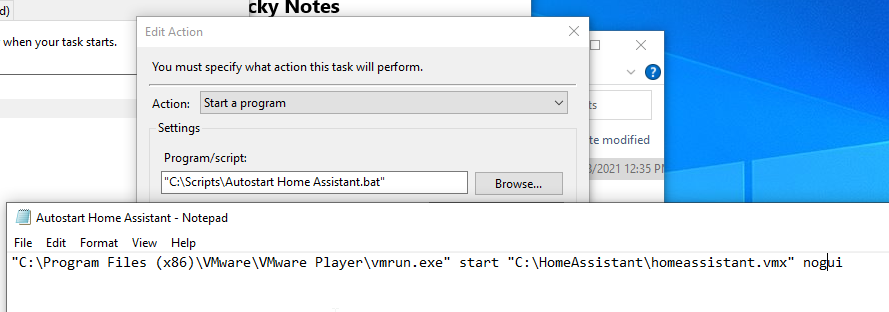
"C:\Program Files (x86)\VMware\VMware Player\vmrun.exe" start "C:\HomeAssistant\homeassistant.vmx" noguiThe nogui at the end tells VMware to run the Home Assistant virtual machine without opening the VMware Workstation Player window, which means it will run in the background.
Then save the file. File > Save As > and then change the "Save as Type" to All Files.
Name the file something like Autostart Home Assistant.bat.
Move Batch File to Window Startup Folder
The last step is to move the batch file to your Startup folder. This is a folder where programs will automatically start after you log into your computer or server.
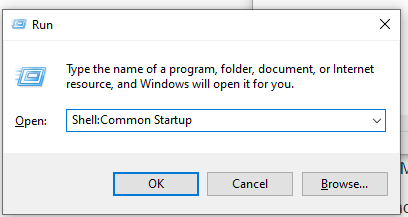
Open Run > type Shell:Common Startup
Simply drag and drop the batch file into this folder and click Yes on the Administrator prompt.
Congratulations - Home Assistant will now run in the background without the GUI after logging in!
Option 2: Start VMware Workstation VM using Task Scheduler (without needing to login)
This option will automatically start Home Assistant after your computer reboots, without you needing to login. This would be useful if your PC reboots for updates or if you lose power.
If you are a using a USB zwave/zigbee dongle (I'm using the Nortek GoControl), then make sure to follow this guide to automatically connect USB drives to VMware Workstation first.
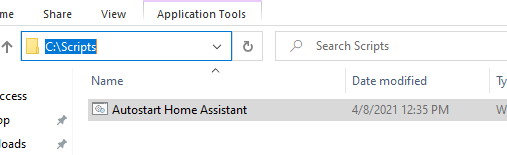
Create a batch file just like you would've done in Option 1. Save it to a folder like C:\Scripts. Then, create a scheduled task to run the batch file by following the guide below.
- Search Windows for Task Scheduler.
- Right-click Task Scheduler Library > Create Task.
- Give it a name, choose Run whether user is logged in or not > and configure for Windows 10.
- Under Triggers, begin the task At Startup. Make sure the Enabled box is checked.
- Under Actions, choose Start A Program
- Program/Script: point to the location of your Autostart Home Assistant batch file. (for me, this is "C:\Scripts\Autostart Home Assistant.bat" ) I used quotes but not sure if that is necessary.
Test It Out
For Option 1: Reboot your computer and login. If all goes well, your Home Assistant VM (or whatever VM you want) should startup automatically in the background, without the VM Workstation GUI!
For Option 2: Reboot your computer but do not log in. Wait about 1-2 minutes, then open the Home Assistant mobile app. If all goes well, the scheduled task should've ran and your Home Assistant VM should be running in the background without a gui!
During your testing, you should toggle both zwave and zigbee devices to ensure the USB drive was detected.
Let me know in the comments below if this guide helped you out!