How To Pair Ikea Tradfri Motion Sensor to Home Assistant
In this guide, I will show you how to add an Ikea TRADFRI Wireless Motion sensor to Home Assistant in 2021. This device uses the Zigbee prototcol, not zwave, so you will pair it using the ZHA integration within Home Assistant.
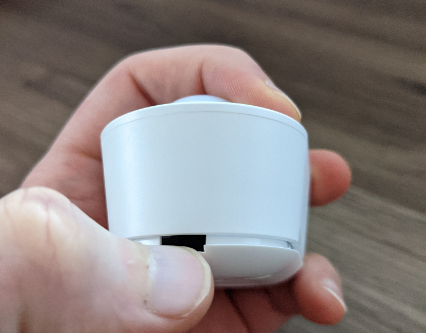
For reference, here is what it looks like:
Unbox Device
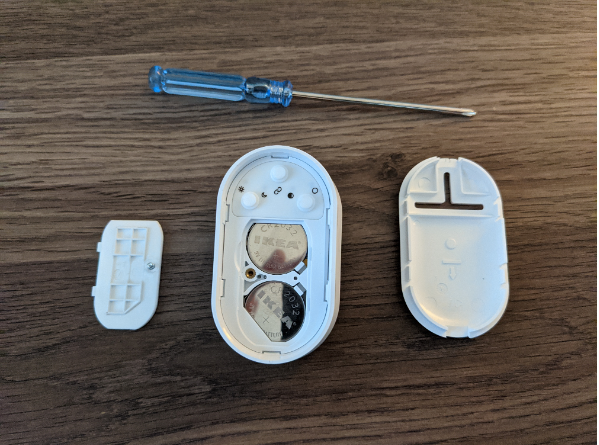
The first step is to obviously unbox the device. It contains two batteries, a piece of 3M tape, and the motion sensor itself.
To install the batteries, you must remove the backplate. You may be able to do this with your thumbnail, but I had to use a small flathead screwdriver and gently pry it off.
Then, using a small phillips screwdriver, remove the battery cover.
Insert the two batteries afterwards.
For testing, I would keep the battery cover and backplate off until successfully added to HA.
How To Pair Ikea Motion Sensor to Home Assistant
You will see 3 buttons inside the backplate.
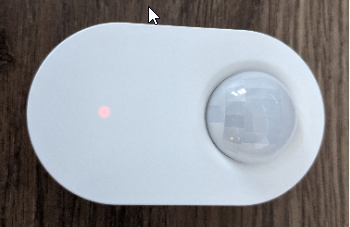
Factory reset by pressing the middle "link" button 4 times rapidly. A red LED should display on the front indicating it has been reset.
This also puts the device into pairing mode.
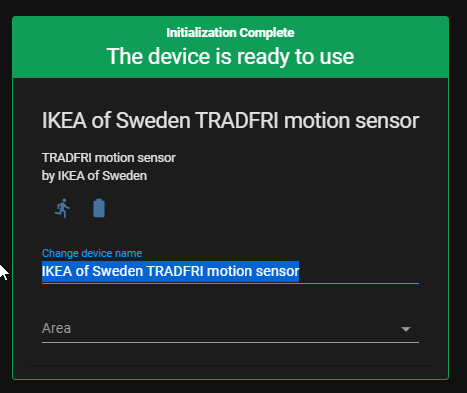
In Home Assistant, navigate to Configuration > Integrations > Zigbee Home Automation (or ZHA).
Click Configure > Add Device.
Change the device name and assign it to an area.
Turn On Lights When Motion Detected by Ikea TRADFRI Motion Sensor
This is actually two different automations: one for turning on the light during a certain time, and another for turning the light off if no motion was detected for 1 minute.
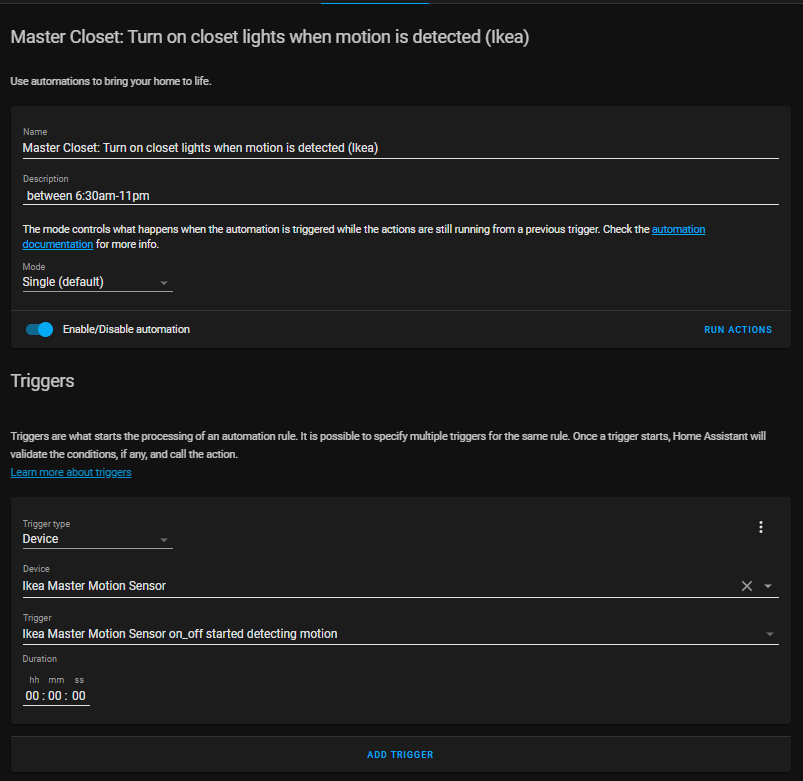
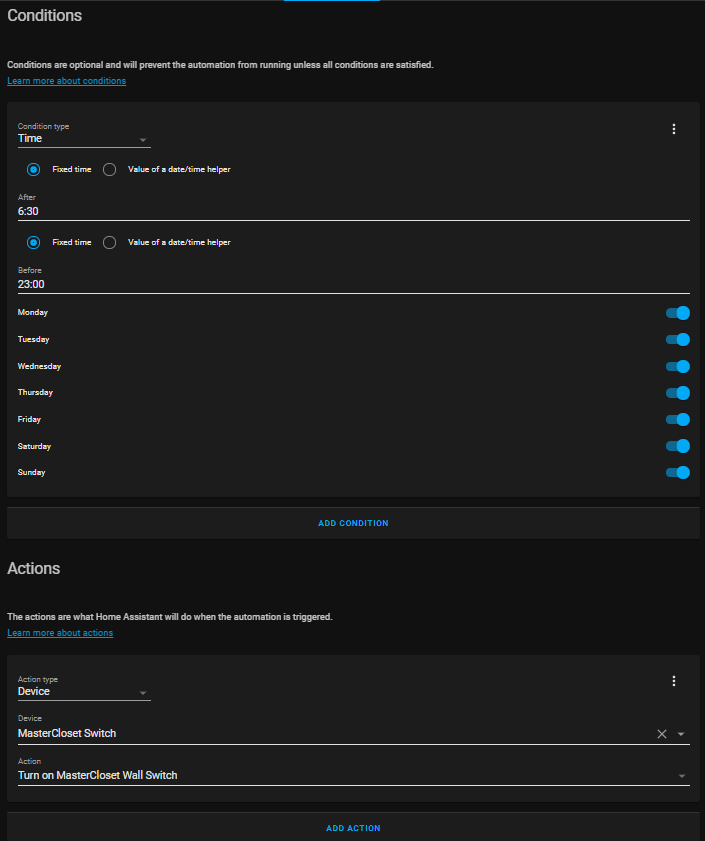
For this example automation, I am going to turn on the in-wall switch located in my master closet only if it's between 6:30am and 11:00pm.
Automation 1: Turn On Lights When Motion Detected
Go to Configuration > Automations and create a new blank automation. Give it an appropriate name and configure the settings to match mine.
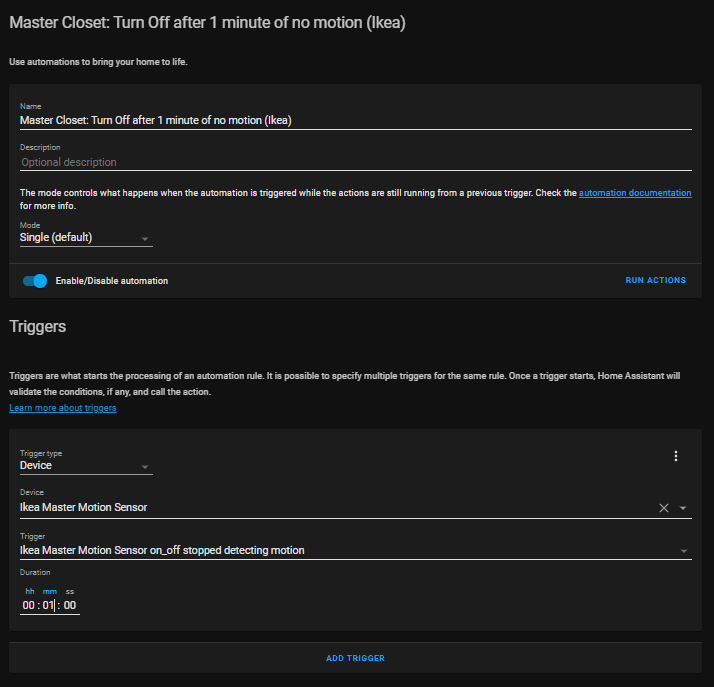
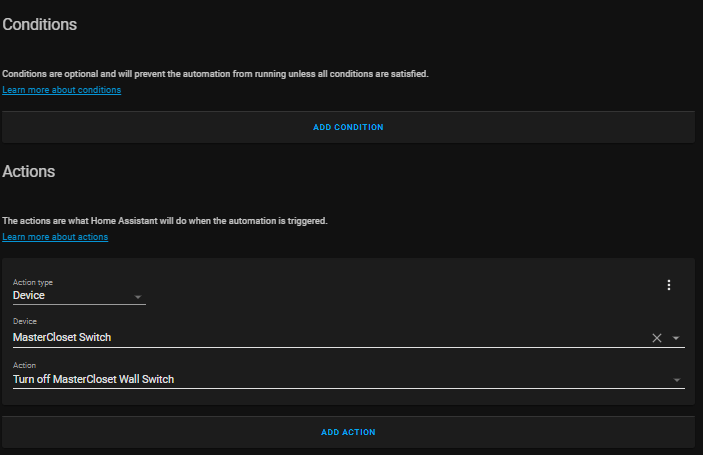
Automation 2: Turn Off Lights after 1 Minute of no motion
This one is a little more simple, but follow my automation below for this one as well.
Reboot Home Assistant
The final step before the automations will start working is to reboot Home Assistant from Supervisor > System > Reboot Host.
If you don't reboot or reload your automation, you will see errors in your log file and the automation won't trigger correctly.
Wrapping Up
After you confirm everything is working well, go ahead and screw in the battery cover and re-attach the backplate. Attach the motion to a wall or ceiling using the included 3M sticker.