How to Install OpenSprinkler into Existing Sprinkler System
One of the most recent smarthome projects I've worked on was making my sprinkler system "smart". After doing some research, I stumbled across an open source project called OpenSprinkler. OpenSprinkler is web-based sprinkler controller for your lawn, garden, or plants.
If you'd like to play around with a live demo, you can do that here: http://demo.opensprinkler.com/#sprinklers
In this guide, I will show you how to install OpenSprinkler into your existing sprinkler system in 2021.
Getting Started
First, read over their getting started guide. Depending on how many sprinkler zones you have will determine whether you need to purchase a Zone Expander. I currently have a 6-zone Hunter Pro-C, so I didn't need to purchase one. I just purchased the pre-assembled OpenSprinkler with a 24v AC adapter. Total cost was $172.95 for both after shipping. If you purchase the pre-assembled kit, nothing else is needed and no soldering is required.
If you'd like to go the DIY route, you can follow one of their github guides to install it on a raspberry pi.
I purchased both the OpenSprinkler unit and 24VAC adapter from here: https://opensprinkler.com/products/
Physical Installation
Everything you need to know about installing OpenSprinkler can be found in the getting started guide. I recommend taking the time to label every cable and takes pictures. If you ever move houses and plan on keeping your OpenSprinkler, then you can quickly plug the wires back in correctly to the old system.
Installation was pretty straightforward. However, one thing that was lacking was how to physically install the various cables and zones into the unit. I've never opened up my sprinkler before, so this was all brand new for me.
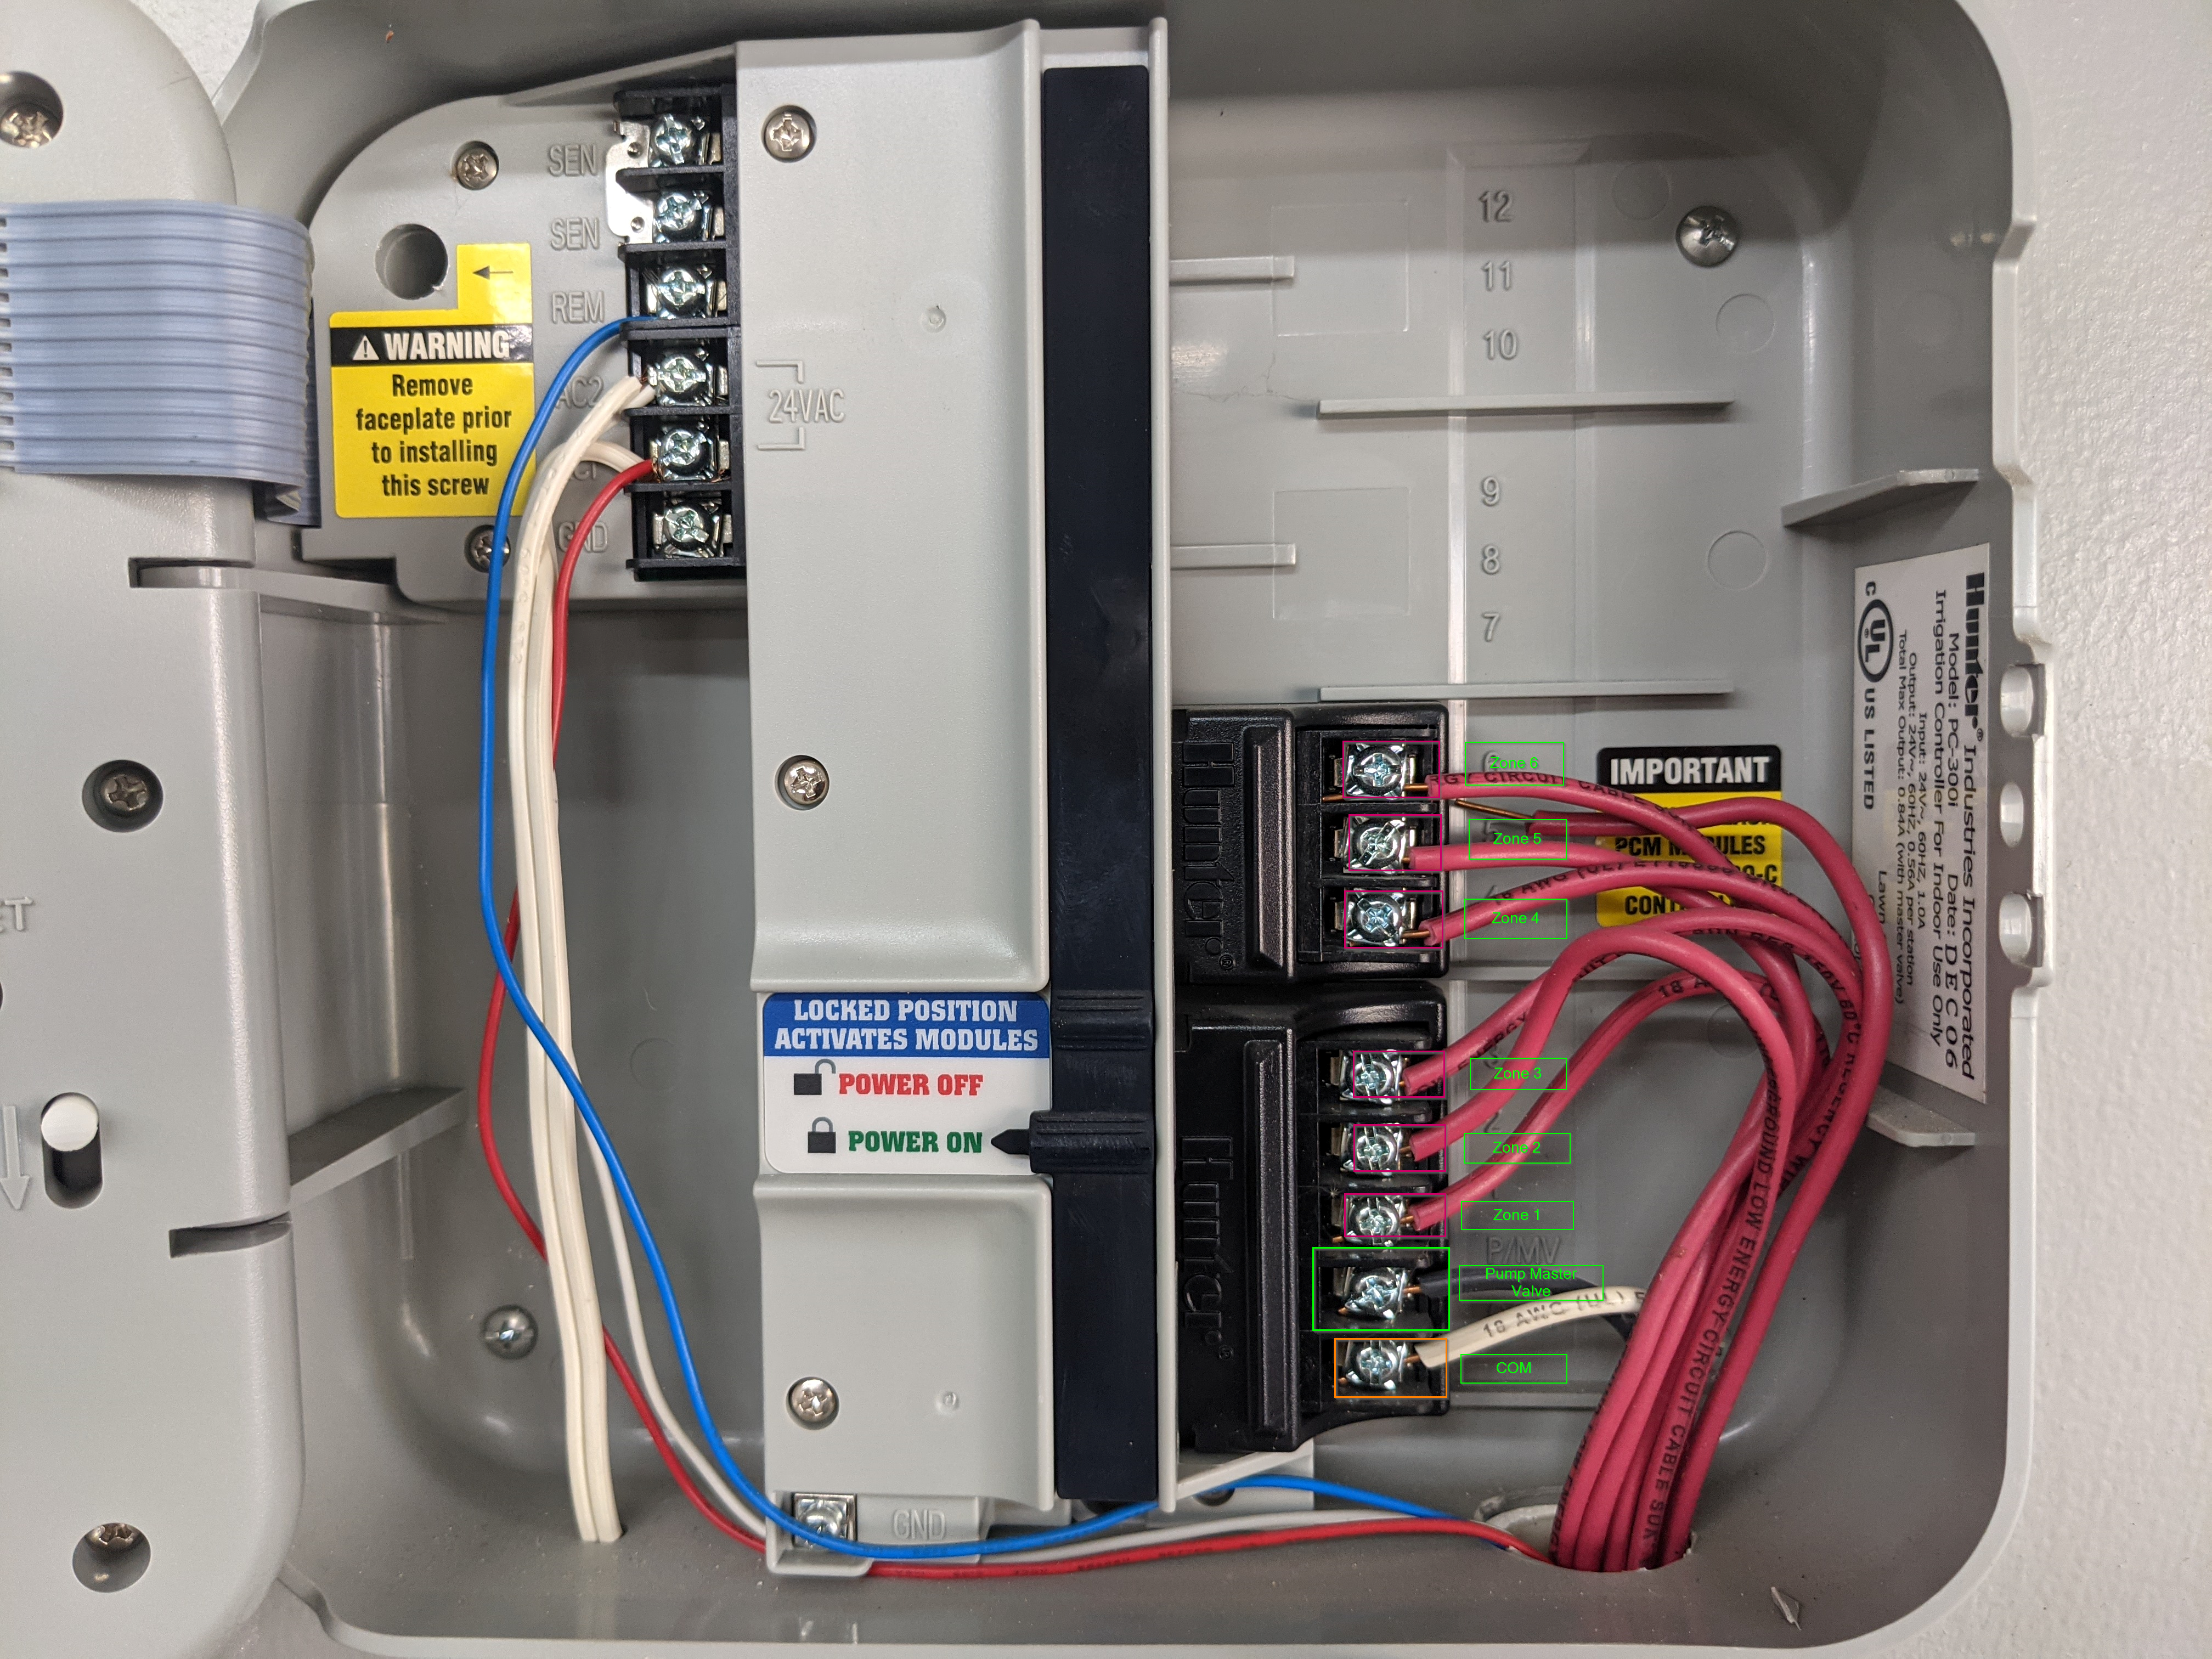
In short, the only cables you really need to unplug from the old system into the new are:
- COM (white cable in image below)
- Each Zone cable ( 6 red cables)
- P/MV (black cable)
Your setup might not have a P/MV wire, but if it does - you'll need to plug that into an available Zone port on OpenSprinkler.
Existing Hunter-C System
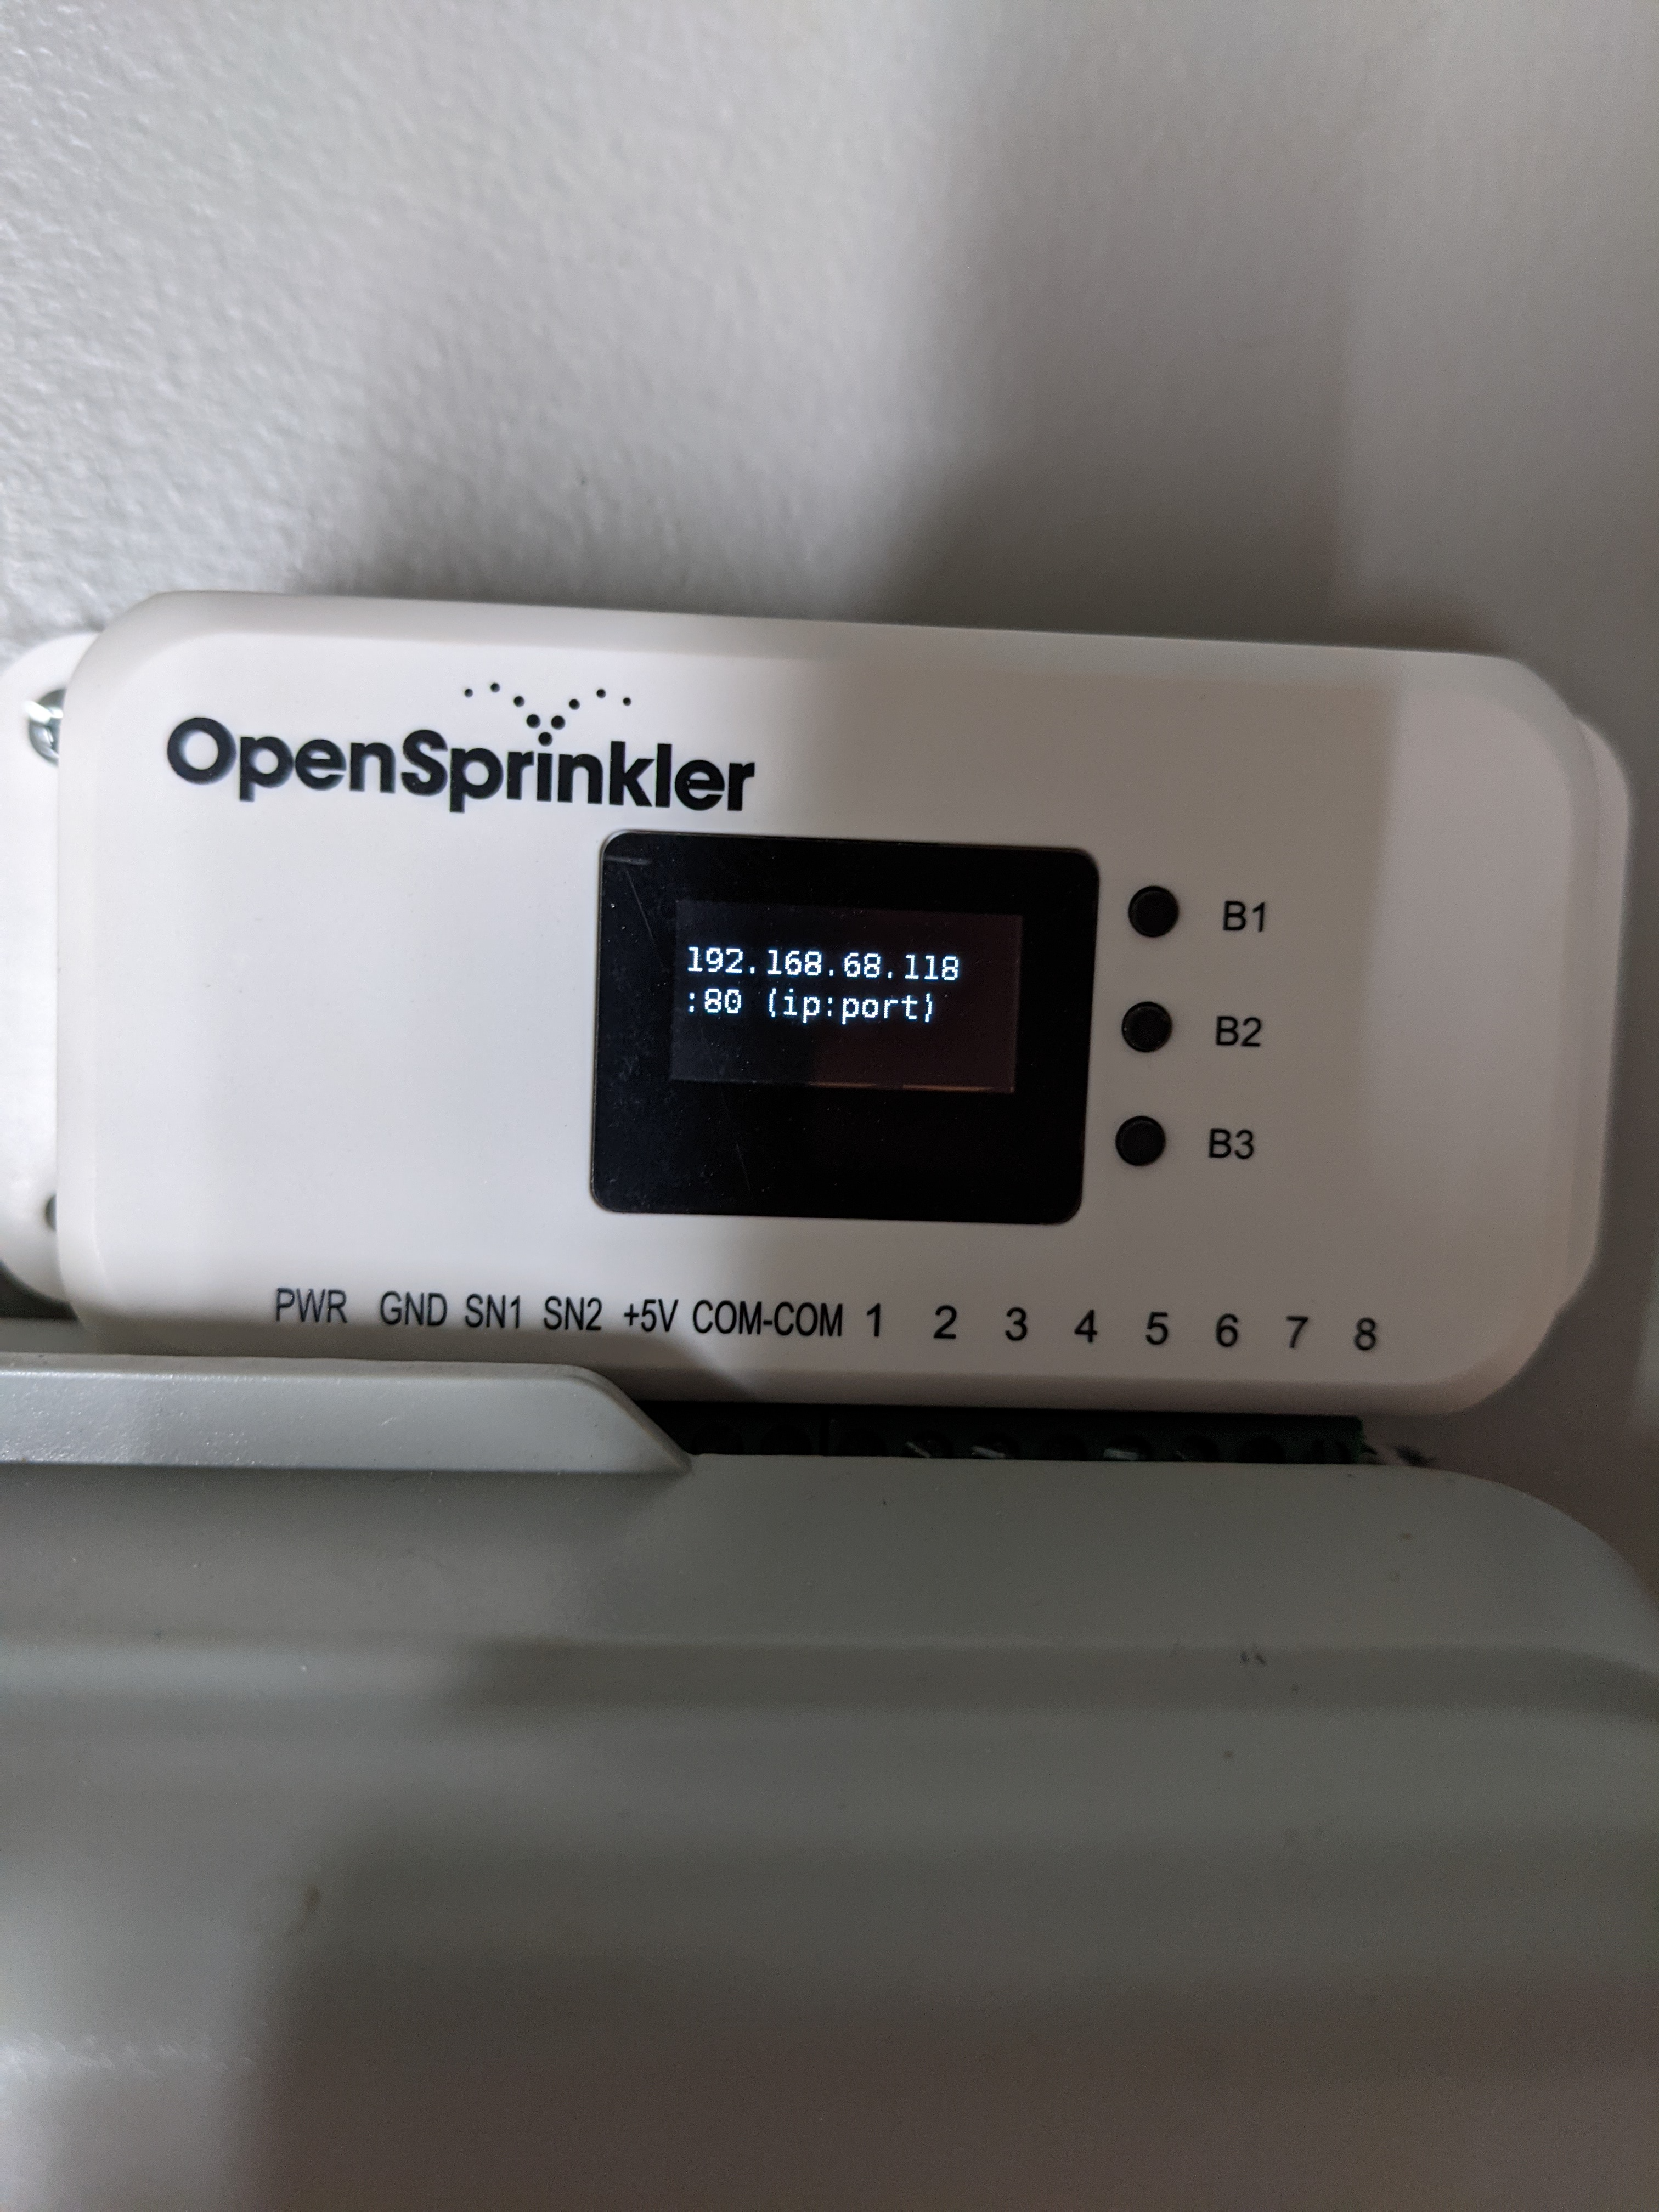
OpenSprinkler Wiring Guide
Then, you will insert those cables into the corresponding ports on the OpenSprinkler unit.
Just in case you didn't know, the orange and green wiring blocks can be removed to insert the cables in easier. Unscrew each of them first. Insert each wire and tighten them down with a small screwdriver.
The red zone cables should be inserted into the corresponding zones (Zone 1 on the old system goes into #1 on OpenSprinkler).
The black P/MV cable is your pump/master valve. Plug this into an available zone (either 7 or 8). Once you have your OpenSprinkler setup, you will assign your P/MV to the "Master" section.
The white COM wire goes into the COM port.
The black power cable has a red and a black wire. This will be from your AC power adapter. The power cable will be inserted into the orange block; it doesn't matter which side they go into. Do this one last, as you probably don't want to provide power to OpenSprinkler until everything is setup correctly.
If you have ground (GND) or rain sensors (I don't), then plug those into OpenSprinkler as well.
Power On OpenSprinkler
Once all the cables are plugged, plug your AC power brick into the wall. There are no physical on/off buttons, but the LCD panel should start displaying a text indicating that's it booting up.
If it doesn't boot up right away - don't fret. Chances are the red and black cables connecting to the orange block aren't seated correctly. Unscrew, adjust, and try it again.
Setting Up Wifi
Once powered up, OpenSprinkler starts in AP mode. This creates an adhoc wireless network called something like "OS_Last6ofMACaddress).
Connect your phone to this network. If you have an Android phone, you will receive a notification that says "wifi has no internet connection", which is normal. Click YES to stay connected. (this part is required for Android.) If you don't click yes or clicked out of that notification too fast, you can go into your wifi settings, click and hold the network, and then confirm it that way.
Next, open a web browser on your phone and go to OpenSprinkler's default IP address: http://192.168.4.1
Follow the prompts to connect OpenSprinkler to your wifi network. Once connected, it will restart the device and automatically connect to your home network. The device will now show it's new IP address, so you'll need to disconnect your phone from OpenSprinkler wifi and connect it back to your normal network. Then, enter the IP displayed on your screen.
You will then see a Logon screen like below. Enter the default password "opendoor".
Once logged in, you will see your different zones (S01-S08). Remember, 1-6 are your zones, and 7 was your Master.
Configuring Master
If you have a master zone, the first thing you need to do is assign S07 to your Master. Click Options in the bottom right corner > Edit Options > Configure Master.
As you can see, I've already renamed all my zones as well as the master. Whenever you test it out, your Master will now show up as an active sprinkler.
Testing OpenSprinkler
There's a couple ways to test it, but you can either click on the red circle and run each zone manually, or go into Options > Run Once Program > Test All Stations.
Other Settings
If all of your zones are working correctly, you can now play around with some of the other settings, such as renaming zones, configuring schedules, changing the rain delay, and much more.
I highly recommend changing the default password in the options, especially you port forward OpenSprinkler so you can control your sprinkler system remotely when away from home.
There is also a handy OpenSprinkler mobile app you should download, that way you don't need to constantly remember the IP address when checking on or running the sprinkler.
Wrapping Up
Hopefully this guides helps you get your smart sprinkler system up and running pretty quickly in 2021! Although the pre-configured OpenSprinkler unit is a bit pricey, it's still less expensive than completely replacing it with something else or purchasing all the parts and assembling it yourself.
Overall, I am extremely happy with my purchase. Shipping was extremely quick, and installation took less than an hour.
However, if OpenSprinkler does sound like the solution for you, I recommend going with a top rated brand wifi sprinkler system such as Rachio or Rainbird.


