How To Backup Home Assistant Locally using Samba Share Addon
In this guide, I'm going to show you how to backup Home Assistant to a file share or mapped network drive using the Samba Backup addon. Specifically, I'm going to show you to backup your HA instance to a Windows Server 2019 file share.
This will get installed via the Supervisor addon store. Once installed, it will allow you create full or partial Home Assistant snapshots and store them on a computer or NAS you have at your house.
Although many of you already use the Home Assistant Google Drive Backup (myself included!), it's a good idea to have a secondary local backup to follow the standard 3-2-1 backup rule.
Personally, I use this to create local "offline" backups to an external harddrive. I basically plug in the harddrive before the backup is scheduled (or trigger it manually), and once complete - I unplug it. Super easy!
This tutorial will show you how to create a Windows file share, install the Samba Backup addon, and then configure it to run. If using Synology, Proxmox, OpenMediaVault or something else - there are usually "Samba" addons you can install in those OS's to create a shared folder.
Let's get started!
Download Samba Backup Addon
Navigate to Supervisor > Add-on Store tab.
Click the 3 dots in the top right-corner > Repositories.
Then, paste this URL and click Add: https://github.com/thomasmauerer/hassio-addons
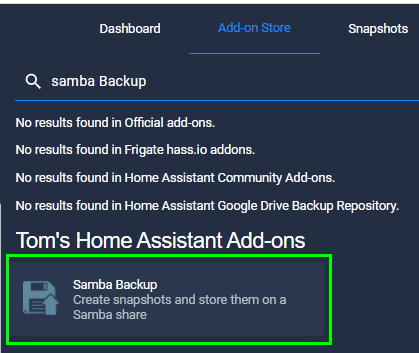
Once complete, it should show up in your list of Add-ons:
Install the Addon
Next, under your Add-on Store tab, search for Samba Backup. Click it, then click Install.
Create Windows File Share
Although this guide covers how to backup snapshots to a Windows computer or server, everything is basically the same for a NAS, Proxmox, Synology, etc. You just create the Samba share and provide the paths/credentials in the next step.
For Windows, I am using my C:\ drive as the target.
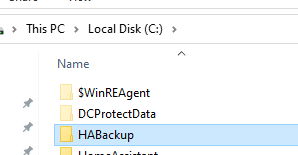
- Open File Explorer (Windows key + E)
- Double-click your C:\ drive.
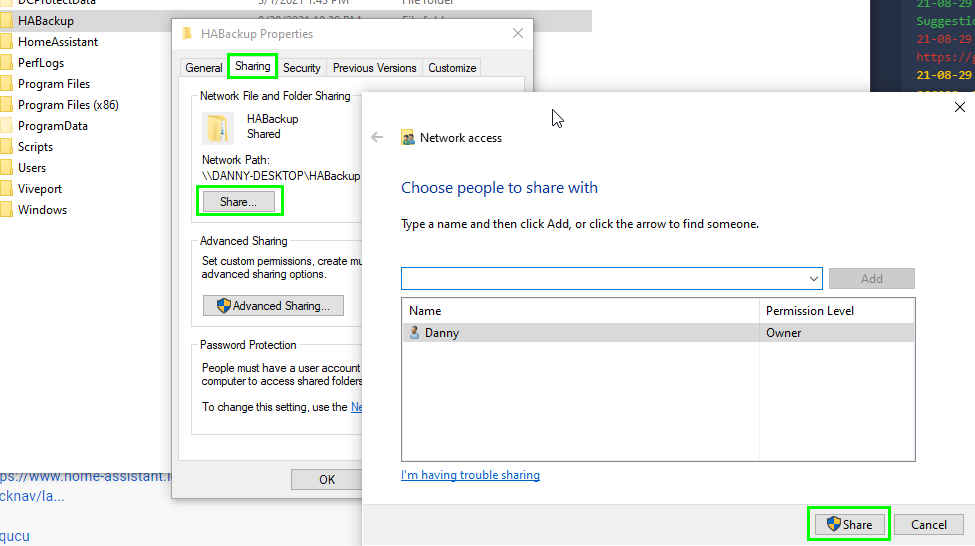
- Right-click > Create new folder. Name it HABackup or similar.
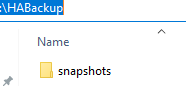
Inside that folder, create a subfolder names snapshots.
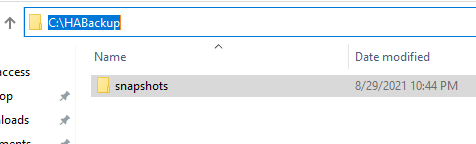
Right-click the parent HABackup folder > Properties > Sharing. Click Share and then Share again.
Great! Your target folder is now shared and should be accessible with Home Assistant. The last step is to configure the addon.
Configuring the Samba Backup Addon
After installing the addon and creating the shared folder, we need to edit it's configuration. This can all done from the UI.
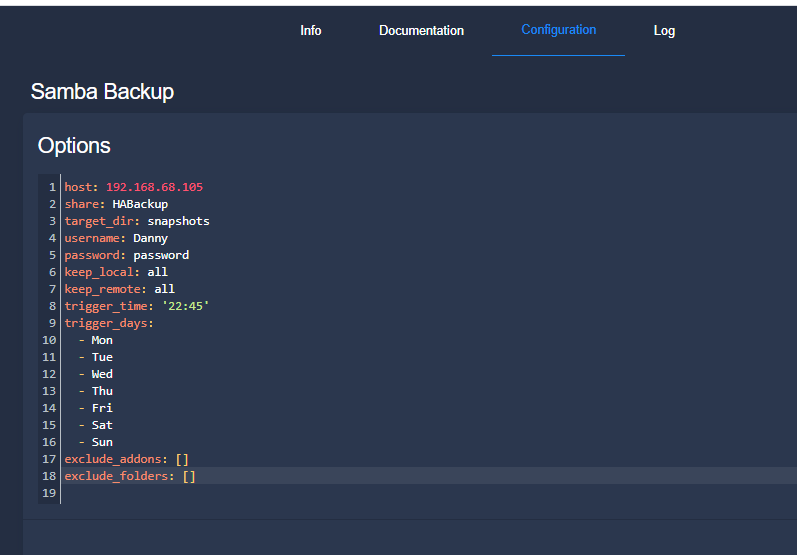
This is where you can specify the time the backup runs, the path the snapshots will go, whether or not you want to exclude any addons, or the credentials used to access the share.
Supervisor > Add-On Store. Search for Samba Backup.
Click the Configuration tab at the top. I have mine scheduled to run at 10:45pm each night and have it backup everything (full snapshot).
- host (required) = the IP address of the PC your share it is (To find your IP address, open CMD > ipconfig > ipv4 address)
- share (required) = the parent folder your shared (HABackup)
- keep_local (optional) = how many snapshots you want saved in Home Assistant.
- keep_remote (optional) = how many snapshots you want saved in your Windows file share.
I recommend reading through the addon documentation to view everything you can configure. In my example config - I have keep_local and keep_remote set it to All, but I highly recommend changing this otherwise you might max out storage space in Home Assistant.
host: 192.168.68.105 share: HABackup target_dir: snapshots username: Danny password: password keep_local: all keep_remote: all trigger_time: '22:45' trigger_days: - Mon - Tue - Wed - Thu - Fri - Sat - Sun exclude_addons: [] exclude_folders: []I wasn't able to get it to work using my computer name (Danny-Desktop), so I had to use the IP address instead.
Security Recommendations
I don't recommend storing your Windows administrator username & password in plain text in the configuration. The proper way to store sensitive info in HA is to use Secrets, but that's a little out of scope for this guide.
You can also probably create a local standard Windows user account, grant it access to the share, and enter those creds into the configuration as another method to limit access - but since I'm using secrets, I haven't tested that out yet.
Testing It Out
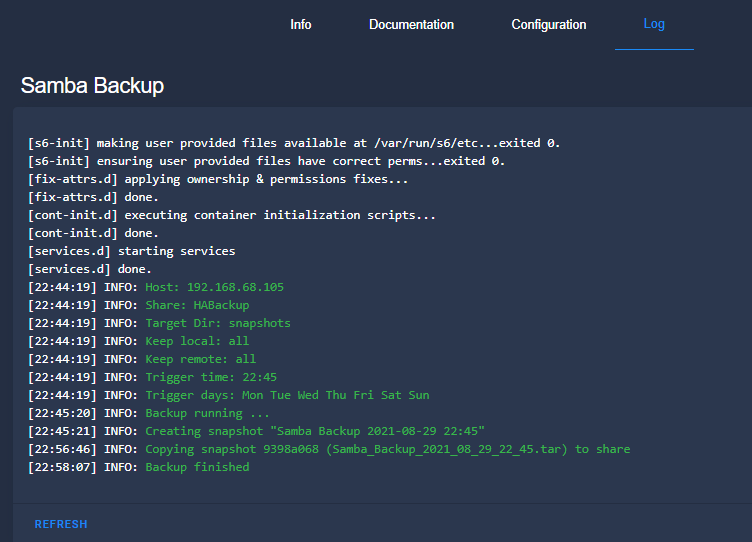
After saving the configurating, click the Log tab to make sure Home Assistant can access the share. If it can't, you'll see some red text letting you know what the problem is. Check your paths and credentials and ensure the folder is correctly shared, and use the IP address instead of computer name in case DNS doesn't resolve it correctly.
To test, set the backup time in the config 1 minute ahead of your current time. Then, switch to the Log tab to verify you see "Backup Running...".
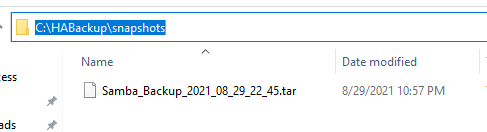
Once the log shows Backup finished, you should see your snapshot in Windows!
Other Questions
Here's just a few questions I had when setting this up. I thought it might be helpful to include before you set it up.
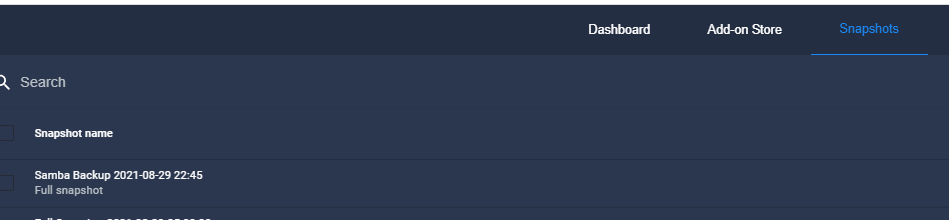
Where are Home Assistant snapshots saved?
Snapshots are saved in Supervisor > Snapshots. Since this addon leverages the built-in Home Assistant snapshot capability, you can also view them directly within Home Assistant.
Does this automatically backup to Google Drive?
If you are also using the Home Assistant Google Drive Backup addon, then yes. Any snapshots that are taken from this Samba Backup addon will also automatically be uploaded to Google Drive.
Samba Backup Entity
After installing, an entity is also created (sensor.samba_backup). More details on the sensor are found in the documentation. You can add this sensor to a basic entities card to view the status:
IMPORTANT: The sensor will be unavailable after Home Assistant reboots. To restore the sensor, create an automation.
Restore Sensor Automation
This automation is required. Whenever Home Assistant restarts, you will lose the attributes of the Samba entity which means the backup job will never trigger.
Configuration > Automations > Create new automation > Edit in YAML. Then, paste in this code exactly and save.
alias: Restore Samba sensor on startup description: '' trigger: - platform: homeassistant event: start condition: [] action: - service: hassio.addon_stdin data: addon: 15d21743_samba_backup input: restore-sensor mode: singleSamba Backup Status Card
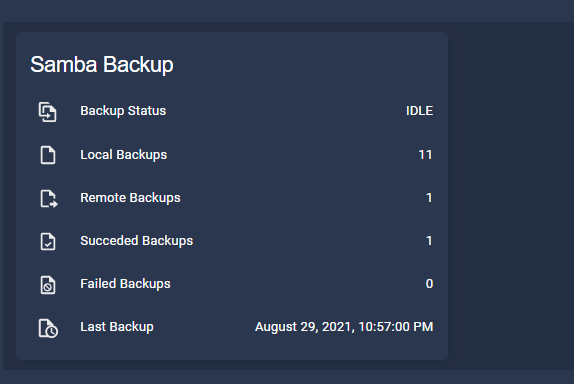
If you'd like to create a Lovelace card that shows things like Backup Status, number of local and remote backups, when the last backup was, etc - you can create a simple Entities card. Thanks to Tom_I in the Community Forums for this neat card.
Add Card > Manual. Paste in this code:
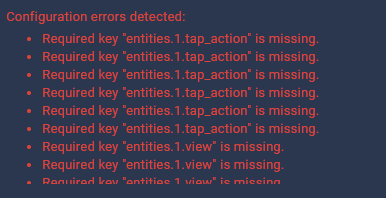
entities: - entity: sensor.samba_backup icon: 'mdi:file-replace-outline' name: Backup Status - attribute: backups_local entity: sensor.samba_backup icon: 'mdi:file-outline' name: Local Backups type: attribute - attribute: backups_remote entity: sensor.samba_backup icon: 'mdi:file-move-outline' name: Remote Backups type: attribute - attribute: total_backups_succeeded entity: sensor.samba_backup icon: 'mdi:file-check-outline' name: Succeded Backups type: attribute - attribute: total_backups_failed entity: sensor.samba_backup icon: 'mdi:file-cancel-outline' name: Failed Backups type: attribute - attribute: last_backup entity: sensor.samba_backup icon: 'mdi:file-clock-outline' name: Last Backup type: attribute show_header_toggle: false title: Samba Backup type: entitiesI did ran into a few errors adding this card (below image). Eventually after a few tries it allowed me to save. Here's two other ways I was able to get it added:
1. Put a # sign in front of each icon: OR
2. Move show_header_toggle:, title:, and type: from the bottom of the card to the top.
After doing either of those, I could save the card successfully.
Samba Backup Notifications
Again, thanks to Tom_I for the notification automation.
- alias: Samba Backup Notifications trigger: platform: state entity_id: sensor.samba_backup condition: - condition: not conditions: - condition: state entity_id: sensor.samba_backup state: IDLE action: - service: notify.notify data_template: title: '*Information*' message: "Samba backup {{ states('sensor.samba_backup')|lower }}." - service: logbook.log data_template: name: Samba Backup message: "{{ states('sensor.samba_backup')|lower }}"Trigger Manual Snapshots from Lovelace
If you'd like to quickly create a snapshot from Lovelace, paste this into a Manual card:
name: Manual Samba Backup icon: mdi:database type: button tap_action: action: call-service service: hassio.addon_stdin service_data: addon: 15d21743_samba_backup input: trigger show_state: trueWrapping Up
Hopefully this guide helps you set up your Samba share so you can backup locally! Although I had backups to Google Drive already, I've been wanting a way to backup my instance locally and this was a great solution.
The documentation for this addon was great, but I went ahead and create a step-by-step guide and basically went through this entire Community Forums post so save you a bunch of time, so you don't have to guess how to setup the card and notifications.