How To Automate Plex Metadata Backups
As any good Plex server owner will tell you, one of the most important things you can do is backup your Plex metadata. Ideally, you should be following the 3-2-1 backup rule, where you keep 3 copies of your data, on two different mediums, with one of those being offline/offsite. In the event you Plex server crashes, you will want to restore your data as quickly and efficiently as possible.
Luckily, Plex has a How To Backup Plex Data guide we can reference. This guide is very basic, but the gist of it is that you will need to backup the entire Plex Media Server Data Directory (Typically under C:\Users\username\AppData\Local\Plex Media Server), along with a few registry keys. In the event you need to restore Plex to a new computer or harddrive, you simply install Plex, import the registry keys and paste the data directory into the new location. This is great, however, I want to eliminate the need to do this manually every week.
In this guide, I'm going to show you how to a automatically backup your metadata and Plex registry keys using a Powershell script in 2021. Once it's installed, you can run this as a scheduled task and set the frequency of when the script should run.
Note: This guide is for Windows users who run Plex. If you have Plex running in Docker or a Windows VM, I recommend taking full VM backups instead.
Why backup Plex Metadata?
You may be thinking, "Why do I need to backup my Plex Media Server Data?"
Technically, you don't need to. But, if your computer crashes and you would like to retain viewstates (what has been watched by who), metadata, thumbnails, custom posters, Plex settings, etc, then it's a very good idea to do so. Plex does automatically backup your database, but it doesn't include some of those items.
To put it simply, if you want to get Plex backup and running as quickly and easily as possible after a migration or server crash, you should have this metadata backed up.
Step 1: Download the Powershell Script
For this guide, I am using a handy Powershell script I found on Github called PlexBackup. PlexBackup is a Powershell script that can back up and restore Plex application data and the Plex registry keys on a Windows system.
The dev has created a very basic how-to guide you can reference here, if needed. My guide below is more of a step-by-step tutorial.
This script is honestly overkill for my use, but it works and saved me from having to write something myself. PlexBackup allows you to backup, restore, receive SMTP notifications once the script completes, and allows you to tweak exactly what metadata you want to backup. For example, if you don't want to backup the Cache directory, you can exclude that.
Before you get started, create a new folder on a different storage array, computer, or external harddrive. This is very important; you don't want to backup to the same harddrive in case of failure. In my case, I have Plex installed on my C:\ drive, so I am going to use my S:\ drive as the backup target.
First, create a new folder called PlexBackup.
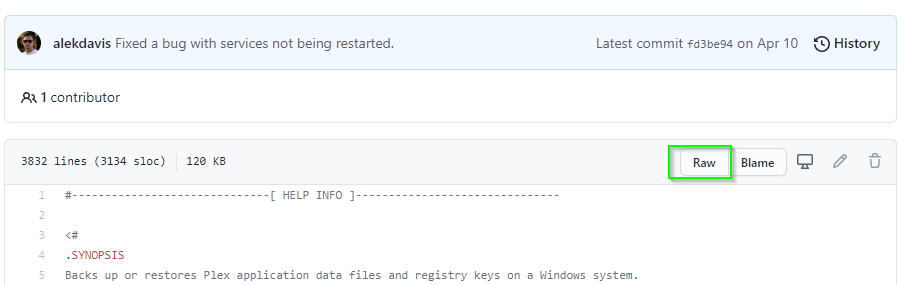
Next, open Powershell ISE as administrator. Then, copy the code from the github page here by clicking the Raw button: https://github.com/alekdavis/PlexBackup/blob/master/PlexBackup.ps1
Once copied, paste this into the Script pane.
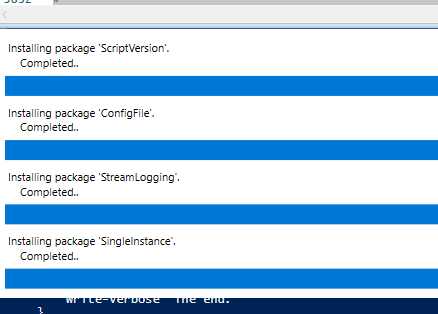
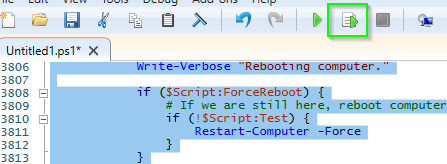
No need to make any changes. Highlight everything, and then press the Run Selection button on the ribbon.
This will run the script and install a few required NuGet packages.
Then, save this script to your target destination (S:\PlexBackup). Give it a name like PlexBackup.ps1.
Step 2: Create Config File
Next, you need to create a configuration file that the PlexBackup.ps1 script will reference. This is the file you can adjust exactly what you want backed up. You can leave just about everything as default, but you do need to change the path to the destination folder.
Navigate to your S:\PlexBackup folder and open it. Right-click the empty space and create a new Text Document. Copy the example config file to your clipboard from here: https://github.com/alekdavis/PlexBackup/blob/master/PlexBackup.ps1.SAMPLE.json
Paste it into your text document.
Scroll down a few lines until you see the BackupRootDir section. Under Value, change this to your backup folder like this. Note: you need two slashes.
Then, go to File > Save As > ensure it's saving to the S:\PlexBackup folder >name it PlexBackup.ps1.json. The json name must be the same name you used when naming the Powershell script.
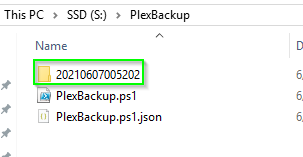
You should now have two files in S:\PlexBackup:
Step 3: Run the Script
Before running the script, you need to make sure your Plex Media Server application is running. This script will close and automatically reopen once it's complete. I recommend running this late at night or after ensuring no one you share Plex with is watching something (I use Tautulli for this).
Next, you will need to open Powershell as admin again. Navigate to the PlexBackup folder by typing cd S:\PlexBackup
Then, run the script by typing .\PlexBackup.ps1
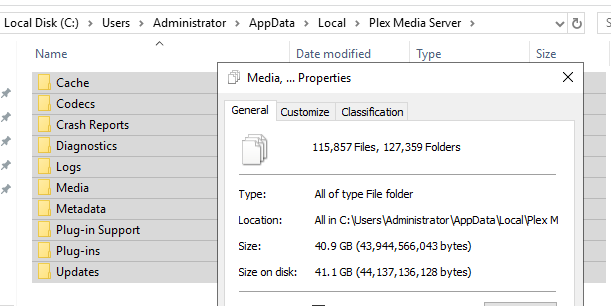
Be patient during this step. For reference, my Plex data folder is 41gb and this script took 1 hour and 3 minutes to complete. Once the backup completed, the compressed backup data was 29gb.
TIP: If the script doesn't run, you may need to check your Powershell execution policy using Get-ExecutionPolicy. If your policy doesn't allow you to run scripts, open Powershell as admin and run Set-ExecutionPolicy RemoteSigned. Then, run through Step 3 again.
Step 4: Run PlexBackup as Scheduled Task
This is optional, but I recommend running this as a scheduled task. The dev already wrote a step-by-step process for this, so I'm just going to include the link here: https://github.com/alekdavis/PlexBackup/blob/master/SCHEDULED%20PLEX%20BACKUP.md
Restoring PlexBackup Data
In the event your Plex server crashes or you need to migrate Plex to another Windows system, simply copy the two files you created in Step 1 and 2 to a folder on the new computer. Ensure Plex is installed and running, and navigate to the script backup folder like you did in Step 3.
Then, type .\PlexBackup.ps1 -Restore
That's it! It will automatically restore the metadata and import the registry keys for you.
Other Thoughts
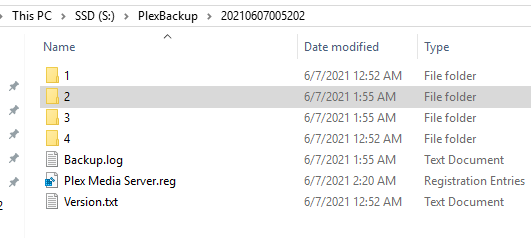
Before you set this to run automatically, you should make sure the target destination has enough storage space as it will create new folders each time it runs.
For example, if I am storing these backups on a 500gb external harddrive, and my compressed backup data is 29gb, I can get about 17 weekly backups before the harddrive fills up. The backups will append the data to the newly created folder. I recommend deleting older backups every couple months.
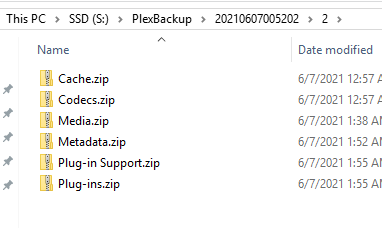
As you can see, here are the contents of the backed up data, compressed.
Wrapping Up
Keep in mind, this does not back up your media (TV shows, Movies); just the application data settings and required registry files.
Anyway, I hope this guide helps you automate an otherwise manual process! Let me know in the comments if this script works for you.