How To Add Tautulli To Home Assistant
Tautulli is a third-party application that runs alongside your Plex Media Server to monitor various stats. You can see who's watching what, when and where they watched it, what device they were watching it from, and whether or not a stream is being transcoded or not.
Tautulli is pretty awesome, although I can imagine it'd be a little creepy if my shared Plex users knew I had access to data like that. I don't really care what they watch or how long they watch it for; it just gives me satisfaction to know my users are enjoying the TV shows and movies I have available. I mainly use Tautulli to see if anyone is watching anything before I reboot my server for updates.
In this guide, I'm going to show you how to add Tautulli to Home Assistant. This will allow you view all those wonderful stats directly within Home Assistant. No more needing to open up the Tautulli webui from a browser bookmark or your self-hosted dashboard!
I will say that this was one of the more frustrating integrations I've played around with. I wasn't able to get Option 1 or Option 3 working (couldn't get past the Tautulli login screen). However, I'm still publishing this guide to hopefully save you guys some wasted time and energy. I was still able to get my Tautulli stats in HA via Option 2, so I guess I'll just have to be happy with that for now.
Option 1 (not working as of 7/29.21): This will install a brand new instance of Tautulli. This will not make your existing Tautulli instance viewable within HA. To get your old data into Home Assistant, you'll need export/import your Tautulli data into this addon.
Option 2: This will create sensors for an already running Tautulli install. Works great!
Option 3 (not working as of 7/29/21): Will embed your existing Tautulli web interface as a new sidebar item in Home Assistant as an iFrame.
Option 1: Fresh Tautulli Install in Home Assistant
Step 1: Install Community Addon Store
Note: I wasn't able to get this option to work.
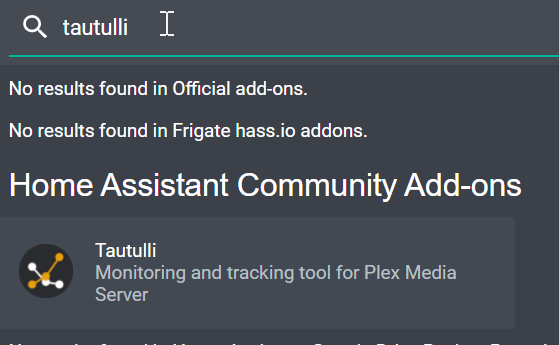
Tautulli can be installed from the Community Add-on store. If you don't have the Community Add-On store, or aren't sure if you have it, go to Supervisor > Addon Store. There should be a section for it.
If you don't have it yet, simply go to the Supervisor Addon Store page, click the 3 dots in the top right corner, and then click Repositories.
Paste in this URL, click add, and it will show up: https://github.com/hassio-addons/repository
Step 2: Install Tautulli Addon
Next, just search for Tautulli.
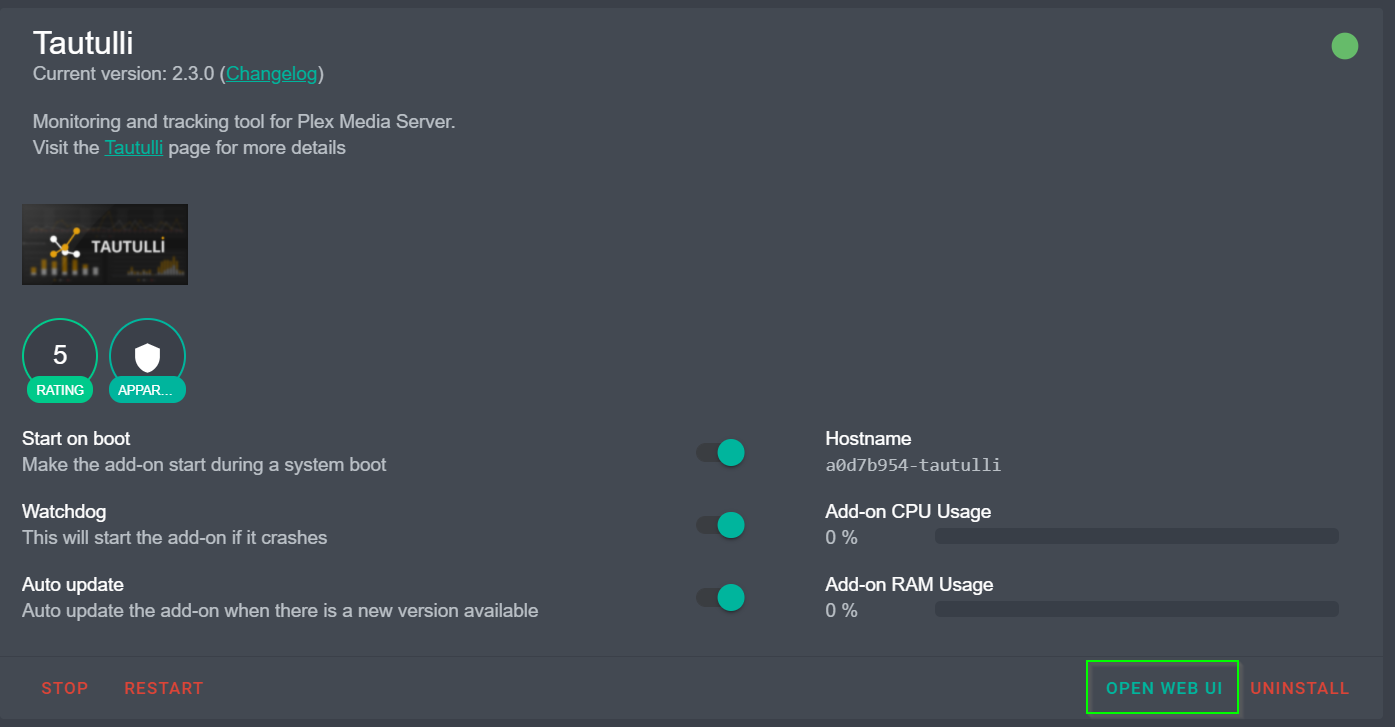
Click it, and then click Install. Under the Configuration tab, set a Username and Password. Then start the addon.
Once installed and running, click Open WebUI to ensure it's running. If if doesn't seem to launch, check the Logs tab. If the logs verify that it's running, clear your browser cache by pressing CTRL+F5 or open the IP:port in an incognito browser.
It should be accessible from your Home Assistant IP and port 8181 (i.e. http://192.168.68.124:8181/) From there, just login and follow the on-screen instructions to add your Plex API key.
Option 2: Add Existing Tautilli Data to Home Assistant
Follow this option if you already have Tautulli up and running and want to show some basic sensors in Home Assistant. Instructions are pulled from the official Home Assistant Tautulli integration page.
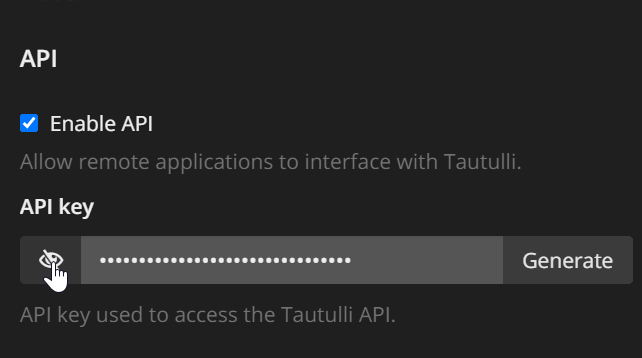
Step 1: Find your Tautulli API Key
Log into your Tautulli web interface. Go to Settings > Web Interface. Ensure API Key is checked and generate a new one (only if you aren't using the API key elsewhere. Otherwise, use the one that's already there).
Your API key will be located at the bottom of that page.
Step 2: Add Tautulli Sensor
Next, you'll have to add a new sensor to your configuration.yaml file.
File Editor > configuration.yaml. If you are using a port other than the default 8181, you'll need to add a port: line as well.
sensor: - platform: tautulli api_key: 300xxxxxxxxxxxxxxxxxxx host: 192.168.68.137If you already have a sensors: block in your configuration.yaml file, then the config to add would just be:
- platform: tautulli api_key: 300xxxxxxxxxxxxxxxxxxxx host: 192.168.68.137If you would also like to add a LAN Bandwidth, WAN Bandwidth, and Total Bandwidth sensor, then you can use this code block instead:
sensor: - platform: tautulli api_key: 6tr6Sxxxxxxxxxxxxxxxxxx host: 192.168.68.137 - platform: template sensors: tautulli_wan_bandwidth: friendly_name: "Wan Bandwidth" value_template: "{{ (state_attr('sensor.tautulli', 'wan_bandwidth') / 1024) | round(2) }}" unit_of_measurement: "Mbps" tautulli_lan_bandwidth: friendly_name: "Lan Bandwidth" value_template: "{{ (state_attr('sensor.tautulli', 'lan_bandwidth') / 1024) | round(2) }}" unit_of_measurement: "Mbps" tautulli_total_bandwidth: friendly_name: "Total Bandwidth" value_template: "{{ (state_attr('sensor.tautulli', 'total_bandwidth') / 1024) | round(2) }}" unit_of_measurement: "Mbps"After adding the new Tautulli sensor, restart Home Assistant from Configuration > Server Controls.
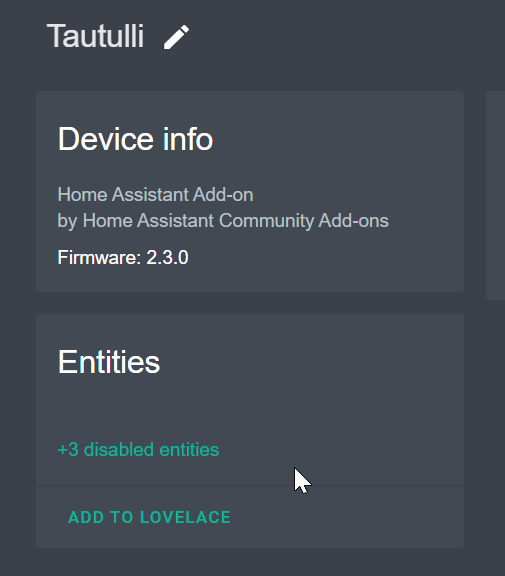
Step 3: Check for New Sensors
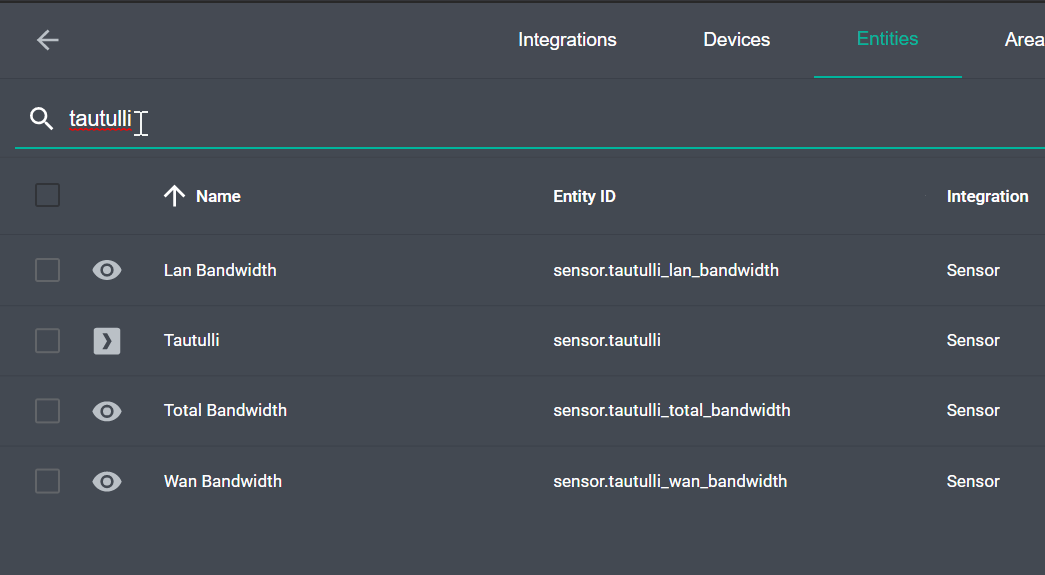
If you go to Configuration > Entities, you should now see a Tautulli sensor (as well as a few others if you added them).
Step 4: Add Tautulli Sensors to Lovelace
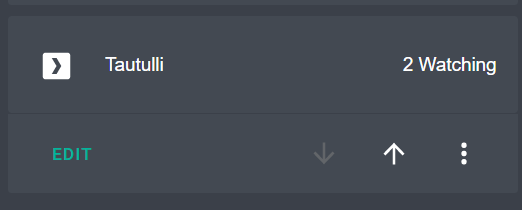
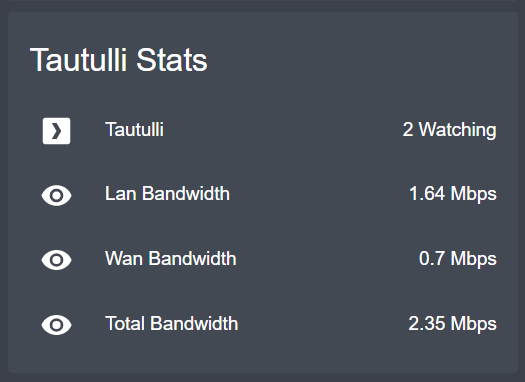
Next, create a new Entities card in Lovelace. Add all the tautulli sensors to it. Start a TV show or movie in Plex and you should now see this:
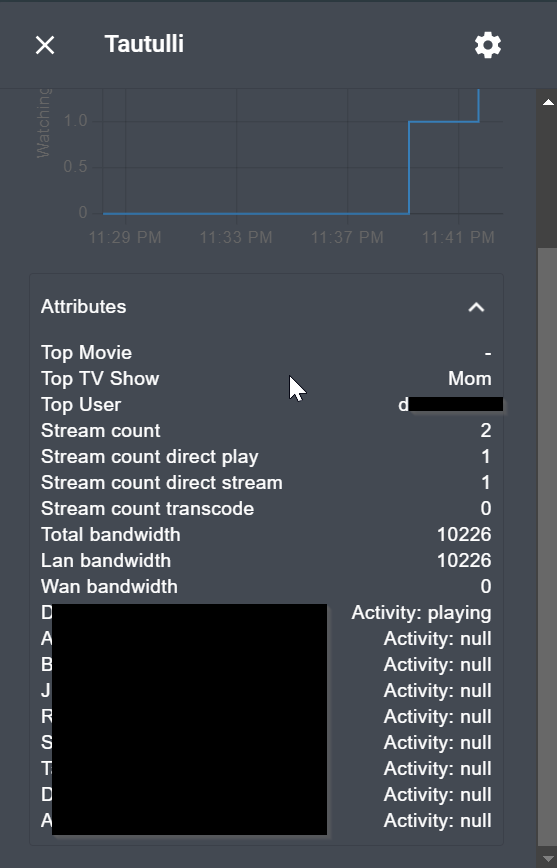
And if you click into the sensor.tautulli entity from the card and view the attributes, you should be able to see if any of your users are watching anything:
Option 3: Add existing Tautulli instance as an iFrame
Note: I wasn't able to get logged in through an iFrame, either. For some reason, it keeps trying to open Tautulli with my Home Assistant IP when I click the sidebar.
If you already have Tautulli running somewhere and would like to view the normal Tautulli web interface directly within Home Assistant, you can do that too!
Just add this to your configuration.yaml. This will show a new Tautulli sidebar item. Note that there isn't a Tautulli icon, so you can use mdi:filmstrip or mdi:plex instead.
panel_iframe: tautulli: title: "Tautulli" url: "https://192.168.68.137:8181/home" mdi:filmstripWrapping Up
All in all, I had high hopes to simply be able to be able to add Tautulli to Home Assistant as an iFrame and view the entire web ui in Home Assistant. Unfortunately, I just wasn't able to get it working. I'm thinking this must be a bug with Tautulli, as I saw several other forum posts about Tautulli not working as in iFrame in the Organizr dashboard as well.
Issues aside, I'm still happy I was able to pull in the stats from my existing Tautulli instance. I would say if you want to start viewing Plex stats in Home Assistant, then just setup Tautulli separately and add it just like I did in Option 2 which works great.