How to add a Xiaomi Mi Scale to Home Assistant
In this guide, I'll show you how to add a smart scale to Home Assistant to using an ESP32 board flashed with ESPHOME. The Xiaomi Mi Scale 2 was surprisingly one of the few "smart" scales I found that work well with Home Assistant (except for Withings scale, but those are much more expensive).
If you've never worked with ESPHOME or purchased an ESP32 board before, don't worry - this is my first time as well. No soldering or programming is needed, either.
I'm documenting every step I took along the way, so hopefully it's a pretty easy guide for you to follow.
Let's get started!
Note: If you already have ESPHome up and running, skip to Step 4.
Equipment List
You will need the following items in order to set this up.
- Xiaomi Mi Body Composition Scale 2
- ESP32 microcontroller
- A micro USB cable (a data transmitting+power USB cable. A lot of them are charge only.)
- Four AAA batteries for the scale.
Project Overview
- Purchased necessary devices above.
- Install batteries in scale, connect to Zepp Life (MiFit) app via bluetooth.
- Install ESPHome, a Home Assistant add-on that lets you manage your ESP32/ESP8266 devices in one place.
- Create a configuration file from within ESPHome, and & install it to your ESP32.
- Add the newly discovered devices to Home Assistant. You can now add sensors to your dashboards!
The reason we are using an ESP32 instead of ESP8266 is because ESP32 has built-in Bluetooth, ESP8266's do not.
How It Works
The Xiaomi Mi Body Composition Scale 2 is a Bluetooth scale. It sends data via Bluetooth to their Mi Fit app (now called Zepp Life). That can already be done just by purchasing the scale.
However, we want the data to go to Home Assistant instead.
So, I purchased an ESP32 microcontroller from Amazon, which has built-in Bluetooth, and flashed it with the custom firmware called ESPHOME.
To sum it up, we are sending the bluetooth data from your scale to Home Assistant instead of going to the MiFit app. Once going to Home Assistant, you can delete the Zepp Life app.
Step 1: Unbox & Install Batteries
You will need x4 AAA batteries for the scale. Install the batteries, place the scale on a flat surface, and stand on it.
If your scale registers an "L" right away, your batteries are dead.
The default weight measurement is in kilograms (kg), but can be changed to pounds (lbs) within the app.
Step 2: Download and Install Zepp Life(MiFit) app
Download the Android or Apple app.
Follow the onscreen steps to complete setting up the scale by connecting the scale to the Bluetooth on your phone.
Once it's paired, feel free to look through settings. The only settings changes I made was changing from kilograms to pounds.
Step 3: Install ESPHome Add-On
Next, we need to install the ESPHome addon. This add-on lets you manage and program your ESP32 or ESP8266 microcontrollers directly from Home Assistant. No programming experience needed.
In Home Assistant, click Settings > Add-Ons.
On the ESPHome changelog page, it says this can eventually be downloaded under the Settings > Addons page. For now, go to that URL and click the blue Add-On button.
It will state that the addon is missing, so click Add to install it.
Then click Install.
Once complete, toggle all 4 settings on.
Then click Start. An OPEN WEB UI button will appear. Click that to start flashing your ESP32.
Step 4: Flash ESP32 with ESPHome
Click Add New Device.
The first thing you'll probably see is this message. The message means I was connecting to home assistant from inside my local network (i.e. - http://192.168.68.124:8123), which isn't SSL secured. If you are using Nabu Casa or DuckDNS, then you'll also have an external URL for your Home Assistant server.
It can be found by going to Settings > Home Assistant Cloud > Remote Control.
Note: If you don't have remote access setup yet, you can flash it from this website instead.
Once on the external URL, click Add Device again. Give it a useful name & enter your wifi SSID and password. "ESP32-bt-scale" would be an good example of a name. This name is what will show up on your wifi network, too.
ESPHome is ready to flash your esp32 device.
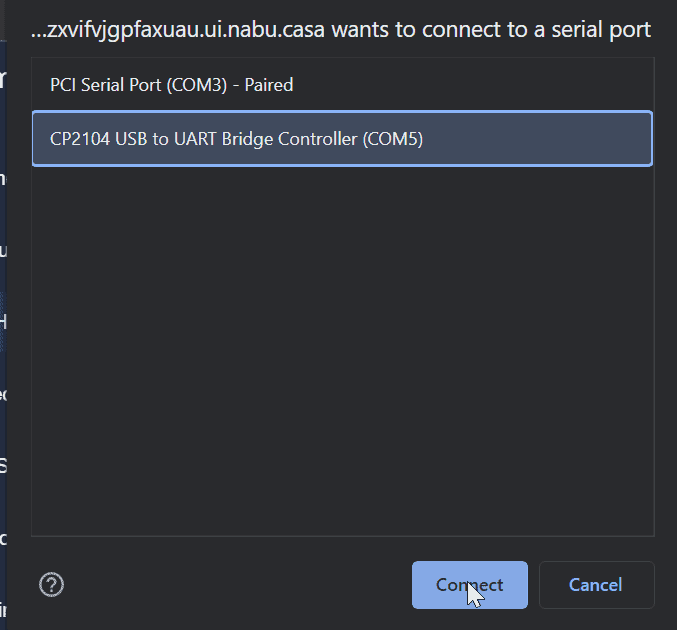
Plug your ESP32 via micro usb into any computer, then click Connect.
If you see this screenshot, follow the troubleshooting steps below
Troubleshooting ESPHome USB Connectivity
Tip #1: Try different USB cable
If it doesn't detect your board right away, try a different USB cable or USB port on your computer. I had to try 4 USB cables until I found one that was a charger+data transfer cable. Standard charging micro USB cables won't work.
Tip #2: Listen for 'connected' sound
If you use a Windows computer, you'll know if it connects or not because you'll hear the audible "device connected" beep, like what you hear when you plug in a flash drive. This means the USB cable you are using is a data one.
Tip #3: Install correct drivers
Once you know it's connected, you'll you'll probably need to install drivers for the serial port to show up. On the ESPHome FAQ page, they list either downloading the CP2102 or CH341 driver. CH341 didn't work for me, so I used the CP2102x VCP Windows driver from here.
Download & extract the folder. In the extracted folder, run the CP210xVCVCPInstaller_x64.exe. Click next until complete.
Try adding the device again. This time, it should be recognized.
Click it, then click Connect. It will show a "Preparing installation" screen for a few minutes, so just be patient.
Congratulations! ESPHome has now been installed and you've added your first node (the ESP32).
Still Not Connecting?
For any other issues, review the ESPHome FAQ page. There's a lot of useful things to check there.
Step 4: Edit ESP32 Configuration File
At this step, your node has been added to ESPHome, but it hasn't be properly configured yet. We configure it by editing the configuration file (which requires no programming, just simple copy and paste).
- Copy the ESP32 Scale YAML below to your clipboard. Then, click Edit on your node and paste it in.
- Note: Keep the API/OTA keys that were autogenerated. Replace those back in after pasting. You shouldn't use the ones I have included in the YAML below.
manual_ip: section of code is optional. I couldn't get mine to connect over wifi until I added it here, so you may as well add it now to save yourself some time, too. - The IP address of your ESP32 can be found in your router.
sensors: block will create two sensors - one for your body weight and one for your Body Mass Index (BMI). - The MAC address of your MiScale can be found in the Zepp Life app. Click your profile > click your scale > Bluetooth address.
# Your Wi-Fi SSID and password wifi_ssid: "SmartHomePursuits" wifi_password: "YourWifiPassword"ESP32 Scale YAML
esphome: name: esp32-bt-scale-test comment: ESP32 Bluetooth Test Scale platform: ESP32 board: esp32dev # Enable logging logger: # Enable Home Assistant API api: encryption: key: "zmLA4pR45aDTkyrUhf7bOz+5VyZF0OQAHJpsJq2BZ0M=" ota: password: "1403deab62b309731516537909c1c047" wifi: ssid: !secret wifi_ssid password: !secret wifi_password fast_connect: true # Enable fallback hotspot (captive portal) in case wifi connection fails ap: ssid: "Scale Fallback Hotspot" password: "8AQ9kTrD6gkC" manual_ip: # Set this to the IP of the ESP static_ip: 192.168.68.106 # Set this to the IP address of the router. Often ends with .1 gateway: 192.168.22.1 # The subnet of the network. 255.255.255.0 works for most home networks. subnet: 255.255.255.0 captive_portal: esp32_ble_tracker: sensor: # XIAOMI MISCALE - platform: xiaomi_miscale mac_address: 'D6:3G:7D:28:13:F4' weight: id: "miscale_weight" name: "Person1 Weight" icon: mdi:scale-bathroom accuracy_decimals: 2 on_value: then: - lambda: |- const float bmi_factor = 0.29860551; return id(miscale_bmi).publish_state(x * bmi_factor); - platform: template id: "miscale_bmi" name: "Person1 BMI" icon: mdi:human-pregnant unit_of_measurement: " accuracy_decimals: 1Click Save, then Install.
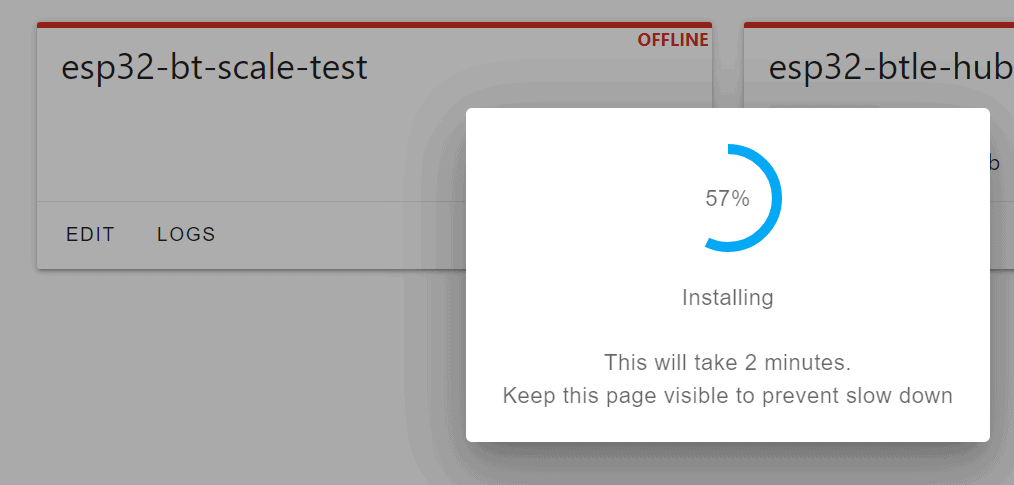
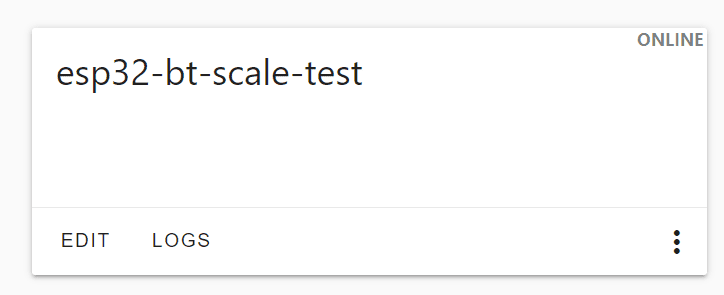
If your shows "online", the easiest way to add this new configuration to it is by clicking the Wirelessly option. There are a few other ways to do it, though.
In my case, I was receiving an Authentication invalid error. So I clicked Manual Download > Modern Format to download the config file & then uploaded to my ESP32 via the ESPHome Web page.
You'll see a Success! screen after about 2 minutes.
Step 5: Locate Discovered ESPHome Node
Getting closer! You have now:
- installed ESPHome
- added your first ESP32 node
- configured the node to connect to wifi, Home Assistant, and to accept Bluetooth from your scale.
Under Settings > Integrations, your new ESPHome node should automatically be detected. Click Configure, then Submit.
When prompted, paste in the Home Assistant API key from your ESP32 node. (To find the api key, go to ESPHome > Edit. It's located under the api: code block)
Then just assign it to an area.
It should now show 1 device and 2 entities:
Step 6: Add Entities to Dashboard Card
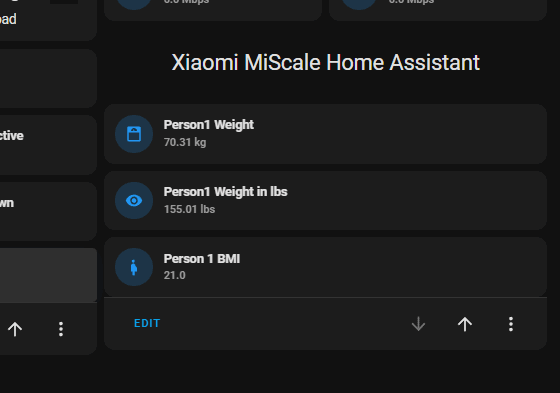
To test if everything is working, add the two newly created sensors to an Entities card.
It will probably show "unknown". This is expected, as we haven't weighed ourselves on the scale yet, so no data has been sent via bluetooth to it yet.
Step 7: Weigh yourself
Go ahead and stand on the scale now. You can even grab your phone so you can see if this updates while you are standing on it. At this point, it should update!
Not detecting anything? Turn off the bluetooth on your phone.
Tip: If you're still having issues, try moving the ESP32 closer in proximity to the scale. (Hint: For those of you new to using ESP32's like myself, you can plug the ESP32 once connected to wifi into any wall outlet via a phone brick + micro USB. It doesn't need to stay plugged into the computer you flashed it from.)
Convert KG to LBS
Despite me setting my unit of measurement from kilograms (kg) to pounds (lbs) in the Zepp Life app, the weight is always displayed in kg in Home Assistant.
So, I created a template sensor that converts it from kg to lbs, and then added this new weight sensorto my entities card instead.
To add the template sensor, paste this into File Editor > configuration.yaml > sensor: block.
- platform: template sensors: person1_weight_lbs_template: friendly_name: 'Person1 Weight in lbs' unit_of_measurement: 'lbs' value_template: "{{ (states('sensor.person1_weight') | float(0) * 2.20462262185) | round(2, default=0) }}"Save your configuration file. Then reload the template entities from Developer Tools > YAML > Template Entities so that becomes available in Home Assistant.
Display Last Changed (Last time you weighed yourself)
To display the last time you weighed yourself, simply add a secondary_info: last-changed to your entities card.
type: entities entities: - entity: sensor.person1_weight - entity: sensor.person_1_bmi - entity: sensor.person1_weight_lbs_template secondary_info: last-changedCustomize your Scale Card
There's a few other things I haven't gone over, such as these, but I'll let you read through those on your own if you'd like.
- adding more stats using the bodymiscale integration from HACS
- adding multiple people. Search this Community post for 'impedance', which is where you basically set a weight range per person (i.e. - between 148-160= Person1, 110-120=Person2, etc, and create sensors around that.
- installing the Body Miscale Card
- storing long term statistics
Things to Note
If you lose power/ESP32 gets unplugged, the sensors will be unavailable until you weigh yourself again. It doesn't retain the previous state.
Wrapping Up
Hopefully this guide helped you integrated your Xiaomi MIScale Body Composition scale into Home Assistant in 2022!
I know there was a lot of info here, but hopefully I presented it in an easy, step-by-step fashion.
Let me know in the comments if you got it working by following my tutorial. Other readers like to read comments first to see if these long guides actually work for others before they attempt it.


