How To Add Aqara Devices to Home Assistant in 2026
In this guide, I'll show you how to add Xiaomi Aqara devices to Home Assistant in 2021. If you've added other devices to Home Assistant using ZHA, then this should pretty straightforward. These are some of the best sensors to add to Home Assistant due to their low cost and appealing looks.
We will be adding Aqara water sensors, aqara motion detectors, aqara door and window sensors, and Aqara mini switch buttons.
Let's get started!
Prerequisites
This guide assumes you have:
- Home Assistant installed on a raspberry pi
- A Zigbee USB hub added to Home Assistant
If you are new to Home Assistant, or are migrating from SmartThings to Home Assistant, then you can follow my How To Add Zigbee and Zwave decices to Home Assistant guide to get setup.
Once those are configured, you are ready to start adding Aqara devices.
Aqara Devices
A quick FYI regarding Aqara devices. From what I've read on Reddit, you should pair the devices near the location of it's final place. For example, if you are adding a water sensor in the guest bathroom, try pairing it from there instead of directly next to the hub.
I personally didn't have to do this, but it's supposed to help keep these devices reporting correctly.
How To Add Aqara Water Leak Sensor to Home Assistant
- Unbox your Aqara Water Leak Sensor.
- Open Home Assistant and navigate to Configuration > Integrations > Zigbee Home Automation.
- Click Configure and then + Add Device.
- Place the water leak sensor on a flat surface. Press the water icon on the top of the sensor & hold for 5-10 seconds.
- You should see the device flicker blue a few times. This puts the device in "pairing mode".
- In Home Assistant, you should see it begin the initialization phase.
Note: I had to attempt the pairing process 2-3 times before it would detect in ZHA.
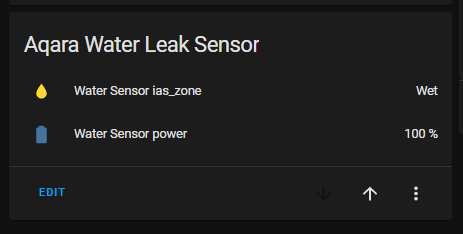
That's it! You can now name your device and assign it to room within Home Assistant!
Aqara leak sensors have two entities: Battery Power and wet/dry status:
How To Add Aqara Door and Window Sensors to Home Assistant
- Unbox your Aqara Door and Window Sensor.
- Open Home Assistant and navigate to Configuration > Integrations > Zigbee Home Automation.
- Click Configure and then + Add Device.
- The sensor will have two parts: a small and a large end. On the sides of both you'll see a line. Place those two lines together
- Press the round button located on the top of the larger part of the sensor. Press and hold for about 5 seconds until you see the light flicker blue rapidly. This puts the device in "pairing mode".
- In Home Assistant, you should see it begin the initialization phase.
Aqara Door and Window Sensors have two entities in Home Assistant: Battery Level and open/closed status.
How To Add Aqara Wireless Mini Switch to Home Assistant (button)
- Unbox your Aqara Wireless Mini Switch. Pull the blue tab.
- Open Home Assistant and navigate to Configuration > Integrations > Zigbee Home Automation.
- Click Configure and then + Add Device.
- Press the round button located on the top end of the button. (not the large button in the middle).
- Press and hold for about 5-10 seconds until you see the light flicker blue rapidly. This puts the device in "pairing mode".
- In Home Assistant, you should see it begin the initialization phase.
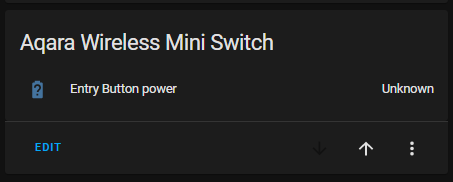
You will only see 1 entity for Aqara mini switches: Battery Level. It will show up as unknown for the first several hours but should start reporting soon.
You will have to manually add automations for the various button clicks. As it stands, the button won't do anything.
How To Configure Aqara Button Presses
Navigate to Configuration >Automations.
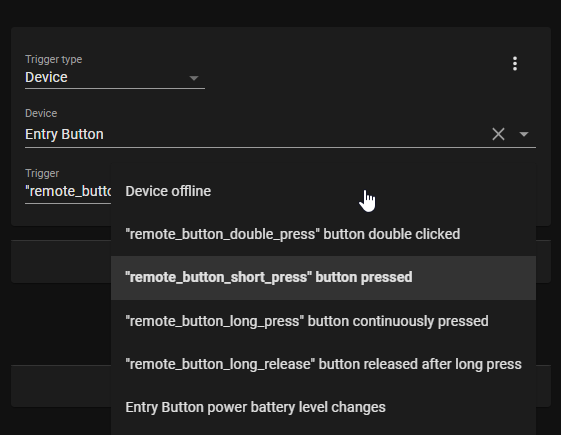
Choose the Button device. Under the Trigger section, you have several options:
- Short button pressed
- Long button pressed
- Long Button released
- Double pressed
Keep in mind, you will have to create 4 different automations for this button, one for each trigger.
For example, if you wanted to create an automation to toggle a lamp from a single short press, that can be created in 1 automation. You'd then have to create another for double press, long press, and long release.
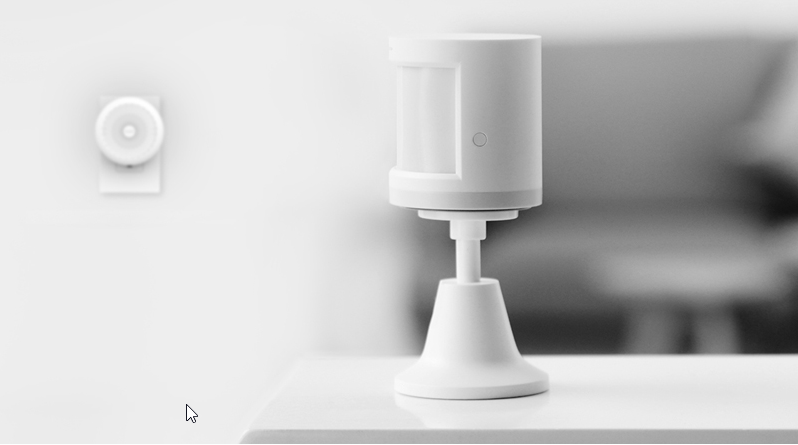
How To Configure Aqara Motion Sensors
- Unbox your Aqara Motion Sensor. Pull the blue tab.
- Open Home Assistant and navigate to Configuration > Integrations > Zigbee Home Automation.
- Click Configure and then + Add Device.
- If you're looking at the front of the sensor, there is a small round button on the right side.
- Press and hold for about 5-10 seconds until you see the light flicker blue rapidly. This puts the device in "pairing mode".
- In Home Assistant, you should see it begin the initialization phase.
- Give it a name and then add it to a room.
Aqara Motion Sensors have 4 entities available: Power, Illuminance, occupancy, and Zone.
Wrapping Up
Hopefully this guide helps you quickly Xioami Aqara devices to your Home Assistant setup in 2021!
These sensors are inexpensive, pair super easily, and work really well.