Configure Watchdog 15 Temperature Sensor in PRTG using SNMP
Chances are that if you are reading this article, you have purchased a Geist Watchdog 15 temperature sensor to monitor the temperature of your server rooms. These temperature sensors are awesome and are highly-rated on /r/sysadmin for good reason. I purchased 4 of these sensors about 2 years ago, and haven't had any issues with them whatsoever.
Did you know you can configure your IT Watchdogs temperature sensor into your PRTG server via SNMP in realtime? If not, then you are in luck. I've configured this several years ago and it's been working flawlessly ever since.
What is SNMP?
Before we get into how to add a Watchdog temperature sensor into PRTG using SNMP, I figured it might be useful to explain what SNMP is for those of you who've never heard of it or used it.
SNMP stands for Simple Network Management Protocol. It's basically a way for different devices to communicate with each other, even if they are on different hardware or software, using the same protocol. I'm not going to go into depth about SNMP here, but feel free to read this article if you're interested in learning more.
Just know that you can configure temperature sensors - as well as many other networked items such as printers, routers, switches, desktops, etc via SNMP and get the data into PRTG.
Why Configure Watchdog sensors into PRTG?
You may be wondering why you should configure temperature sensors into PRTG to begin with. After all, you can already configure them to alert you via email or SMS.
By default, you can log into the device via a URL on your corporate LAN. If you have multiple temperature sensors, this can become a pain to manage. This also means any rules/threshold alerts must be configured from different URL's, each with a different set of credentials.
The two main reasons I added it to my PRTG server monitoring software is:
- Historical data
- Webhook integration (get alerts via Microsoft Teams or Slack)
At a very quick glance, I can log into PRTG and see the temperature history for all of my sensors in one centralized location. I can also configure threshold alerts to notify my entire IT team if a temperature reaches a certain limit. This saves money on SMS costs, and I tend to respond quicker to alerts via Microsoft Teams than I do via email, which means I can address issues faster.
Before We Begin:
Before I get started with this how-to guide, you will need the following items:
- IT Watchdogs 15 Sensor
- PRTG Server up and running
- A laptop
**Regarding the need for a laptop: You will need to plug an ethernet cable from the laptop to the temperature sensor in order to initially configure the sensors. A desktop would also work, but will be more difficult as we need to enable/disable the NIC several times.**
Step 1: Initial Setup of Sensor
The temperature sensor comes pre-configured with a static IP address of 192.168.123.123. Since this IP address is on a different subnet than mine, we need to configure a laptop with a static IP on the same subnet as the sensor to complete the setup.
Even if you have a 192.168.x.x subnet, you'll still want to change the static IP address of each device to DHCP or assign it a new static IP. Follow the steps below to change the static IP address.
- Grab your laptop.
- Plug the Watchdog 15 into power and connect an ethernet cable from the sensor to the laptop.
- Disable the laptop's wifi.
- Give the Ethernet adapter a static IP address:
- IP: 192.168.123.100
- Subnet Mask: 255.255.255.0
- Default Gateway: empty
- Preferred DNS: empty
- Alt DNS: empty
- Open Internet Explorer and enter the Watchdog's default IP address (192.168.123.123) into a browser.
- You should see the Geist login page. Create a username and password and document somewhere safe.
- Navigate to System > Network. Change the DHCP option from disabled to enabled. (We will be setting up an IP Reservation in Step 2 below.)
- Note: You will lose connectivity to this device after enabling DHCP on the sensor.
Step 2: Create an IP Reservation for Watchdog Device
At this point, the Watchdog device will grab a random DHCP IP address, just like any other device on your network does. For easier management, we will create an IP reservation.
- Log into your DHCP server or open the DHCP widget (if RSAT is installed)
- Right-click Reservations > Create New.
- Reservation Name: watchdogS2.contoso.com
- IP Address: 172.16.2.100 Ping these IP's first to make sure they are not in use.
- MAC Address: printed on the device.
- Description: Add physical location
- Support Types: DHCP
Obviously, change the IP Reservation to whatever makes sense management-wise at your company.
Step 3A: Log into sensor and export MIB file
- Plug your sensor into your main network.
- Enter the newly created IP reservation into a browser. Log in with the device credentials you created in Step 1.
- Navigate to System, SNMP. Download the MIB file from the top of this page.
- Copy the MIB file to the desktop of your PRTG server.
Step 3B: Convert MIB File to OIDLIB file
- Launch the Paessler MIB Importer V3 desktop application.
- File > Import MIB File.
- On the "Import Log" screen, click Close.
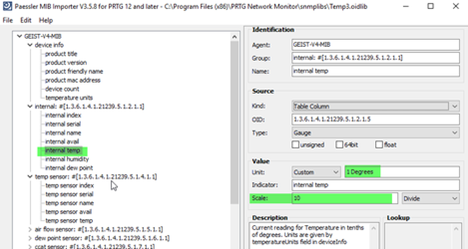
- Expand out Internal > Internal Temp. Change the fields to match the below screenshot.
- File > Save Complete ODLib as…
- Name it something useful (like WatchdogSvrRm1) and save to C:\Program Files (x86)\PRTG Network Monitor\snmplibs
Step 3C: Add to PRTG Network Monitor
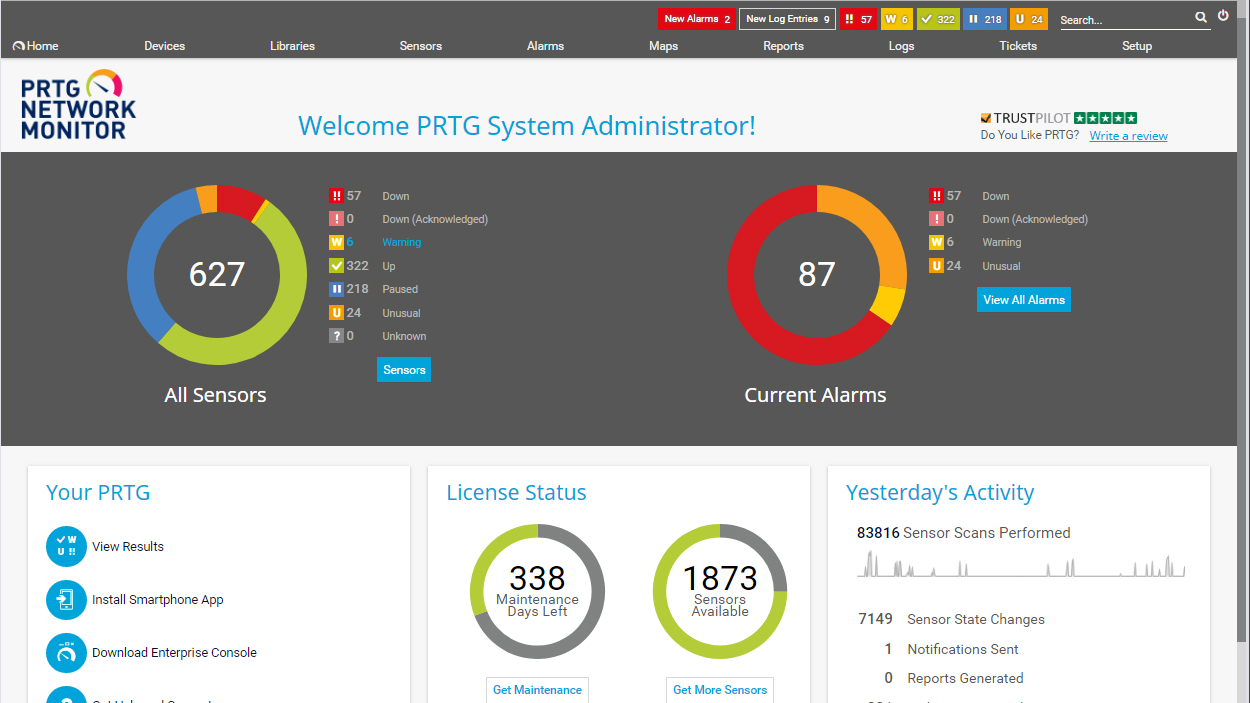
- Log into your PRTG instance via the URL.
- Click Add Devices > Add Device > OK.
- Under Device Name, add the IP address for the new temperature sensor. Click OK.
- Scroll to the bottom of the Overview page. Locate TempSensorR&D.
- Click Add Sensor.
- Search for SNMP Library. Click the + button.
- Scroll down until you find the MIB file you converted. Click OK.
- On the page that opens, select the internal temp. Click the blue Create button.
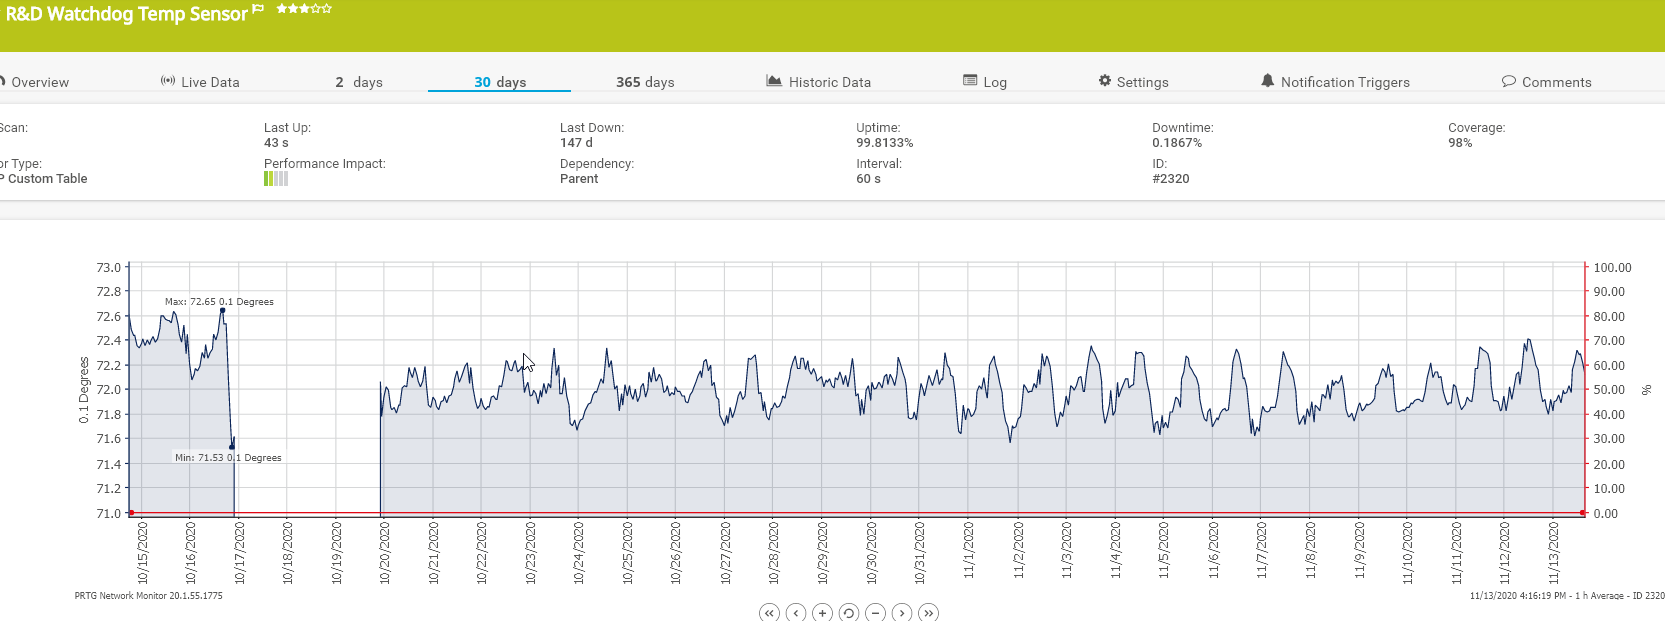
- Wait 30 seconds or so. You should start seeing data for the temperature sensor flowing into PRTG. You might need to refresh the page.
- Click on the graph to view more data.
- If the Value is way off, we just need to change the decimal place. (i.e - if it reports 710.1 degrees, it's actually 71.01 degrees in the server room). Click Edit Channel Settings.
- Change Unit to 1 Degrees and Scaling Division to 10. Apply and OK.
Step 4 (Final): Configuring Notifications to Microsoft Teams
- On the Notification Triggers page, click the blue + icon and Add Threshold Trigger.
- Create your notification like the below screenshot. Check the blue checkmark once complete.
- This should automatically send an email to the admin (Danny), and also post to the Newton Group channel via a Microsoft Teams webhook.
Step 5: Testing Threshold Notifications
Now comes the fun step: testing out your new integration!
For this part, you will want to warn anyone in your Microsoft Team group, because they are about to get a lot of alerts.
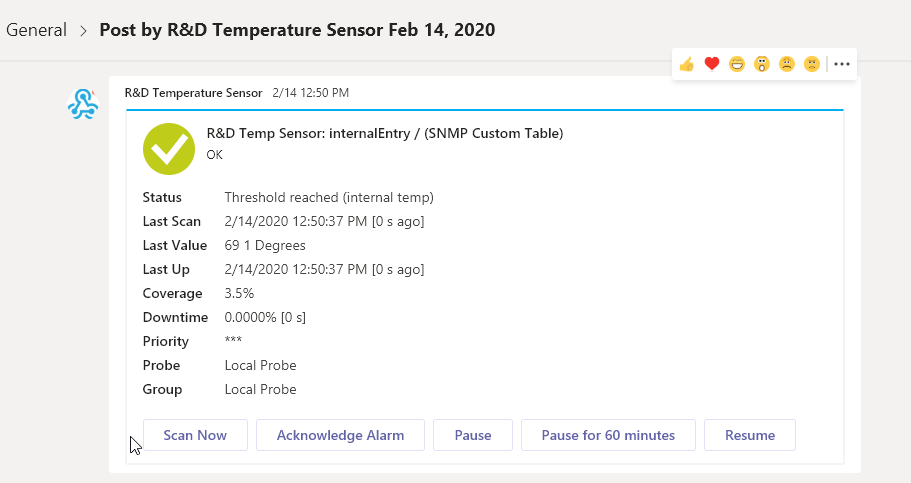
For testing, just set the threshold to something super low, like 60 degrees. (lower than the average temperature reported). Once you know the average temperature of the rooms, change the threshold on PRTG to a few degrees higher than the normal temp. This will trigger your theshold alerts. If all goes well, you should start seeing temperature sensor alerts right in Microsoft Teams, directly from PRTG!
You didn't think I'd leave you hanging, did you? Here's what the alerts will look like in Teams. (If using Slack, the alerts look the exactly same).