How to Configure Ecobee Thermostat in Home Assistant
Wondering how to setup your Ecobee thermostat into Home Assistant? This step by step will walk you the entire process. The setup is very straightforward and can be completed in less than 15 minutes. Home Assistant has an Ecobee Setup guide here you can reference if needed. I decided to include screenshots in my tutorial and changed the setup order slightly to speed the process up.
Since I'm still waiting for my Nortek GoControl zwave/zigbee USB hub to arrive from Amazon, I decided to add all of my wifi devices to Home Assistant first. Ecobee is wifi only, so naturally that was the first item I added to Home Assistant.
Prerequisities
This guide assumes you already have an Ecobee thermostat installed and connected to your wifi.
Devices needed:
- Home Assistant installed (Either on a Raspberry Pi 3B+ or a VMware Workstation VM)
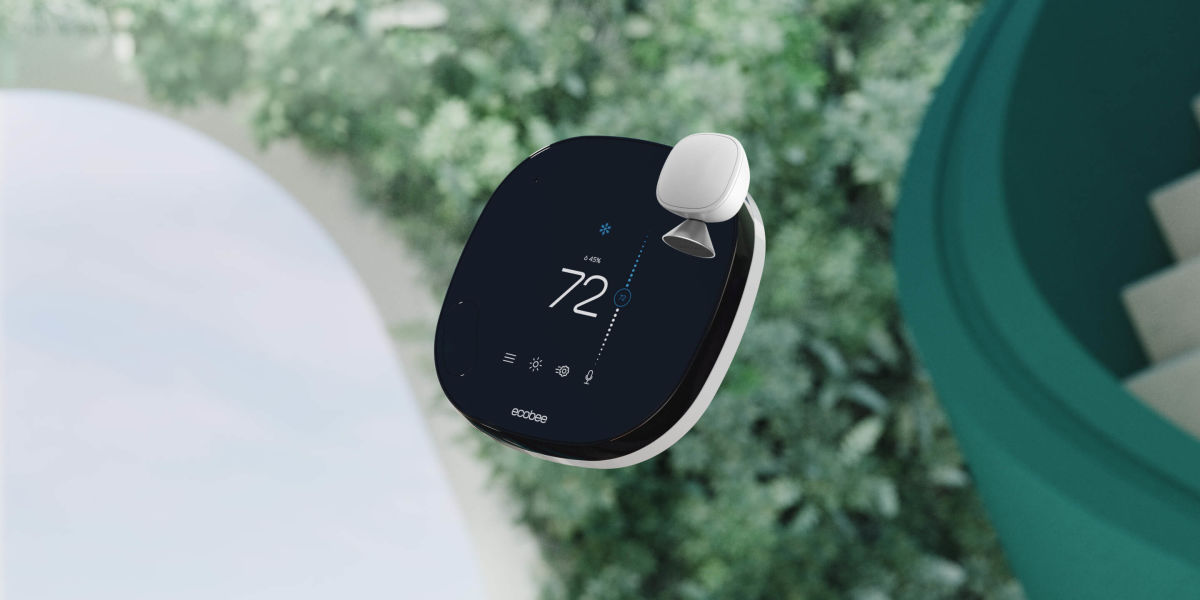
- Ecobee Thermostat (I'm using an Ecobee 4 thermostat/room sensor combo)
Step 1: Generate Ecobee API Key
Before continuing, you will need to disable Ecobee two-factor authentication until the setup is complete.
Log into https://www.ecobee.com/home/developer/loginDeveloper.jsp. After logging in, accept the SDK agreement.
Next, enter your "Company" info. You only need to add a company name:
Step 2: Create API Key
 Home Assistant web interface. It should be something like 192.168.68.124:8123.
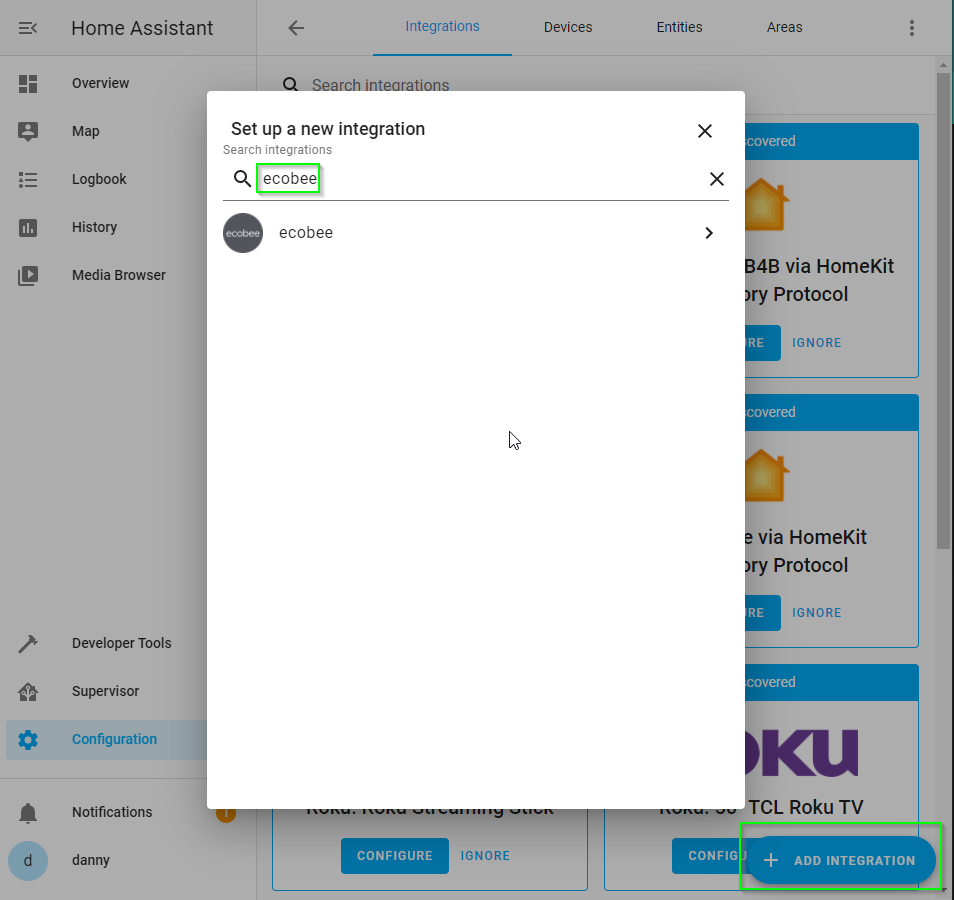
 Click the Configuration tab, and then + Add Integration.
Search for "ecobee".
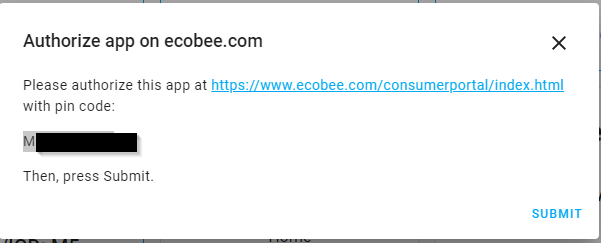
Add your API key that was generated from Step 2. You will then see a screen like below asking you to please authorize this app at https://www.ecobee.com/consumerportal/index.html with pin code:
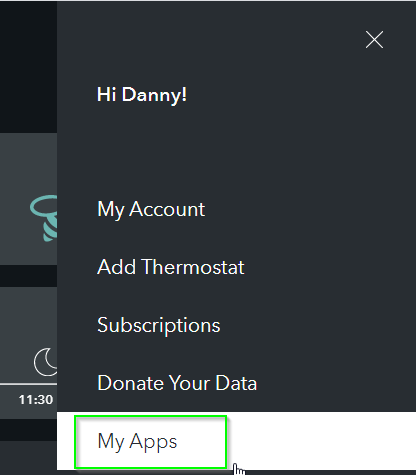
Click the link. Then, navigate to My Apps in the sidebar:
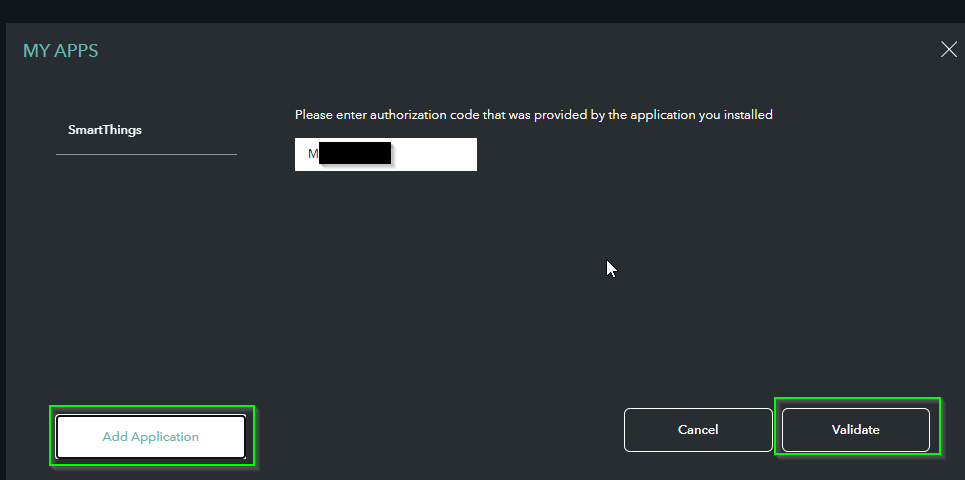
Click Add Application, enter the authorization code, and then click Validate.
Wrapping Up
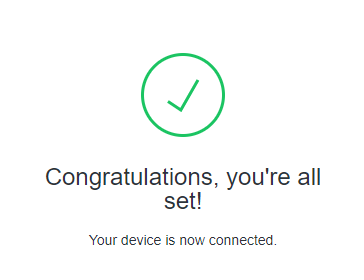
Congratulations! You're all set.
You should now see your Ecobee thermostat show up in Home Assistant!
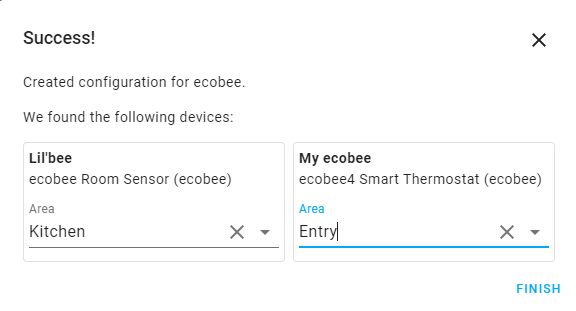
I also have an Ecobee room sensor called Lil'bee, so that shows up as well. Simply assign them to an area and click Finish.
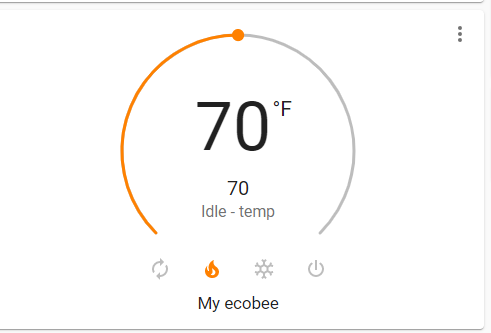
You're thermostat should now show up in your Home Assistant dashboard!